-
Magical Art Nook Makeover
“We are creating a magical play space for the children,” said my inner monologue as I scrolled through wallpaper samples for hours, days and weeks. There were many wallpapers I was attracted to, but I had to keep reigning myself in. I was creating a whimsical wonderland space for my kids to work on art and crafts, not a personal gratification project for Instagram.
With a little creativity and a few design tricks, like colour, composition and contrasting texture, any space can become one that sparks imagination and encourages hours of creativity. By relying on strong artistic elements I was able to bring a dull, lifeless and overly neutral built-in nook to life.
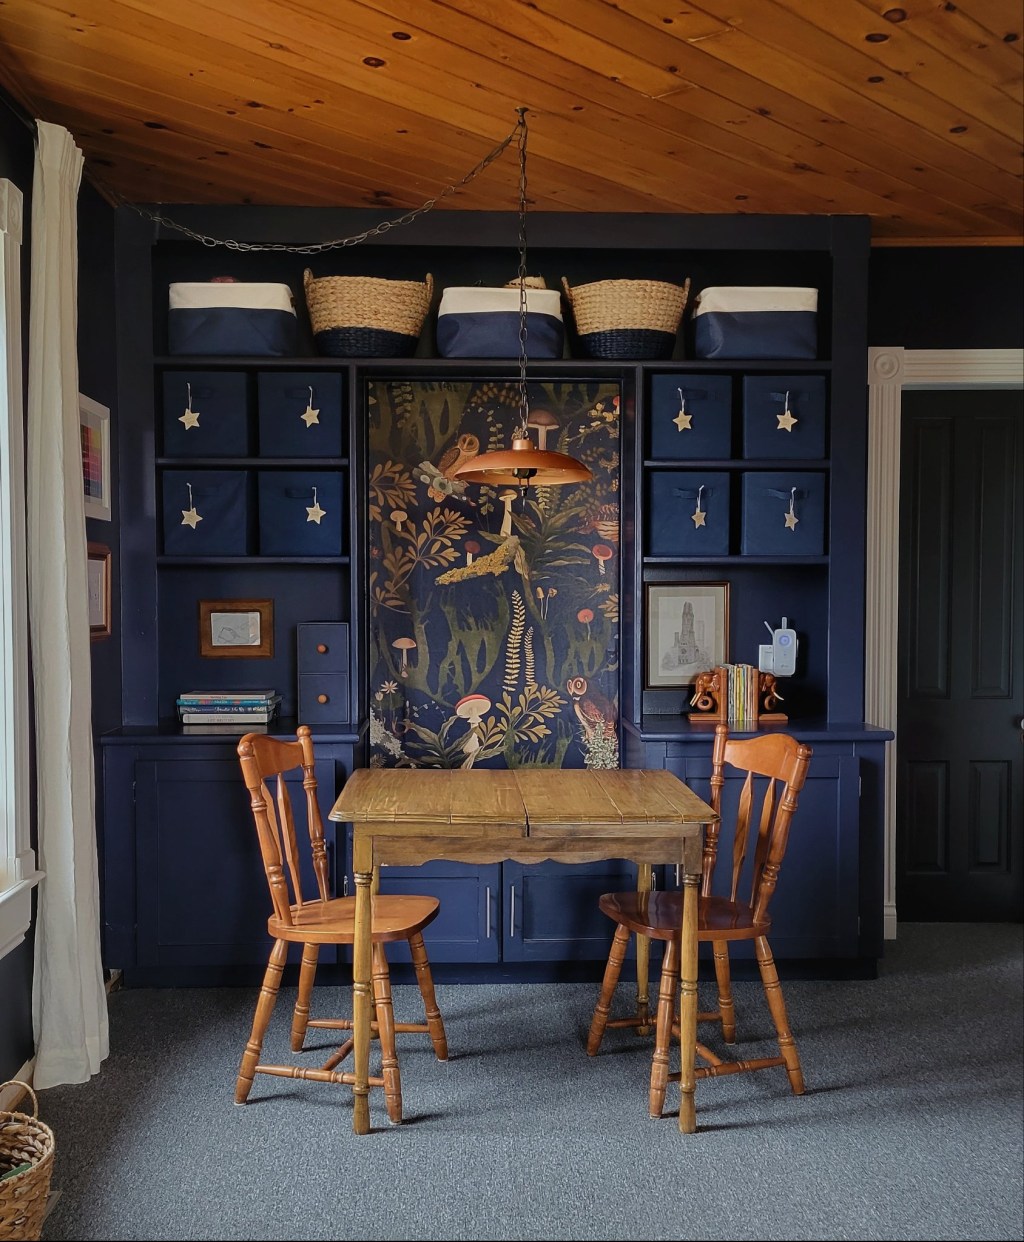
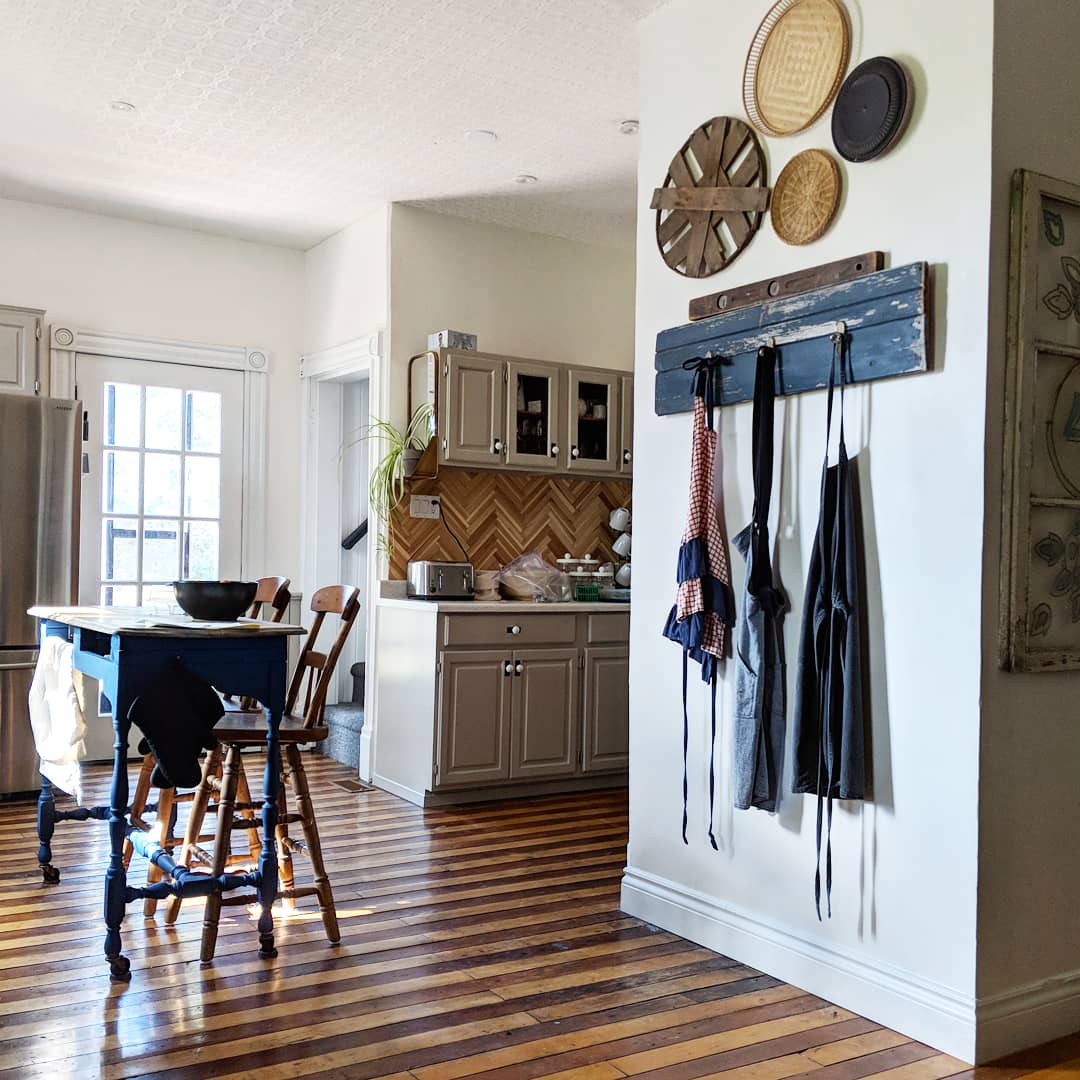
A navy blue built-in, painted the same colour as the wall, houses art and craft supplies for the kids to use. Baskets turn open shelves into functional storage and an antique wood table is the perfect crafting surface. An overhead pendant provides direct lighting.
Do you have a little nook, room or area, where you want to create a sense of playfulness for your kids?
Think about using bright and bold colours for stimulation, and then incorporating natural textural materials to ground the space. Soft rugs, plush toys and wood will all add elements of depth and dimension. Consider framing original art from your own family to give the space special meaning.
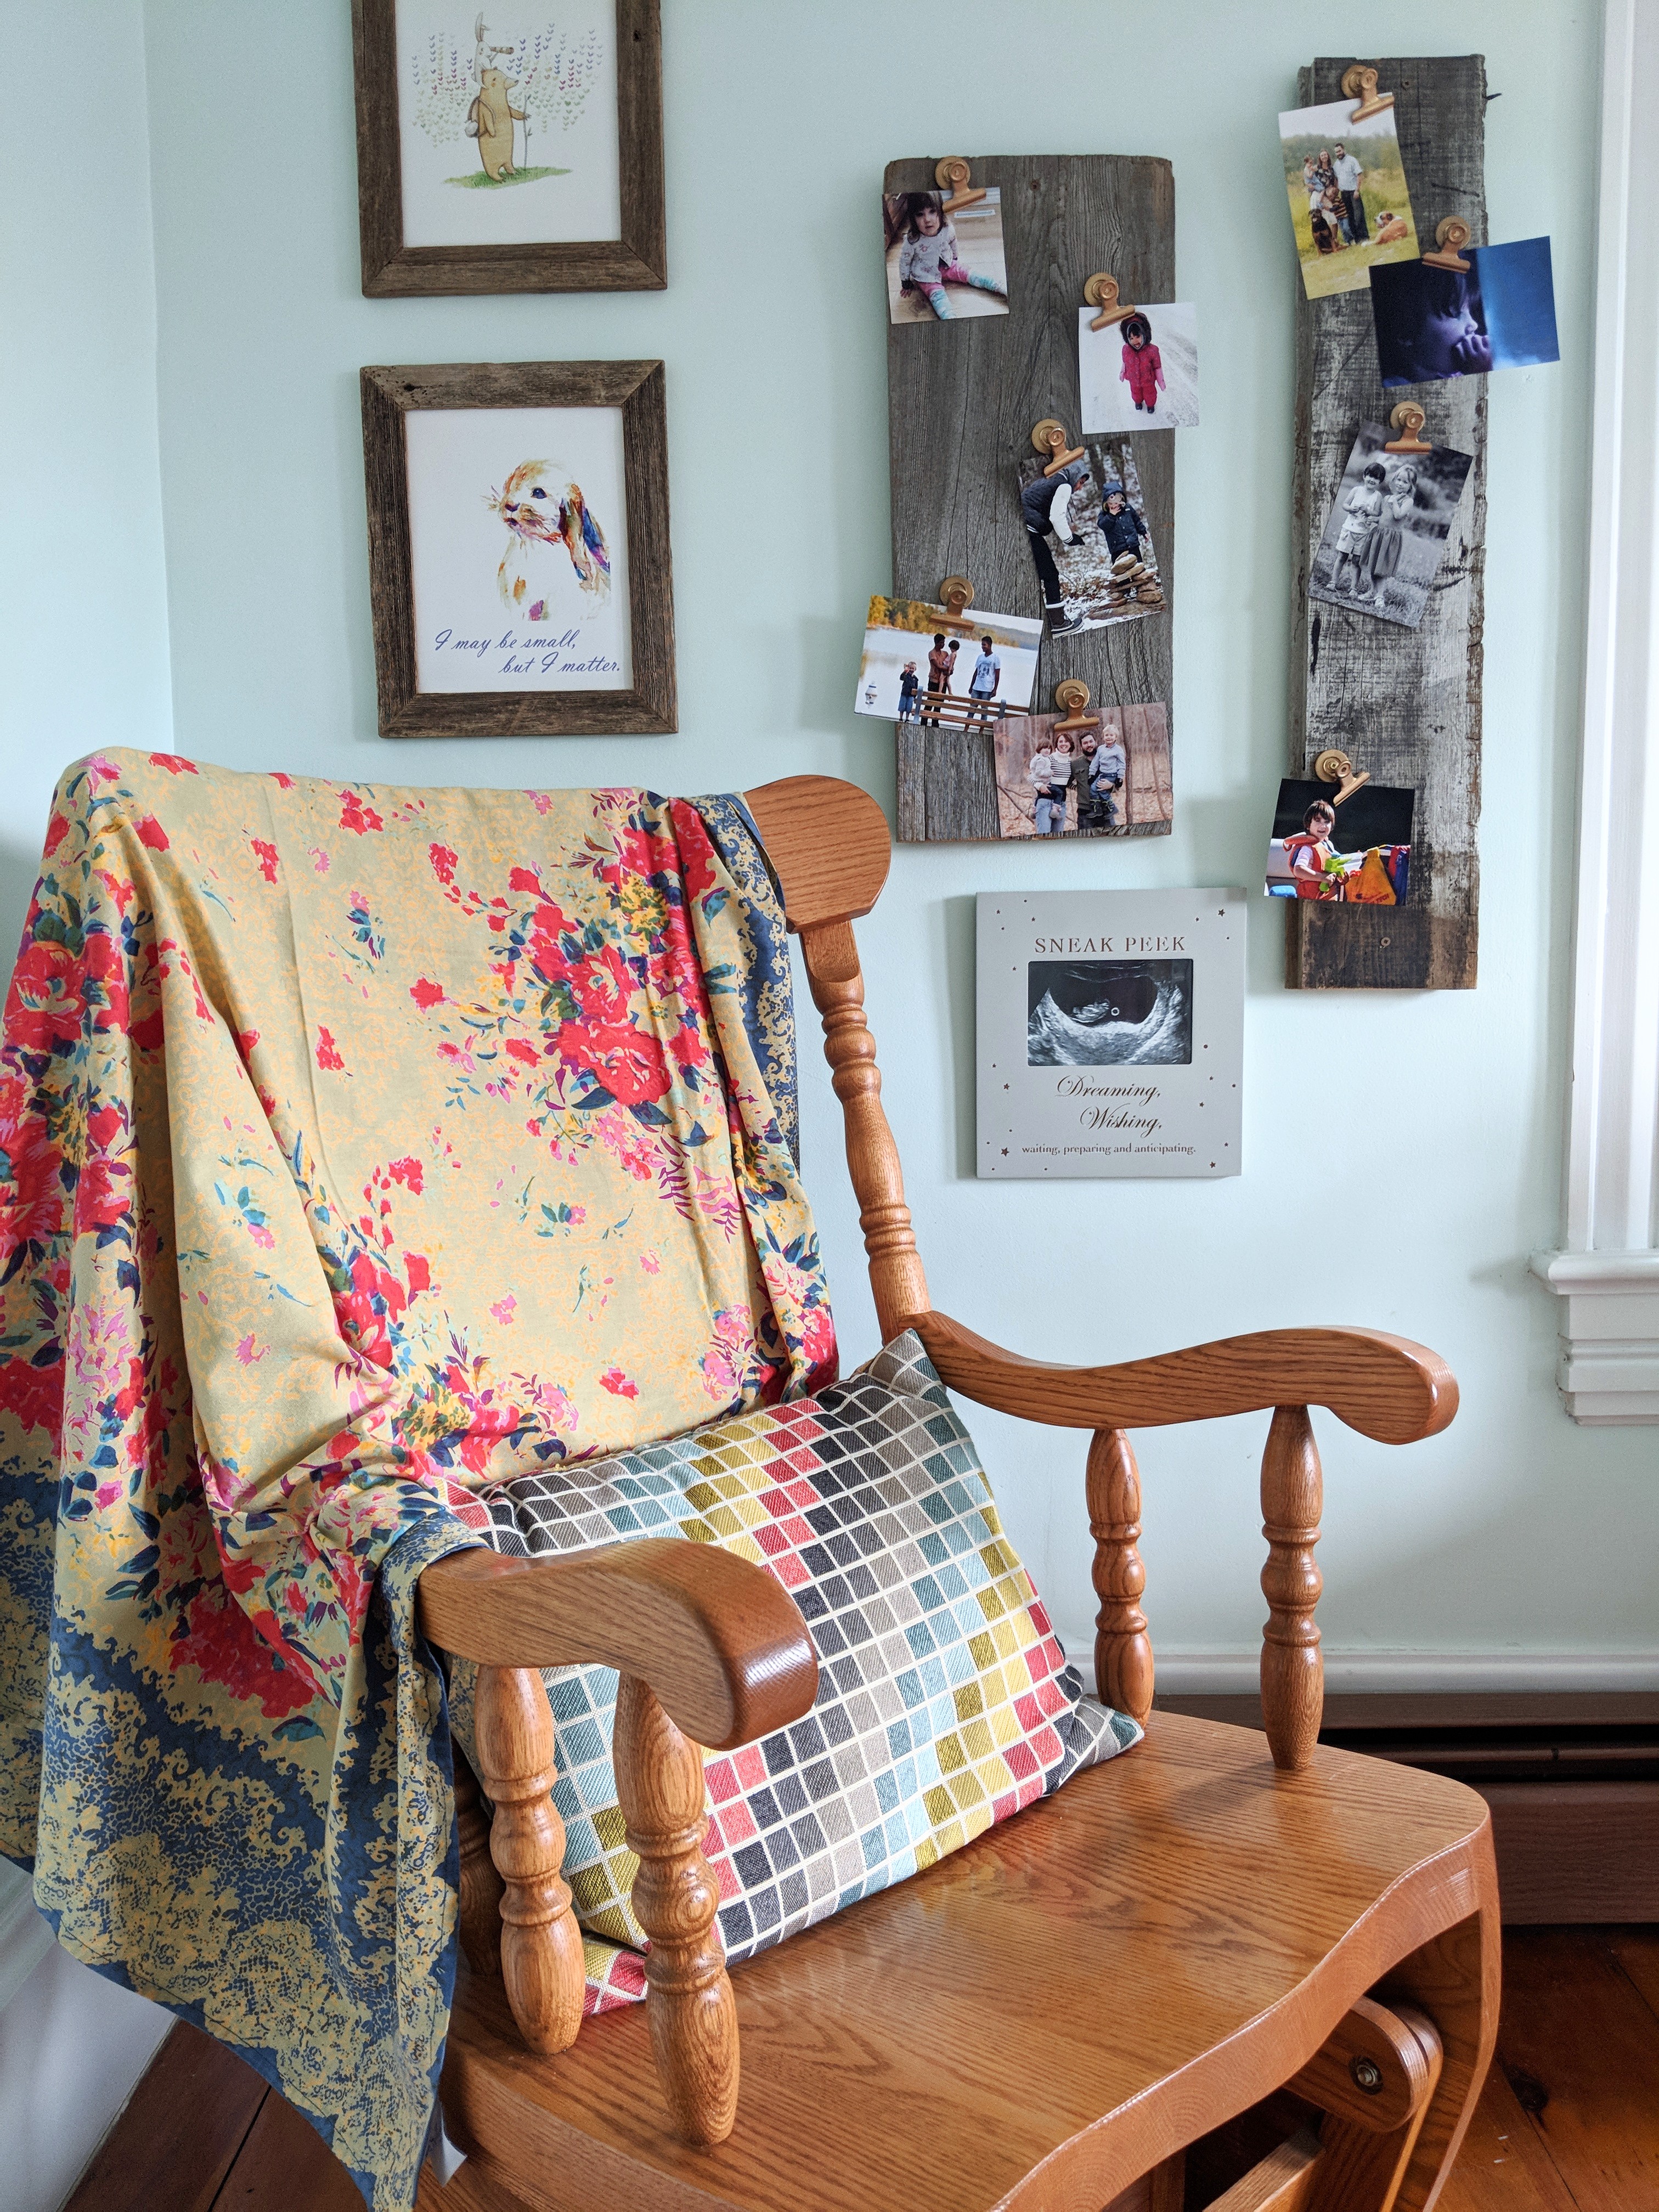
When it comes to designing a magical play space, working with what you have is often the best approach. Look for opportunities to repurpose items you already own, like toys, or using a colourful throw blanket as a makeshift tent. You might provide pillows and cushions for fort-building, or paper and pencils for art-making. By thinking outside the box, you can turn even the most ordinary objects into something extraordinary.
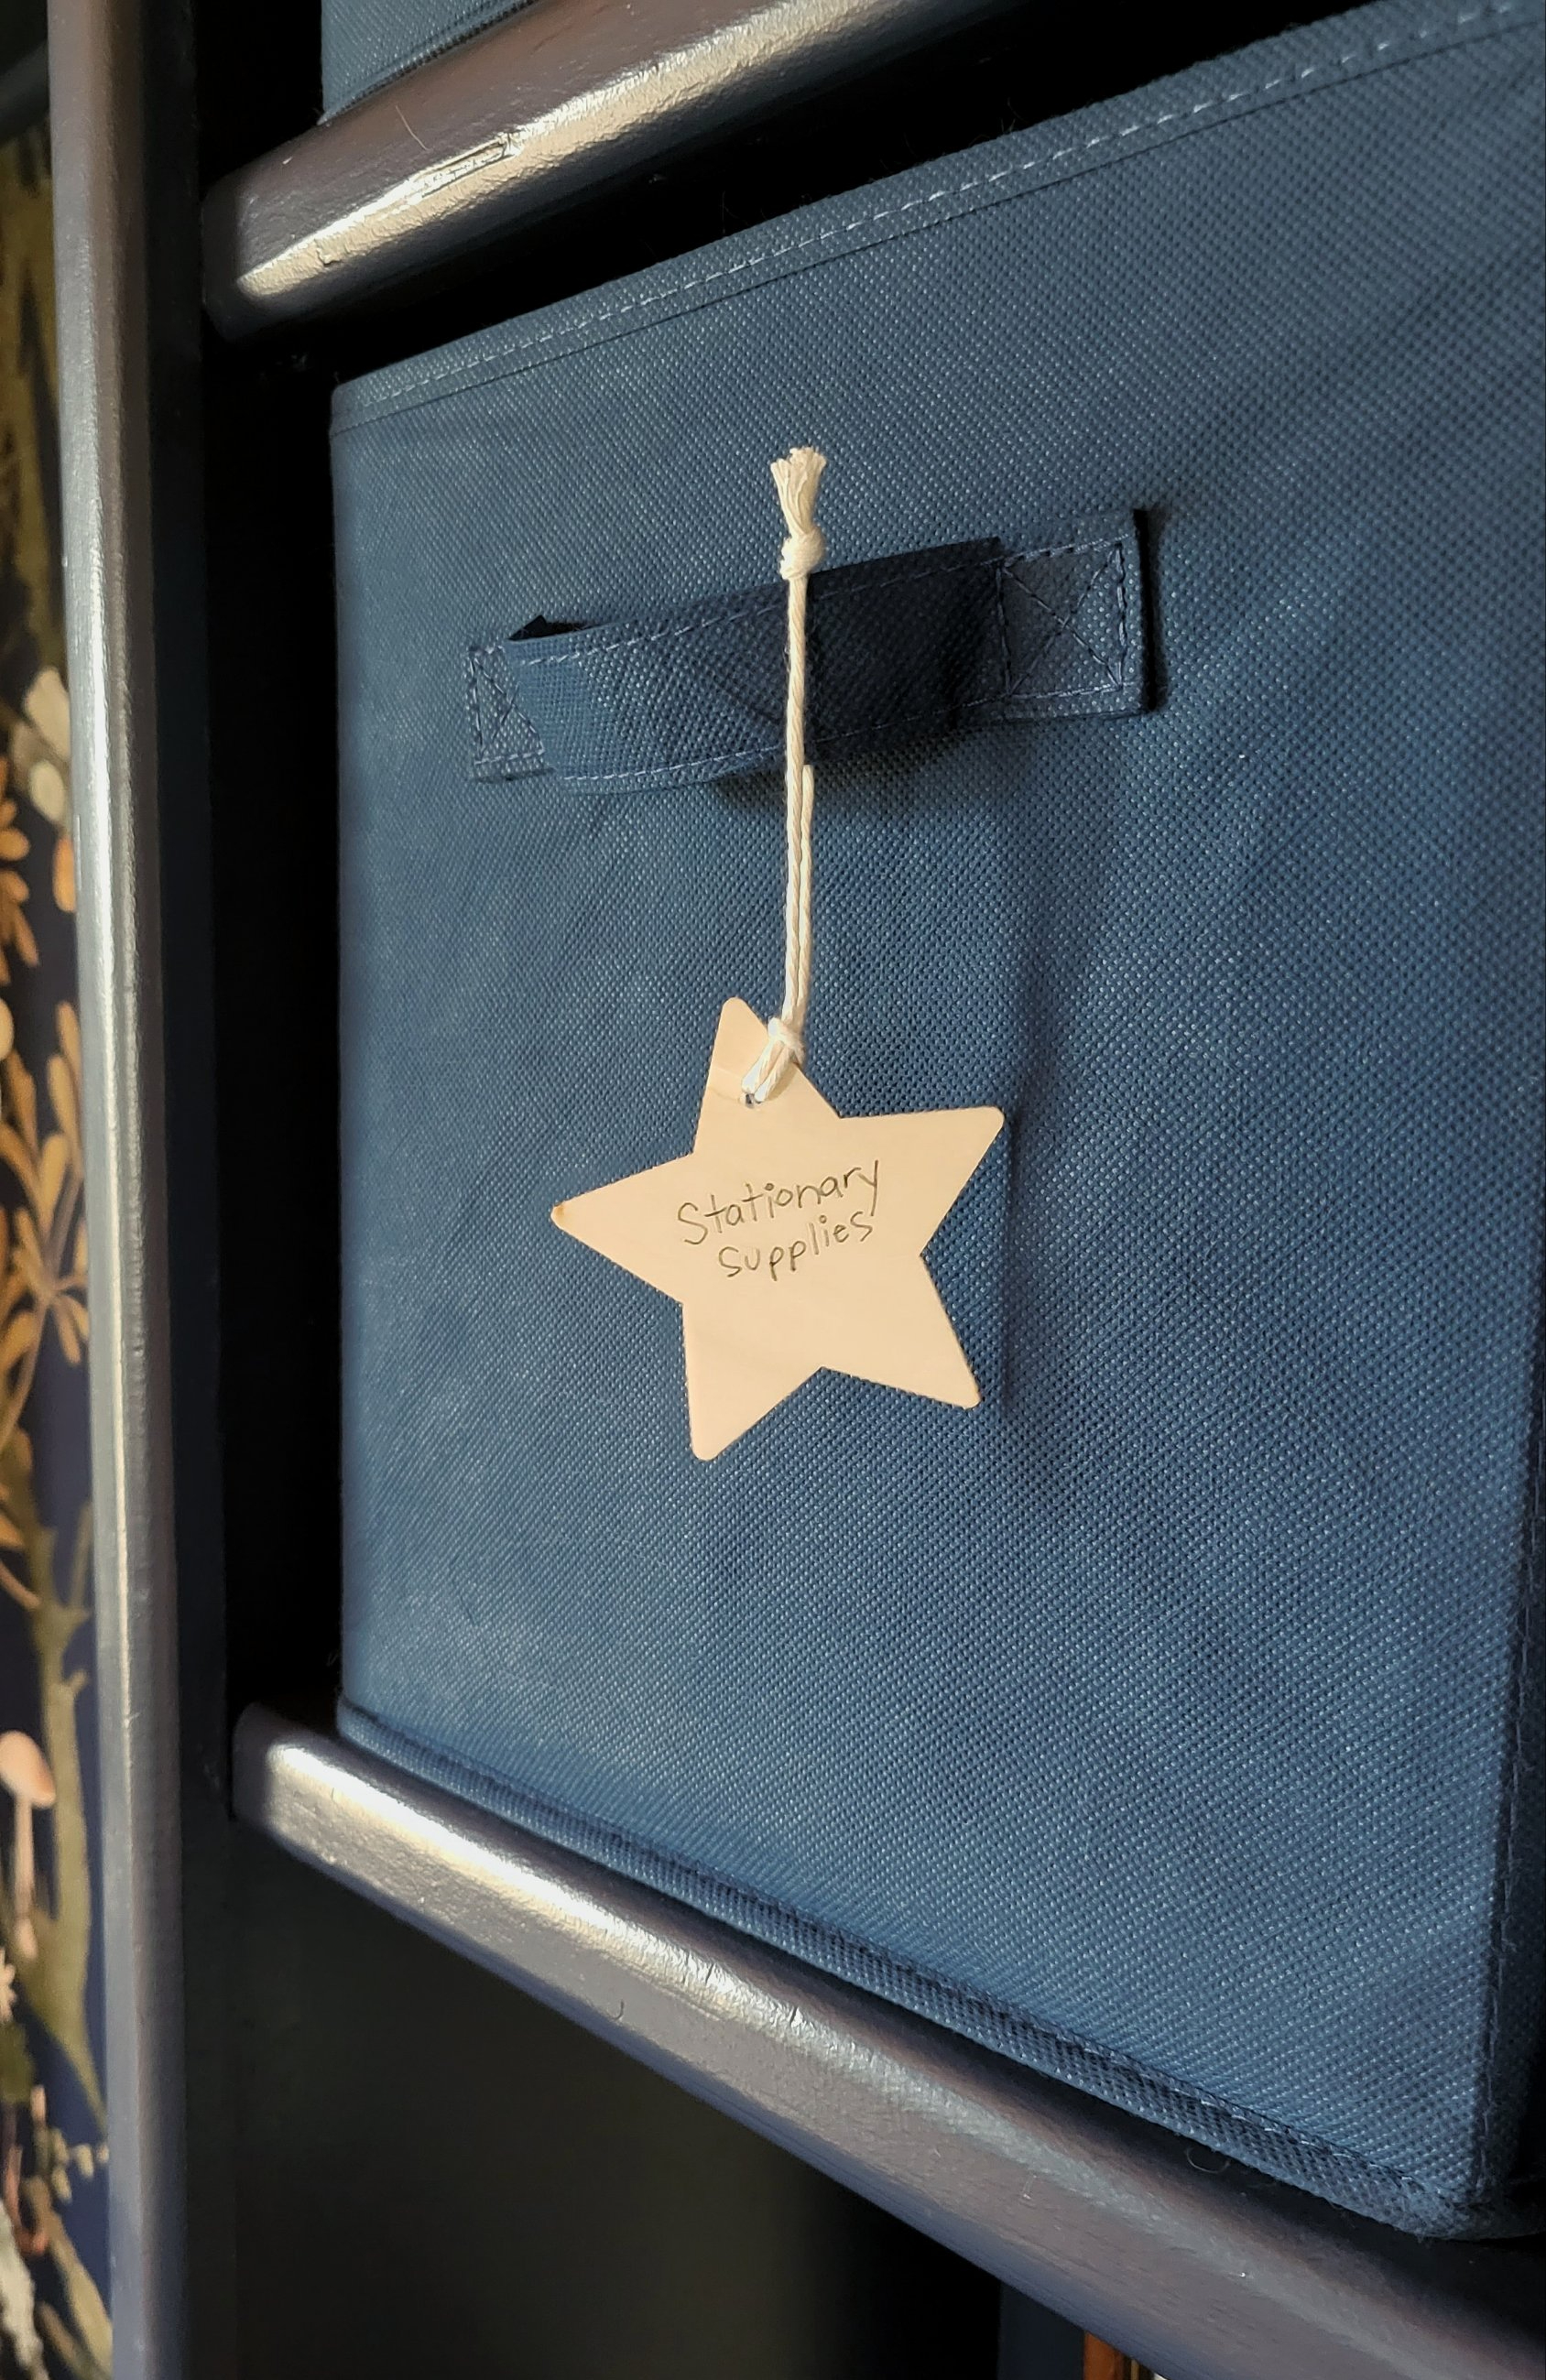
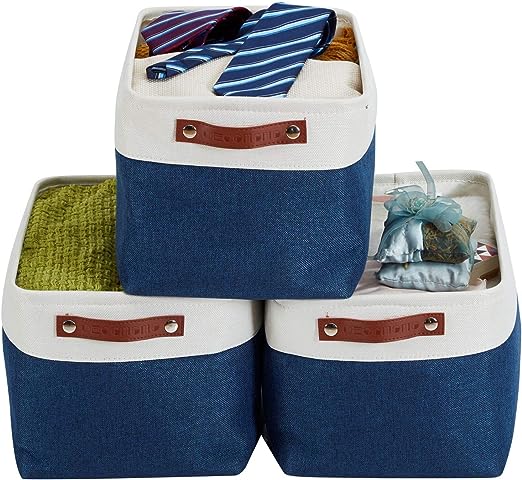
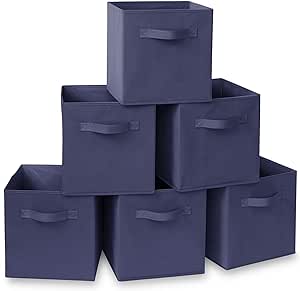
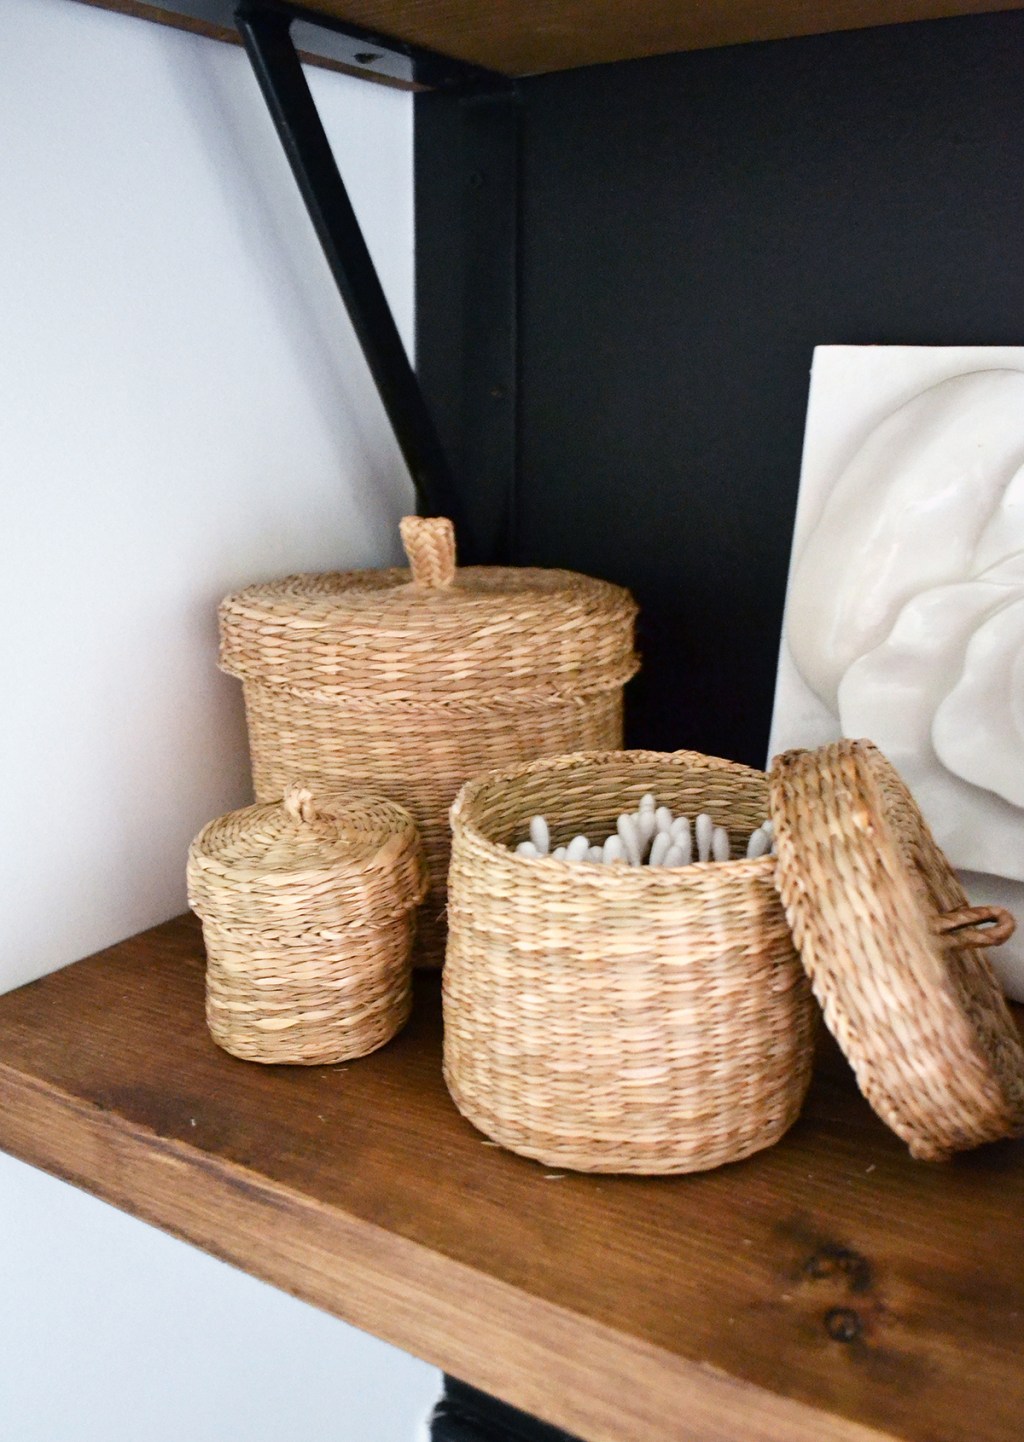
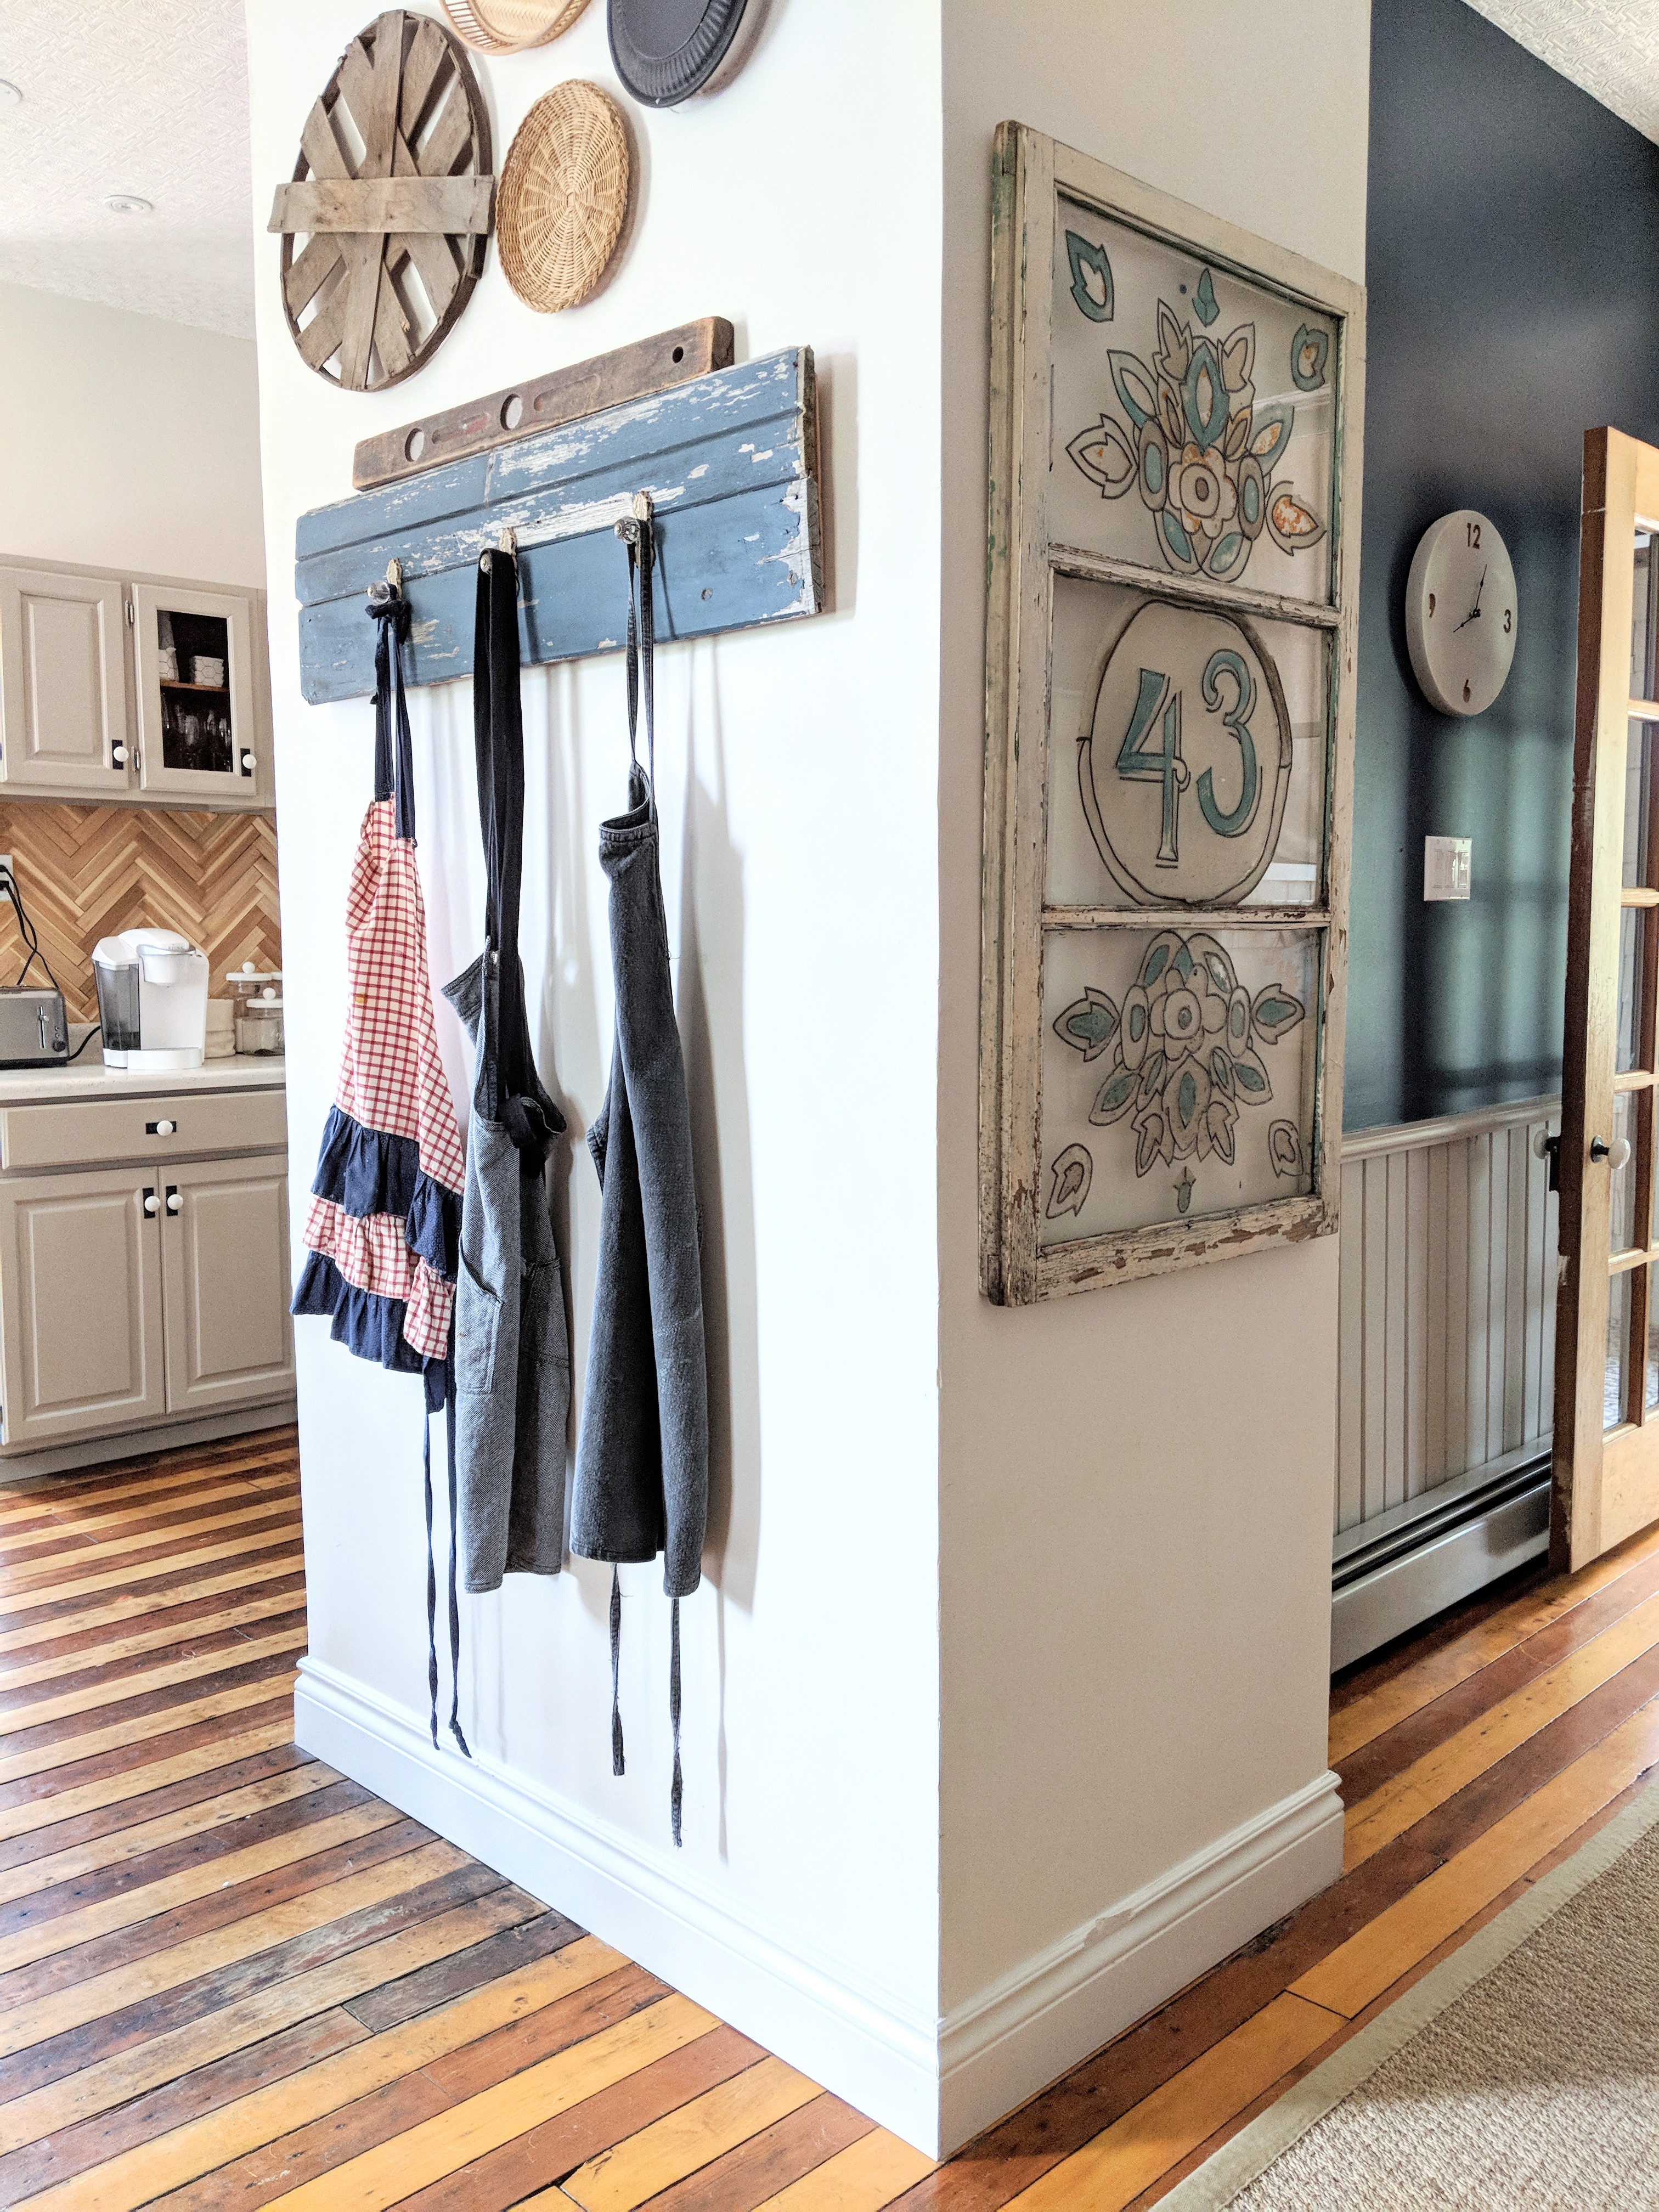
I used different types of baskets to create functional storage, while adding texture and visual interest. Above: simple navy folding fabric baskets are affordable storage for art supplies. 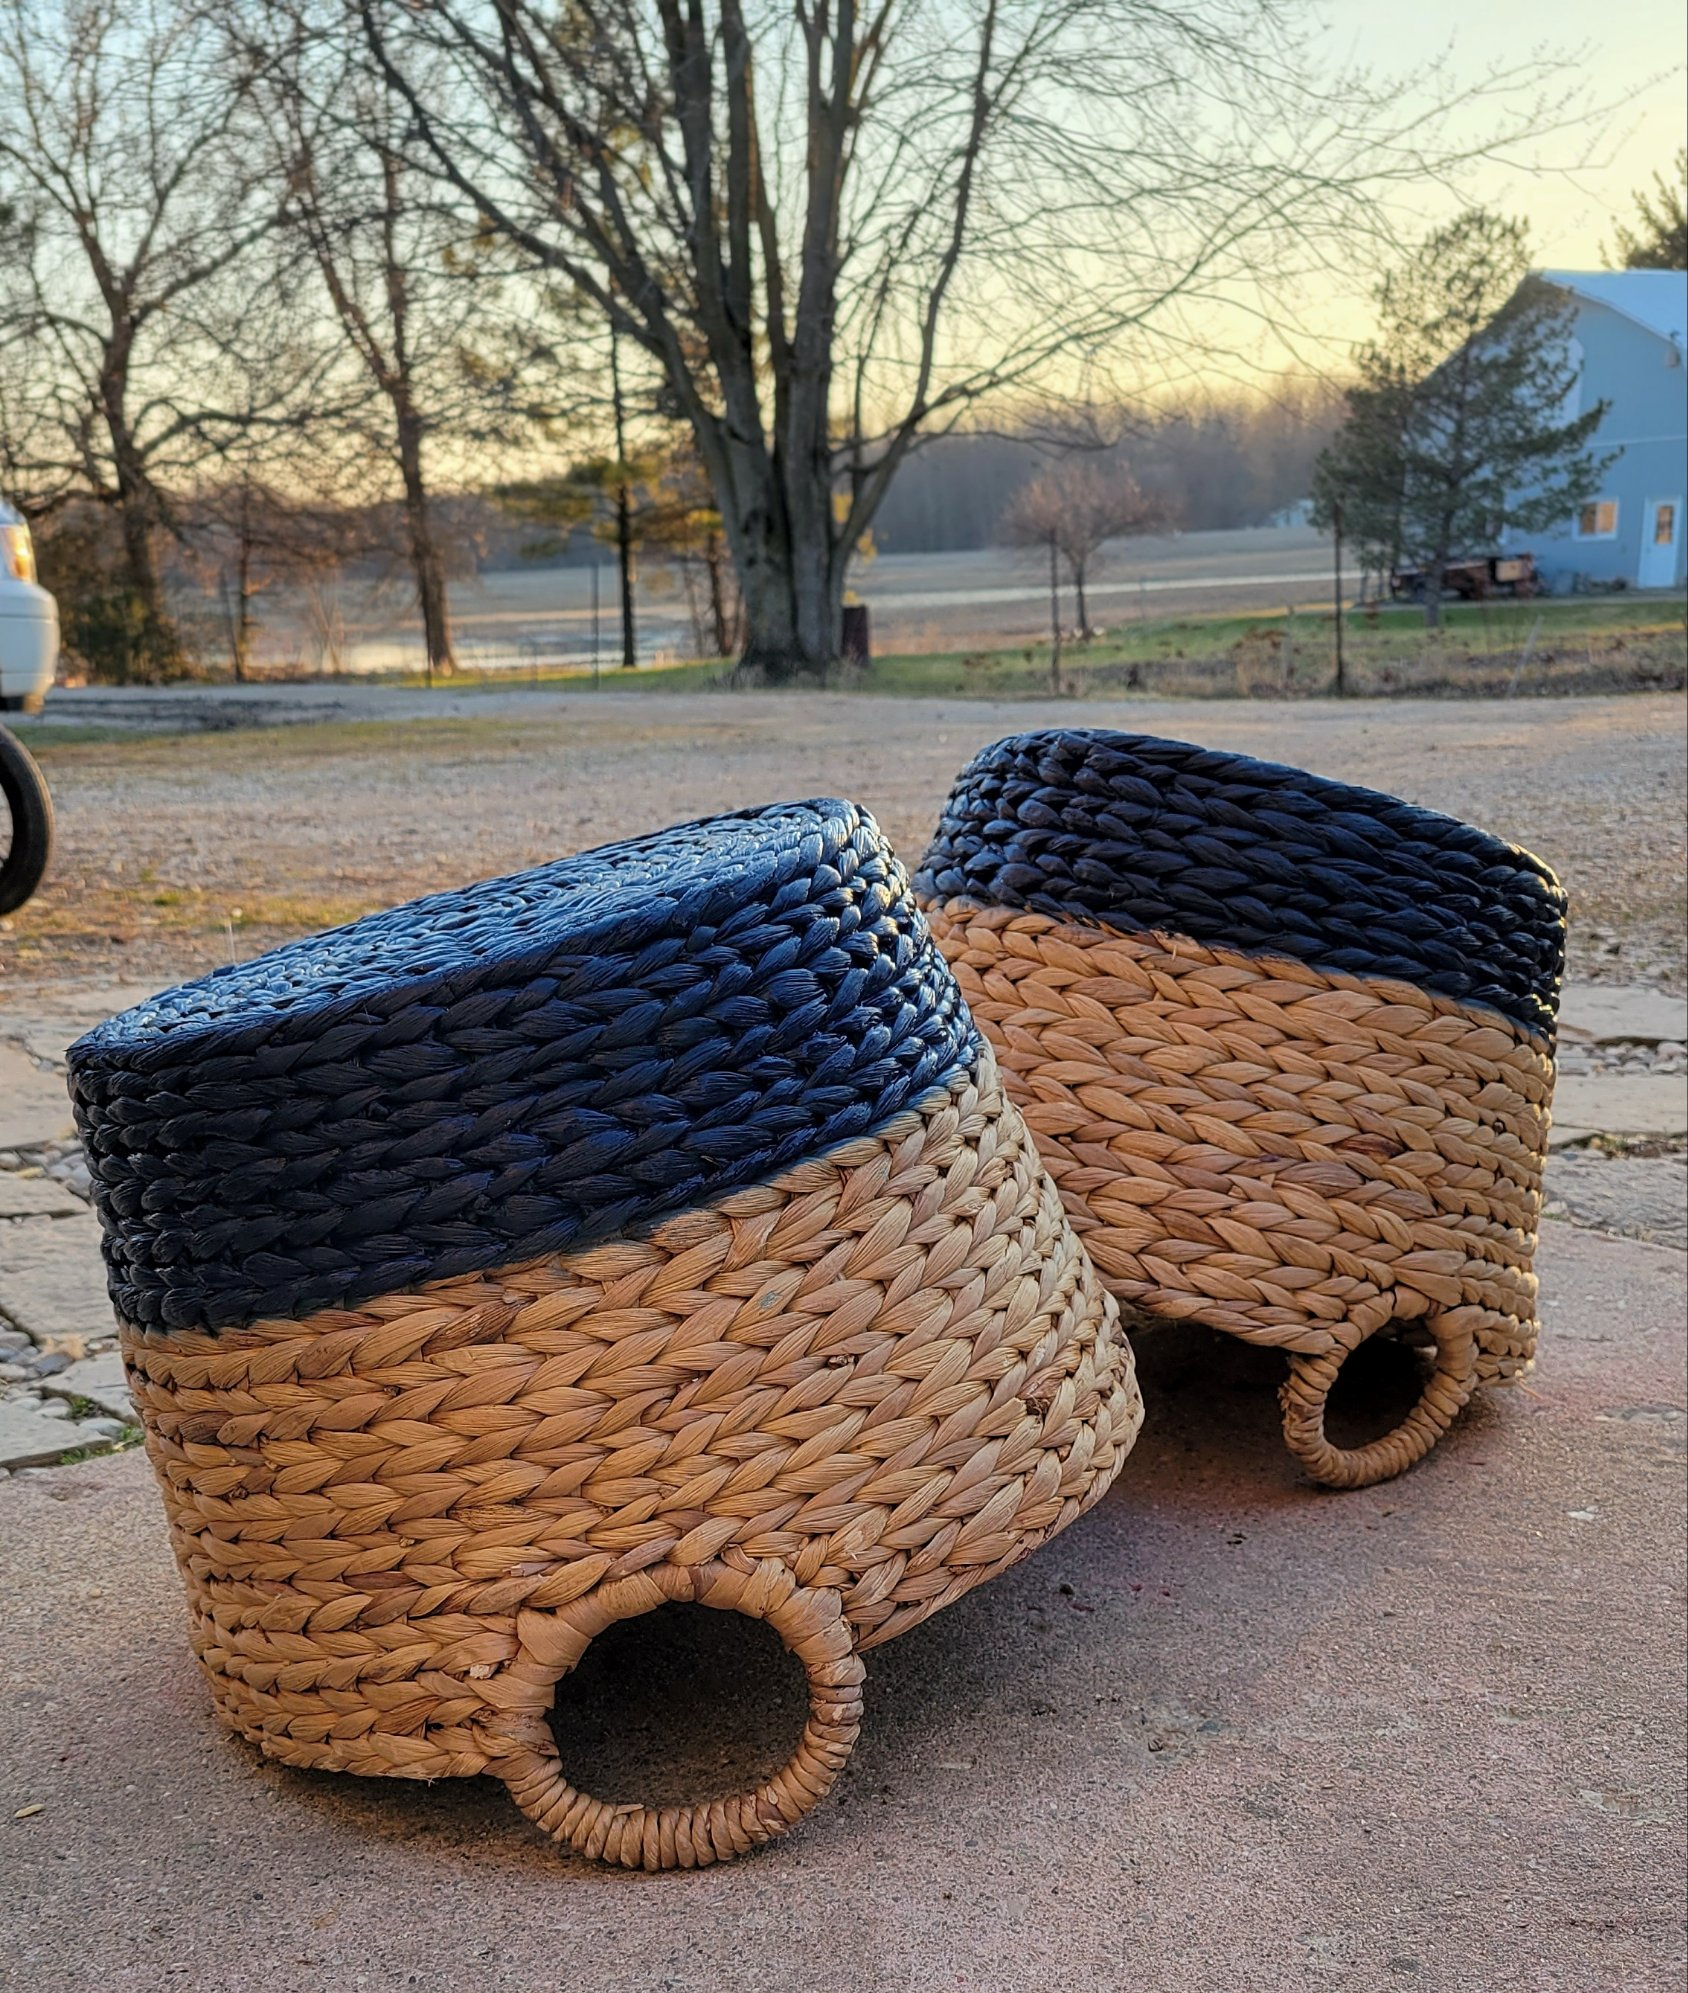
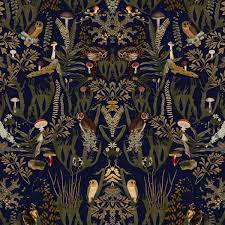
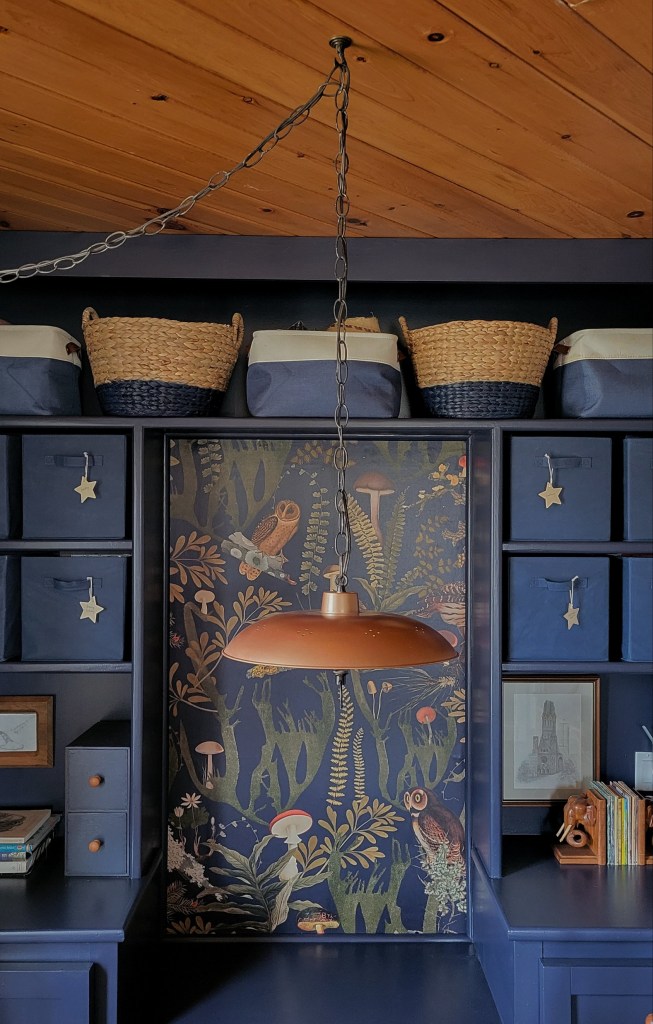
These round woven baskets broke up a lot of square lines. They’ve been kicking around my house for years. The blue paint was wearing off, so I repainted the stripe with the same paint colour I used on the cabinetry. One design element that can instantly add magic to any play space is wallpaper. Consider using a large-scale pattern in a small area of the room, like behind a reading nook or on a single wall, to add a touch of whimsy without overwhelming the space. Pay attention to the small details that can make a big difference. Hang fairy lights or install a starry night sky projector to create a dreamy ambiance, or add a playful rug.
Don’t forget to ask your kids for their ideas and opinions. All of my children each took a look at wallpapers and picked out samples that caught their attention. I used their combined input to finally pick the perfect wallpaper for the space (everyone in my family raved about it when they saw it in person).
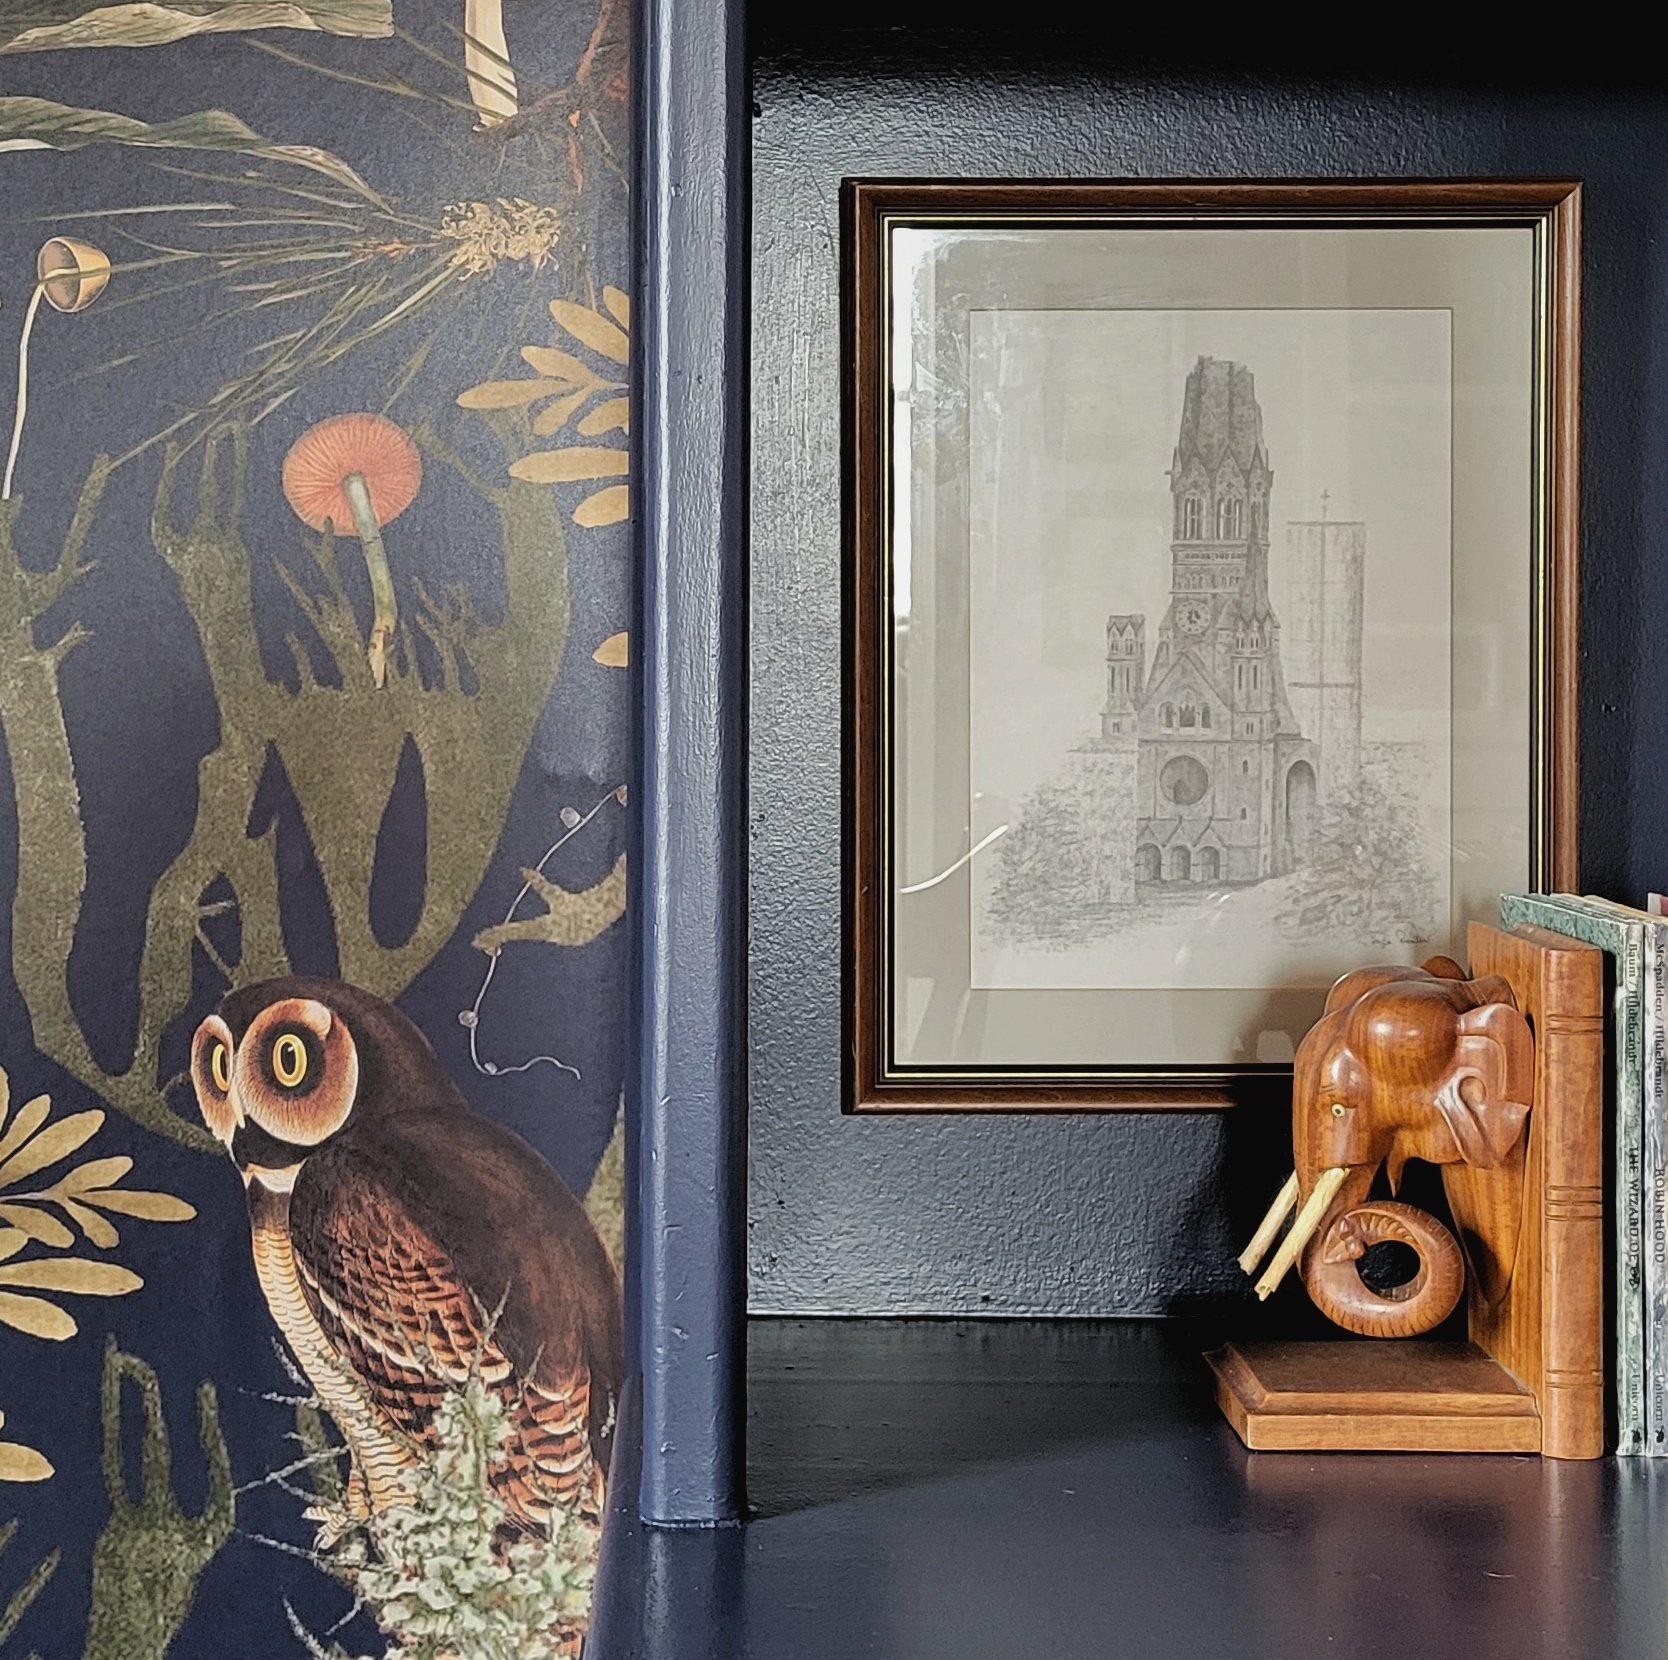
Thrifted items, like wood bookends, framed sketches and art books, add texture to the nook.
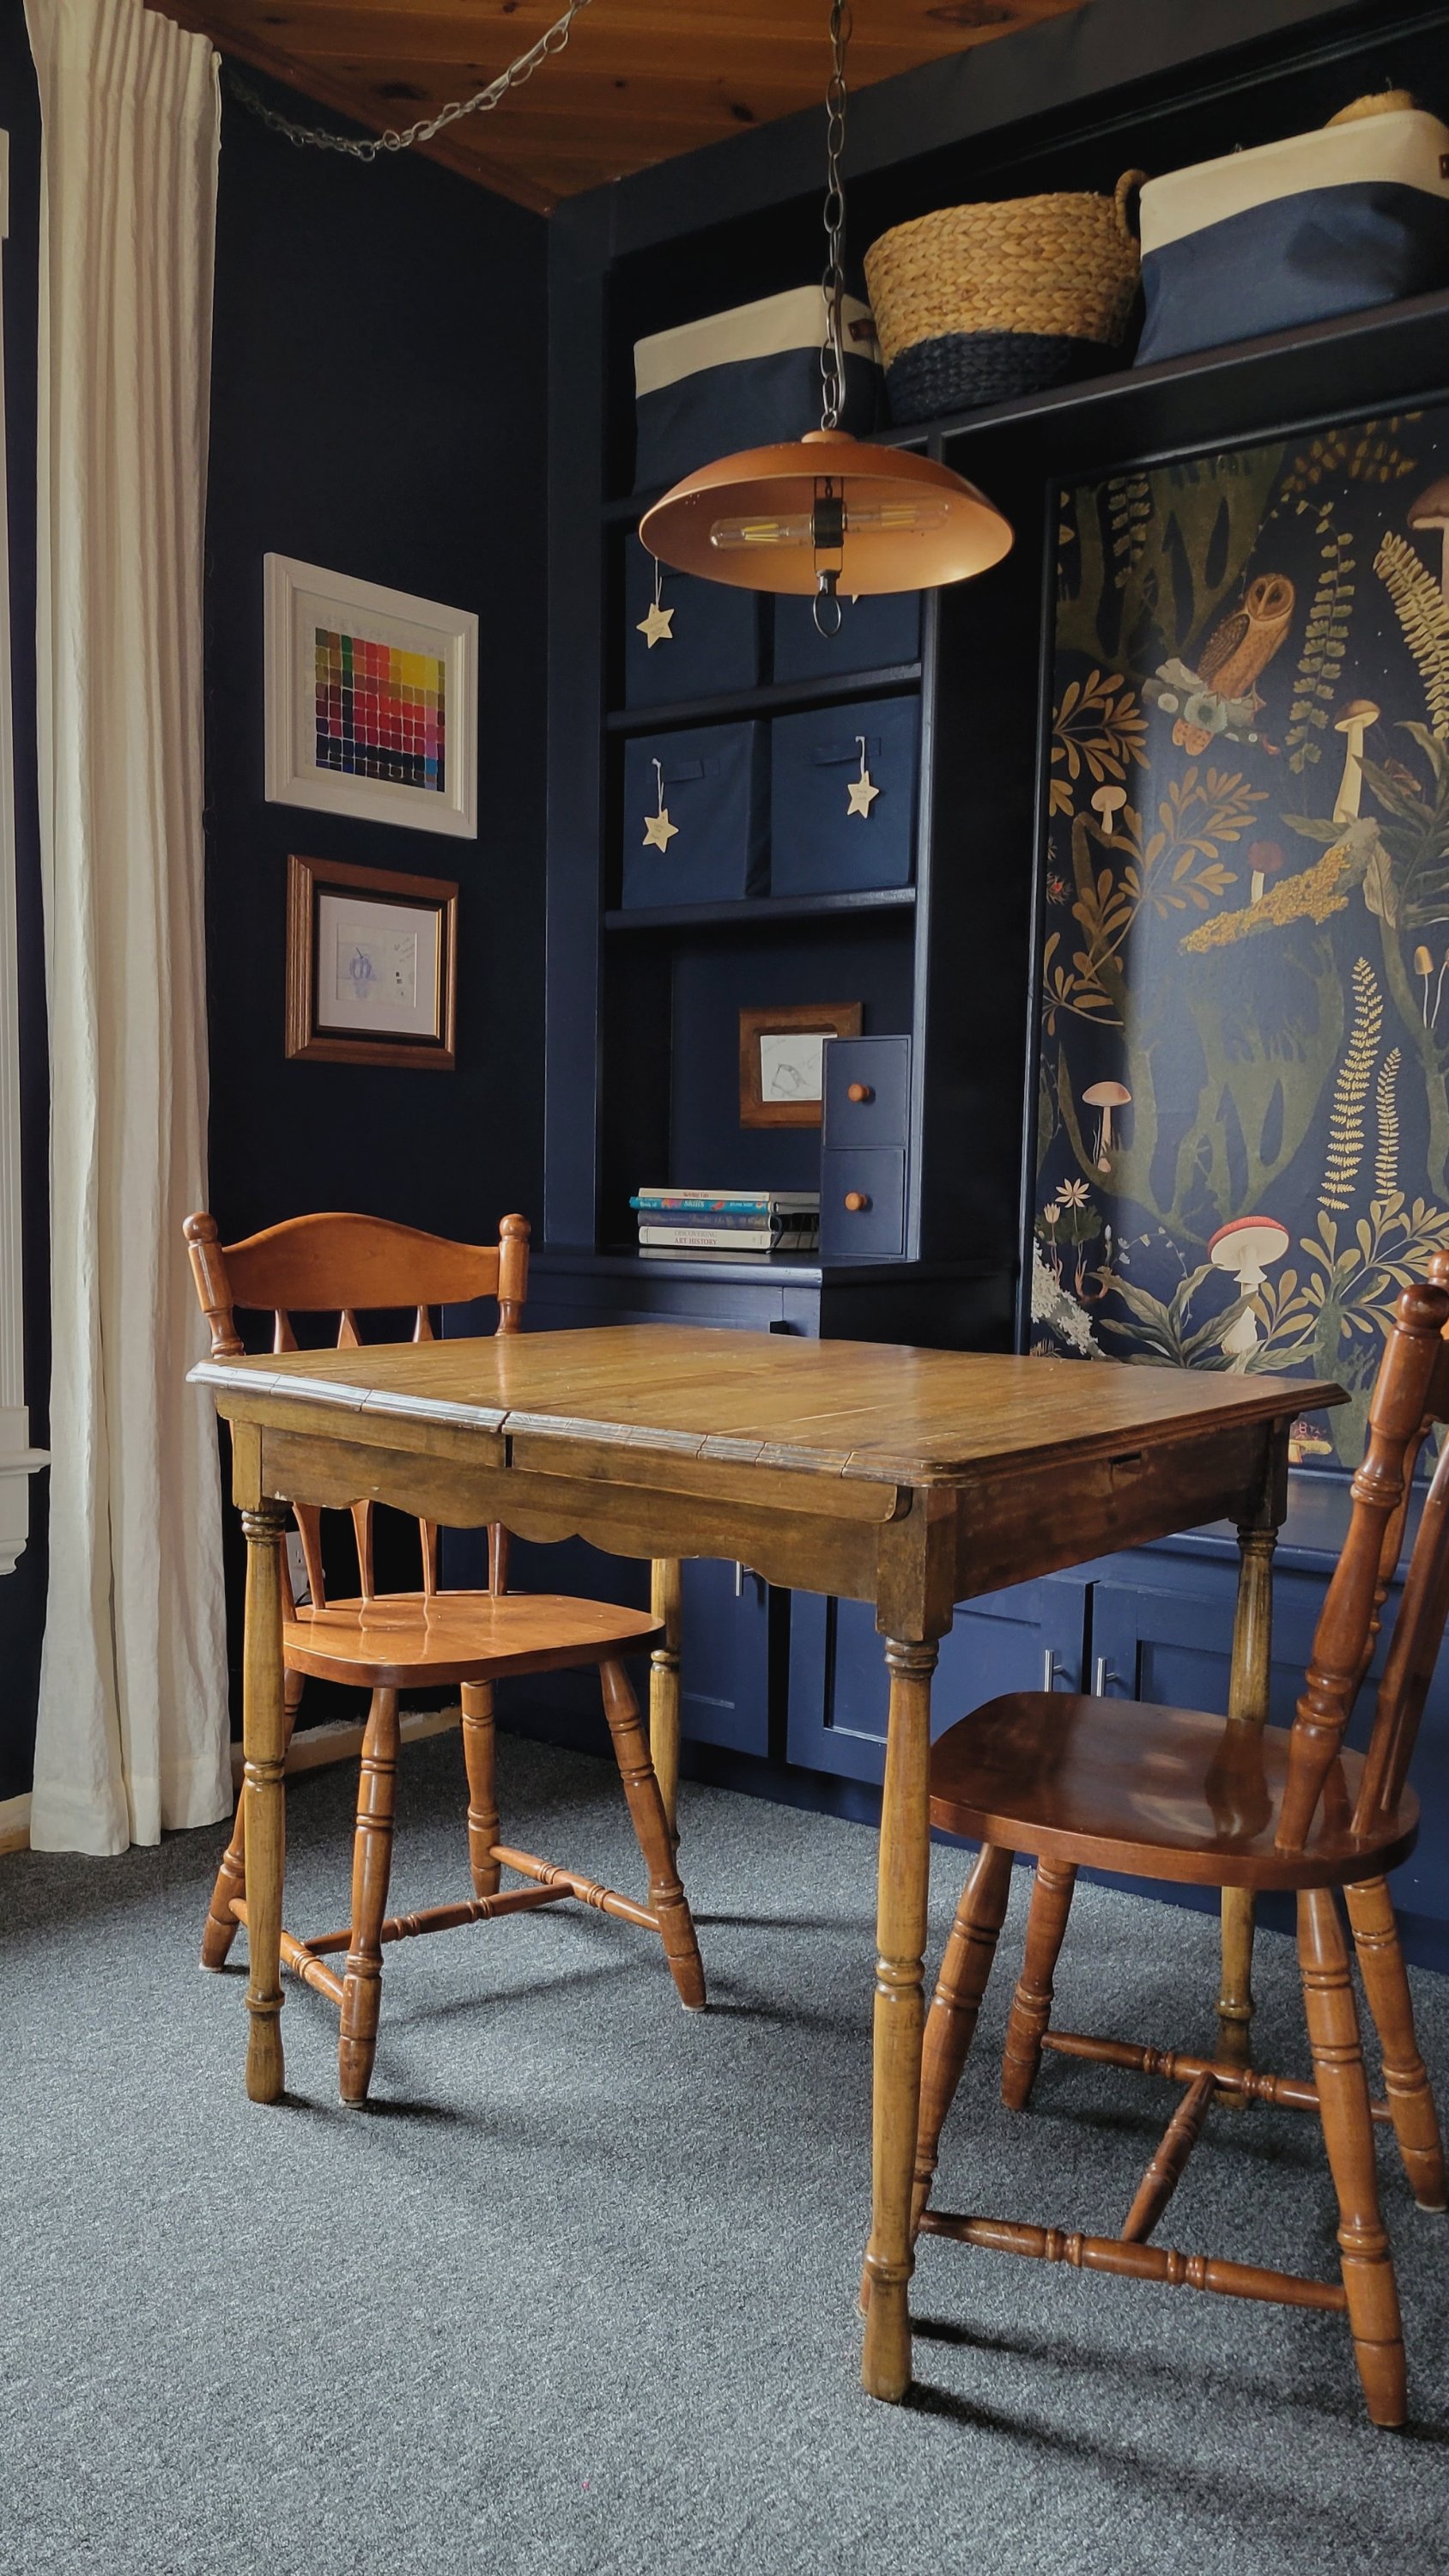
A vintage hand-made copper light fixture sourced from an Etsy seller is a fun task light over the art station work table. A table in a play room is a great idea for art time, games and much more.
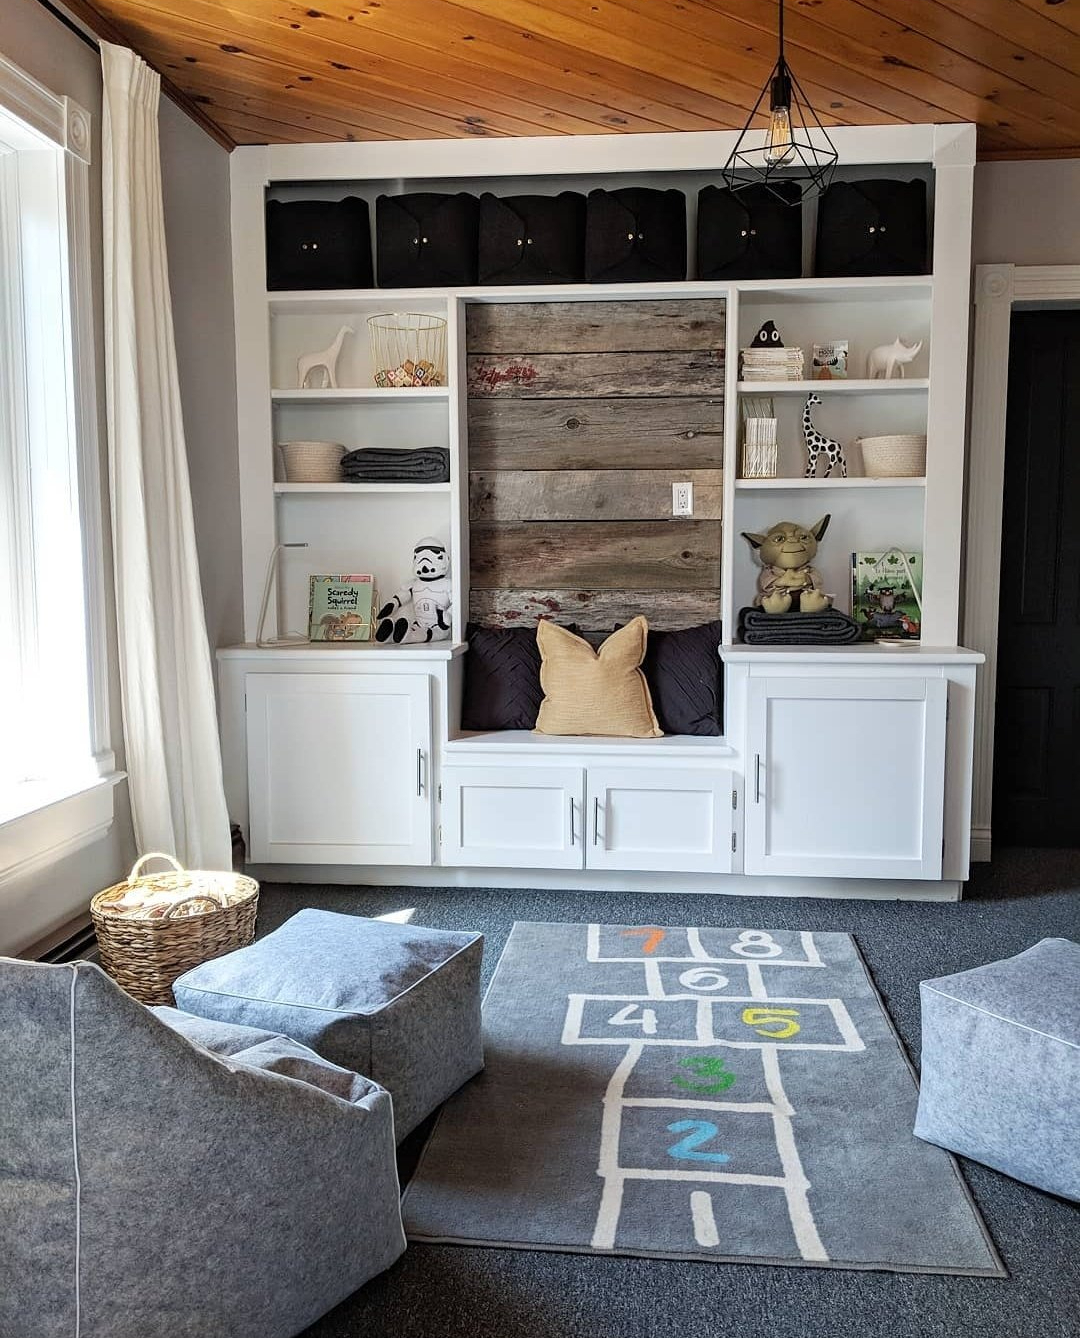
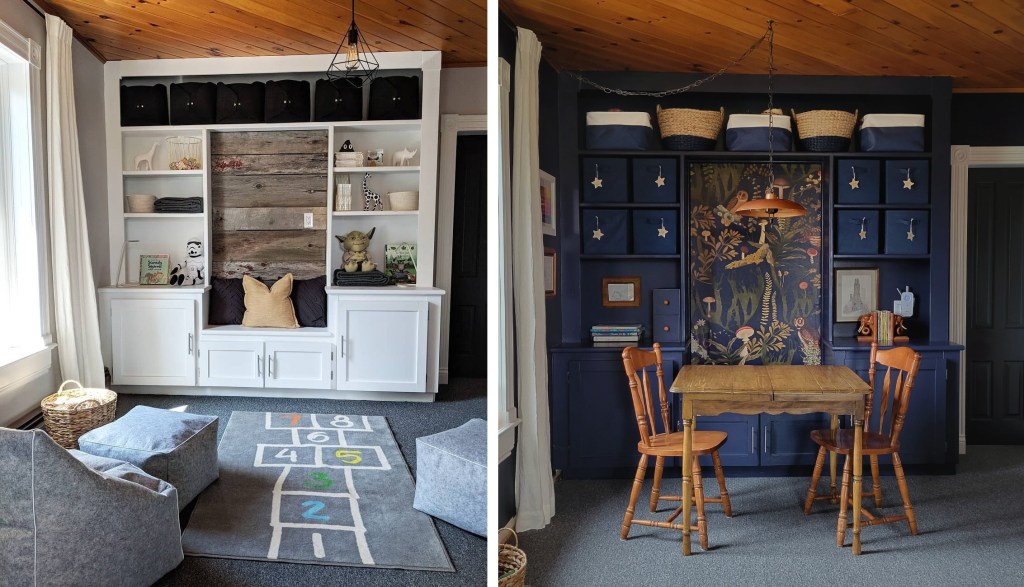
Let’s take a look back at the before. Although neutral and plenty pleasing to look at, the cabinetry is functioning as a display for tchotchkes rather than a storage zone. Not only is it a lot more fun to look at now, it’s a much more practical use of space.
Product Links
(some of these links are affiliate links)
Yankees Navy by Benjamin Moore
-
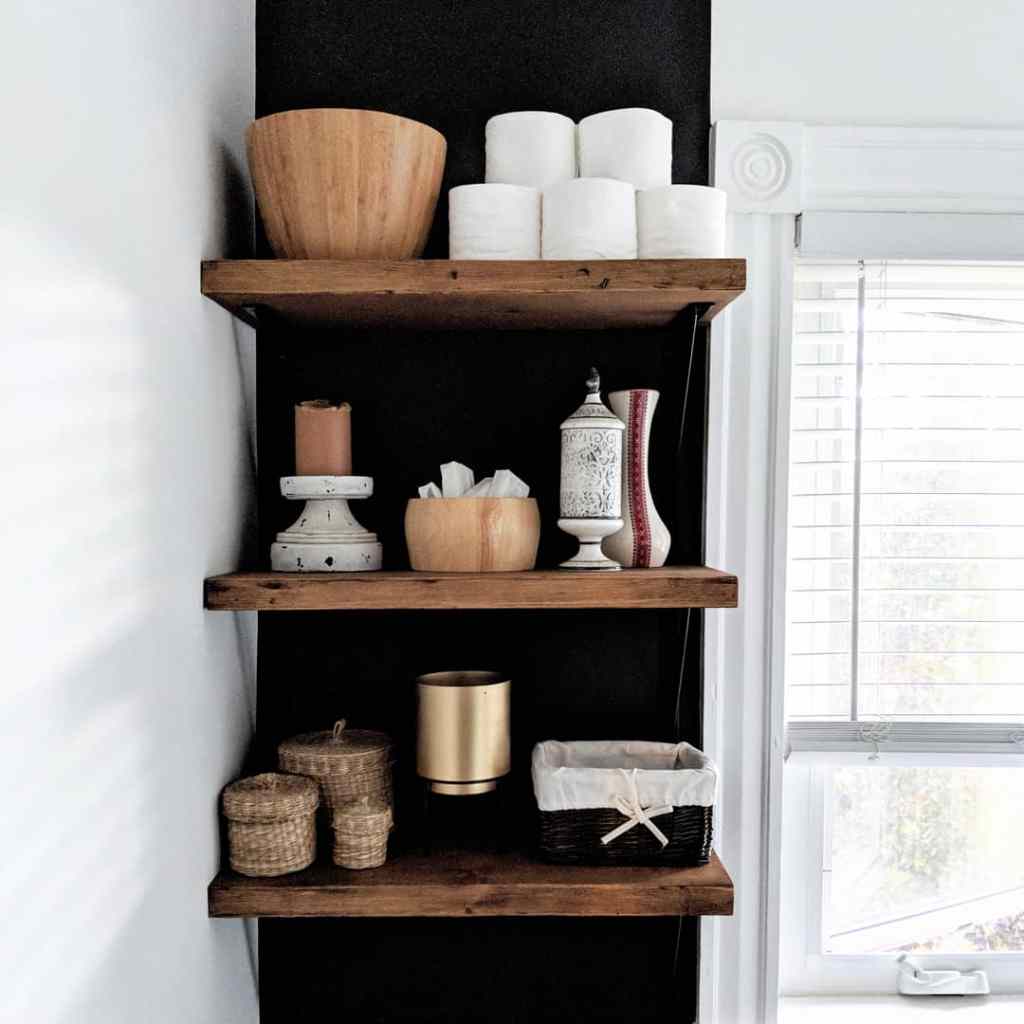
Black and White Bathroom Makeover
We made it. We are here. We are done! It’s very thrilling to have successfully completed the One Room Challenge for the very first time. I’ve had so much fun following along with the other guest participants on Instagram while working hard on my own bathroom makeover.
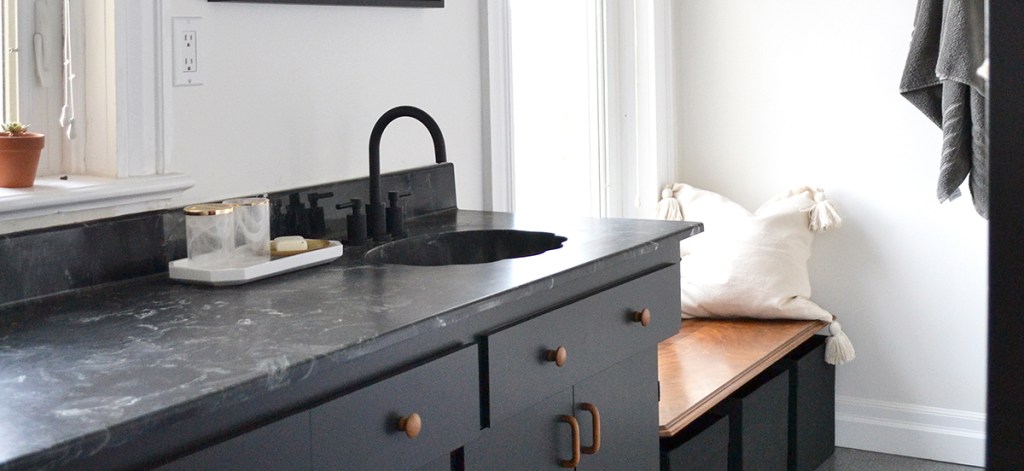
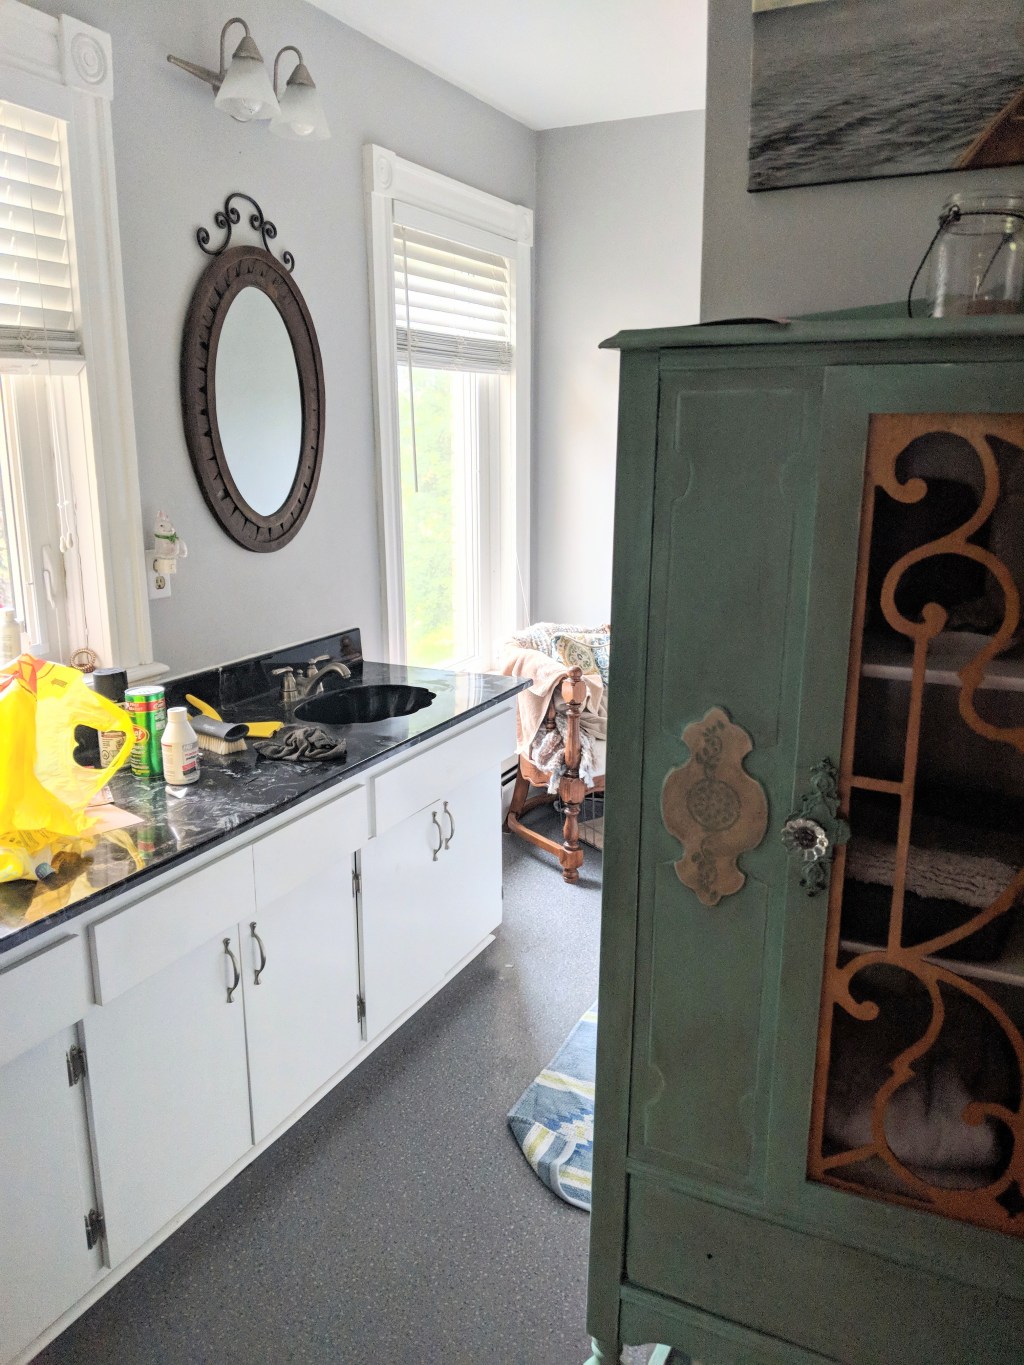
When I began planning the bathroom makeover I looked back at some of our design inspiration for the space from when we moved into our house two years ago. All of my inspiration required huge guts to the room: new shower, new vanities, new floors … you catch my drift. The thing was though, I really didn’t want to spend our time and resources on such an expensive project anymore. Let me remind you of the before.
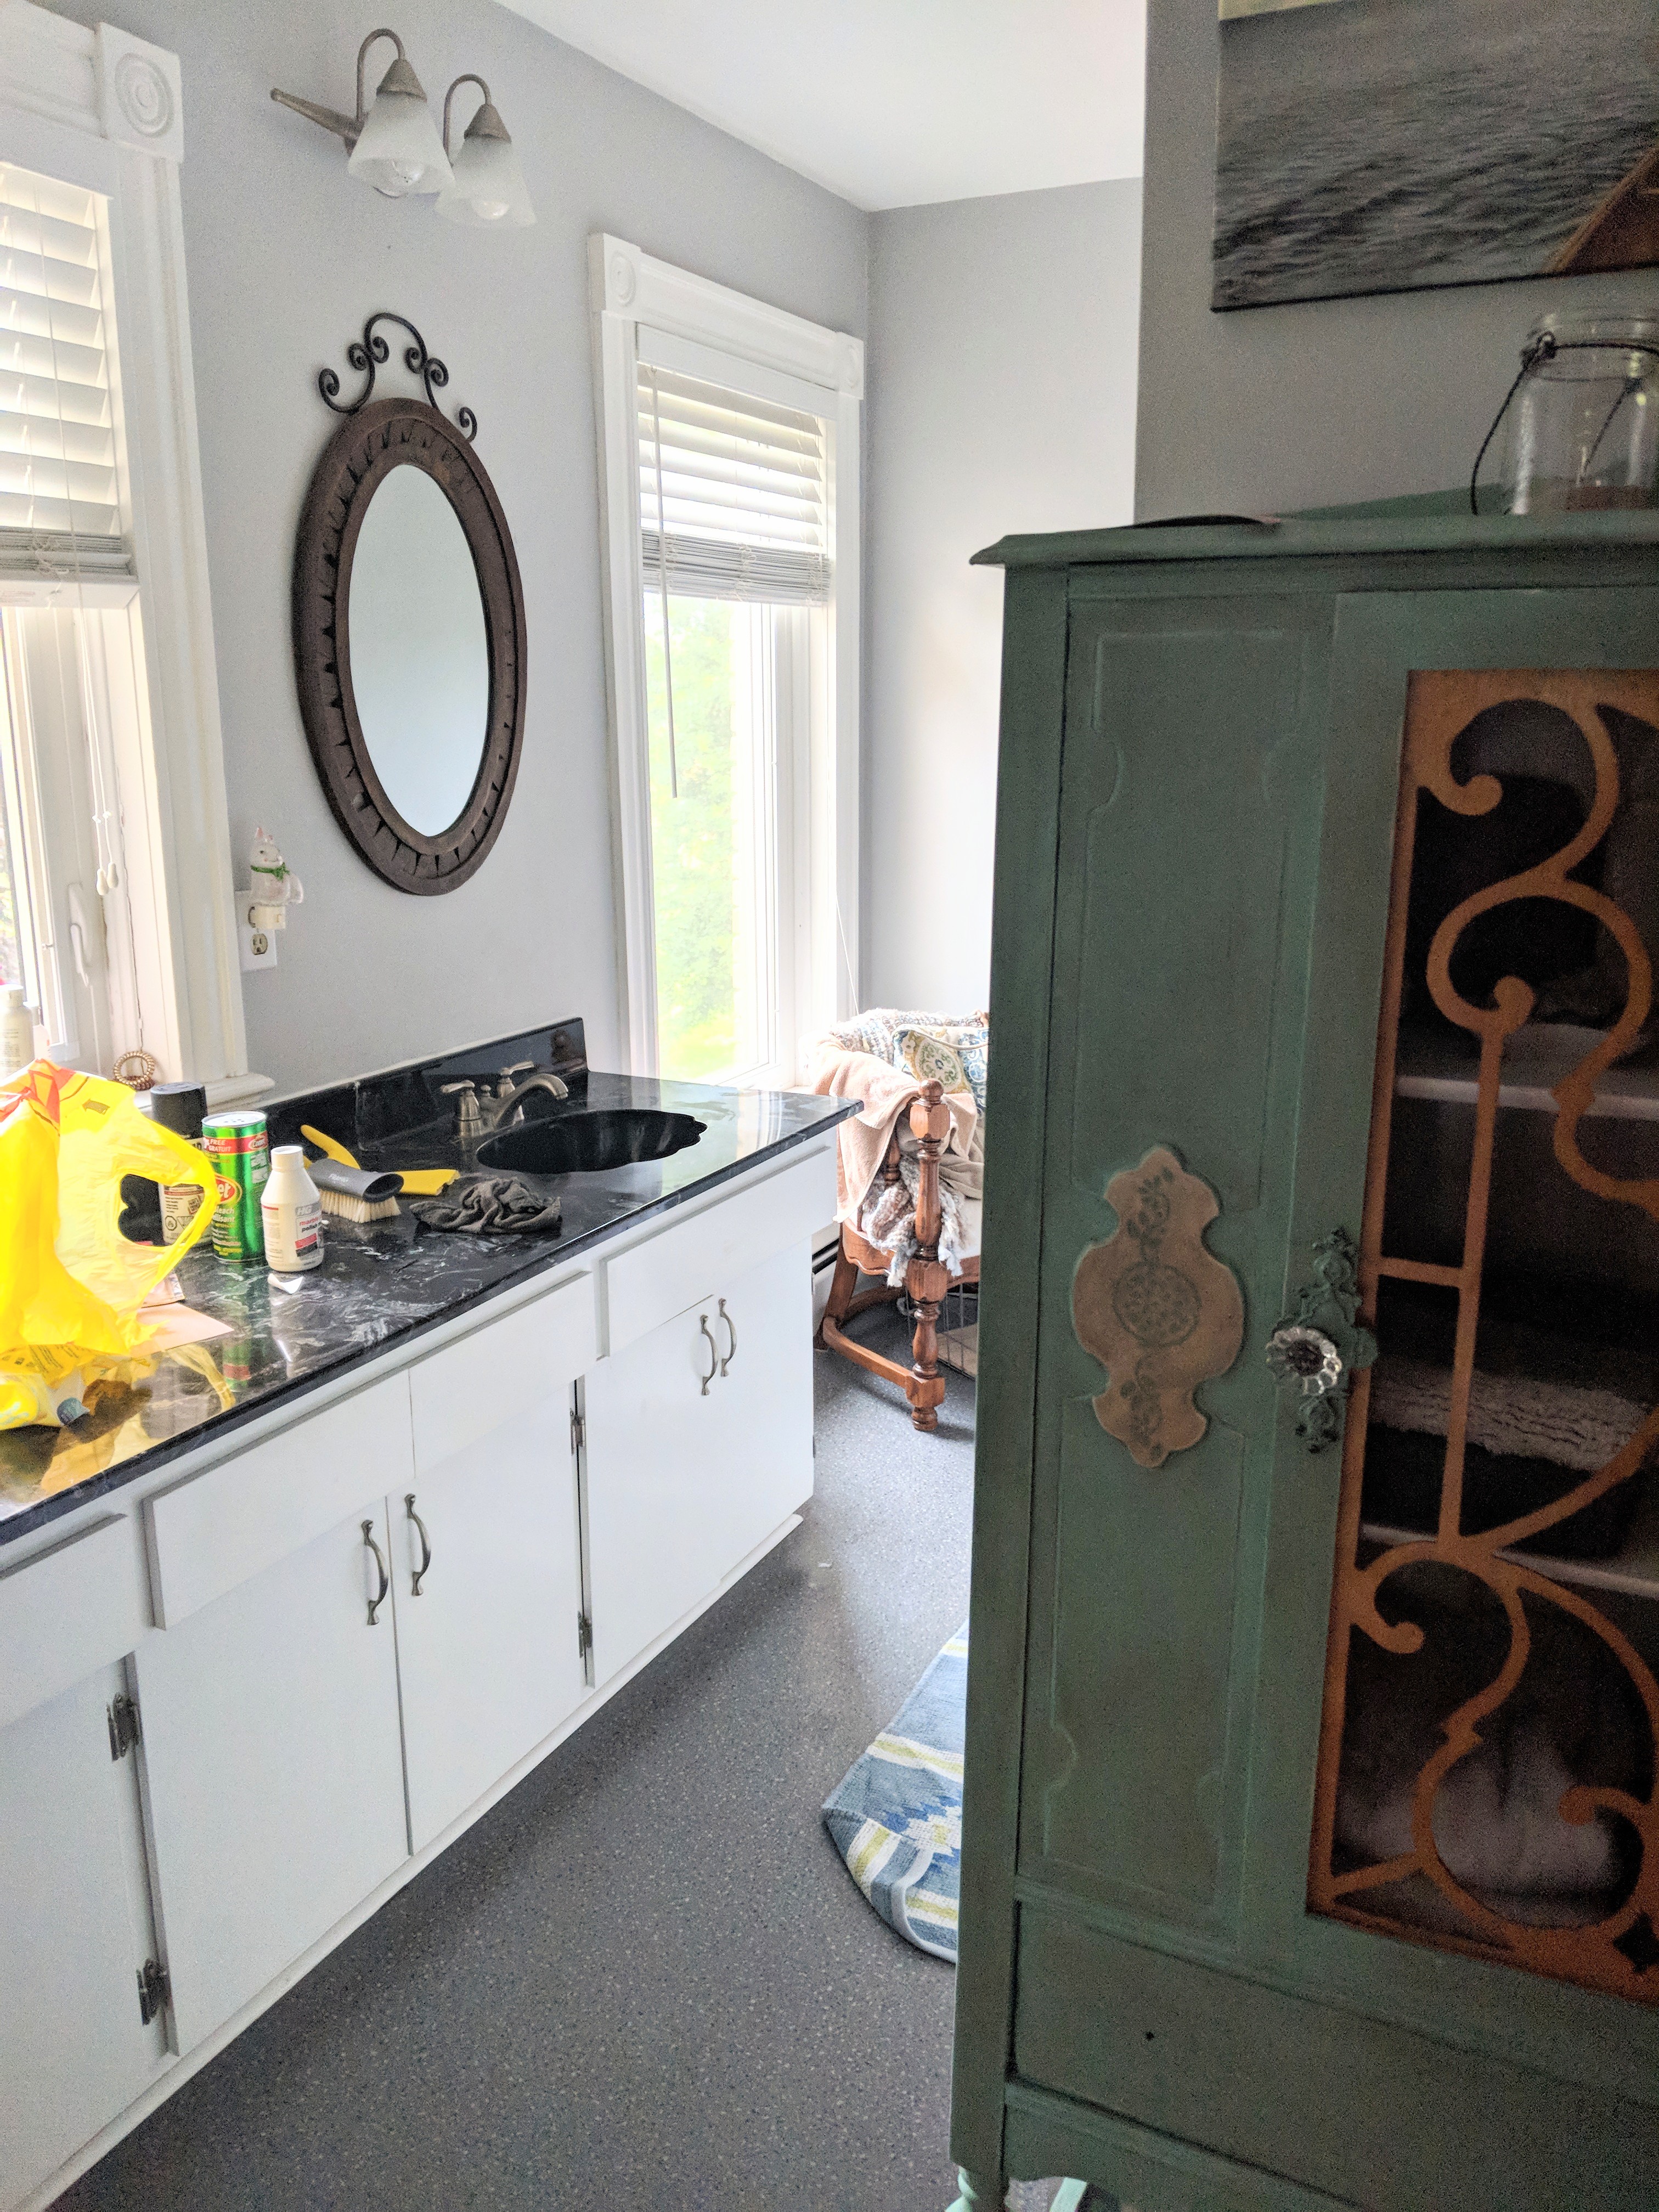
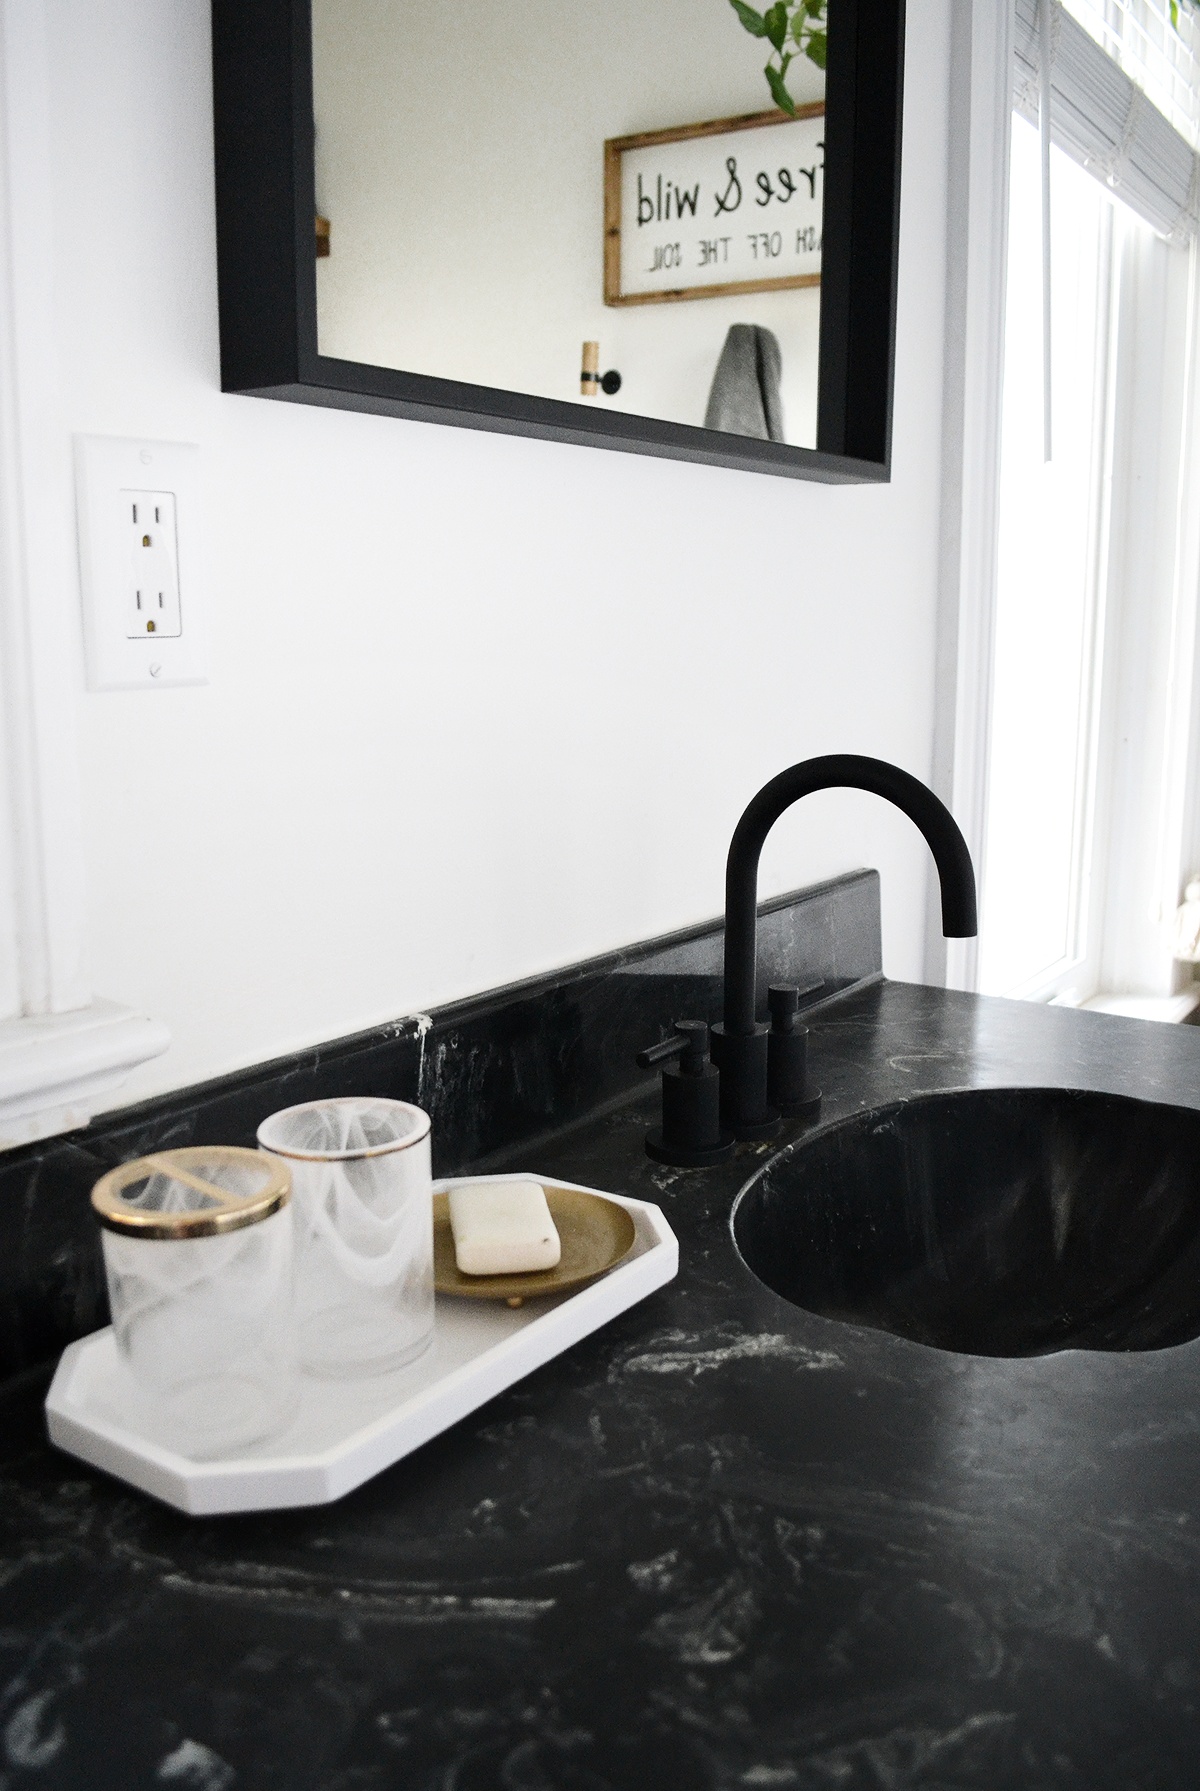
I looked around the space and asked myself how could I salvage this situation with its blah grey vinyl floors and black cultured marble sink and countertop.
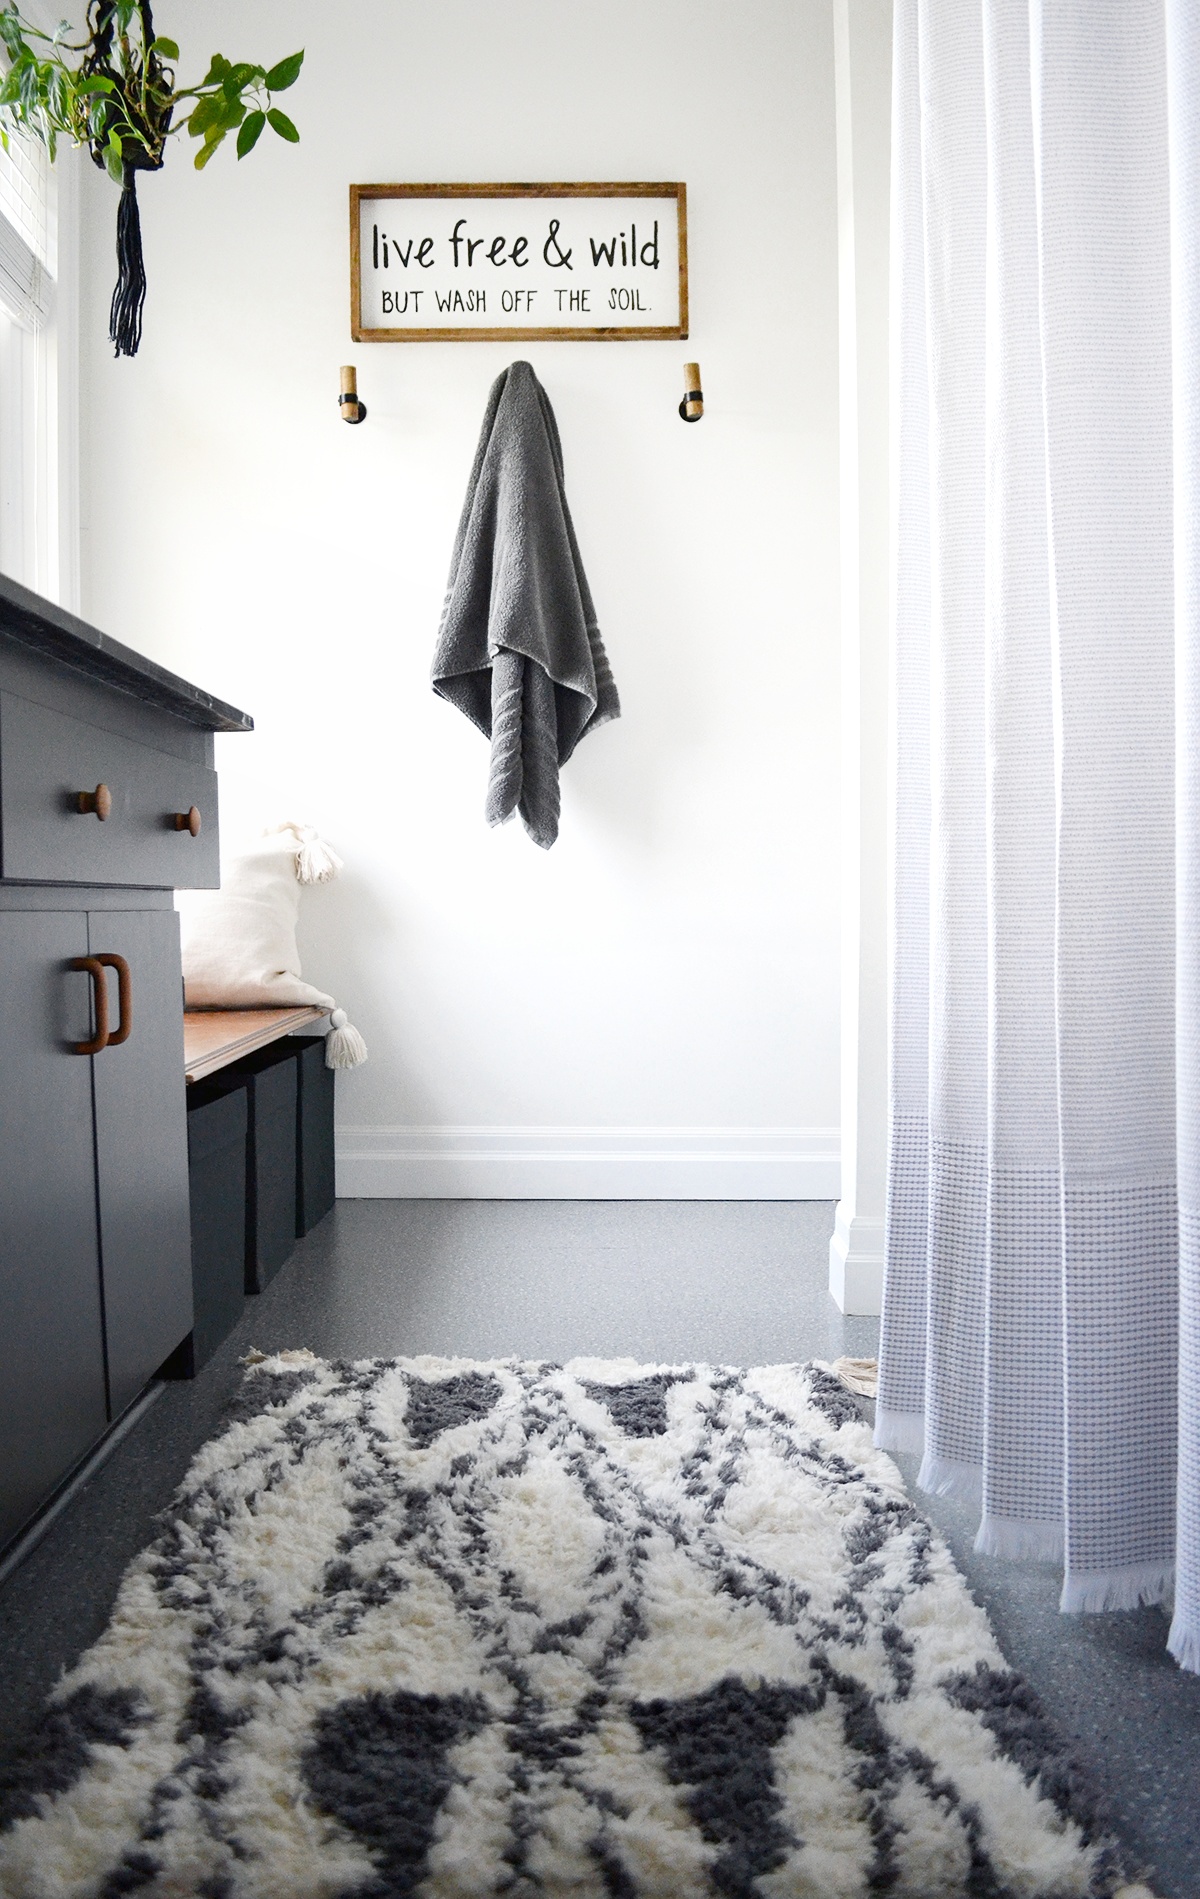
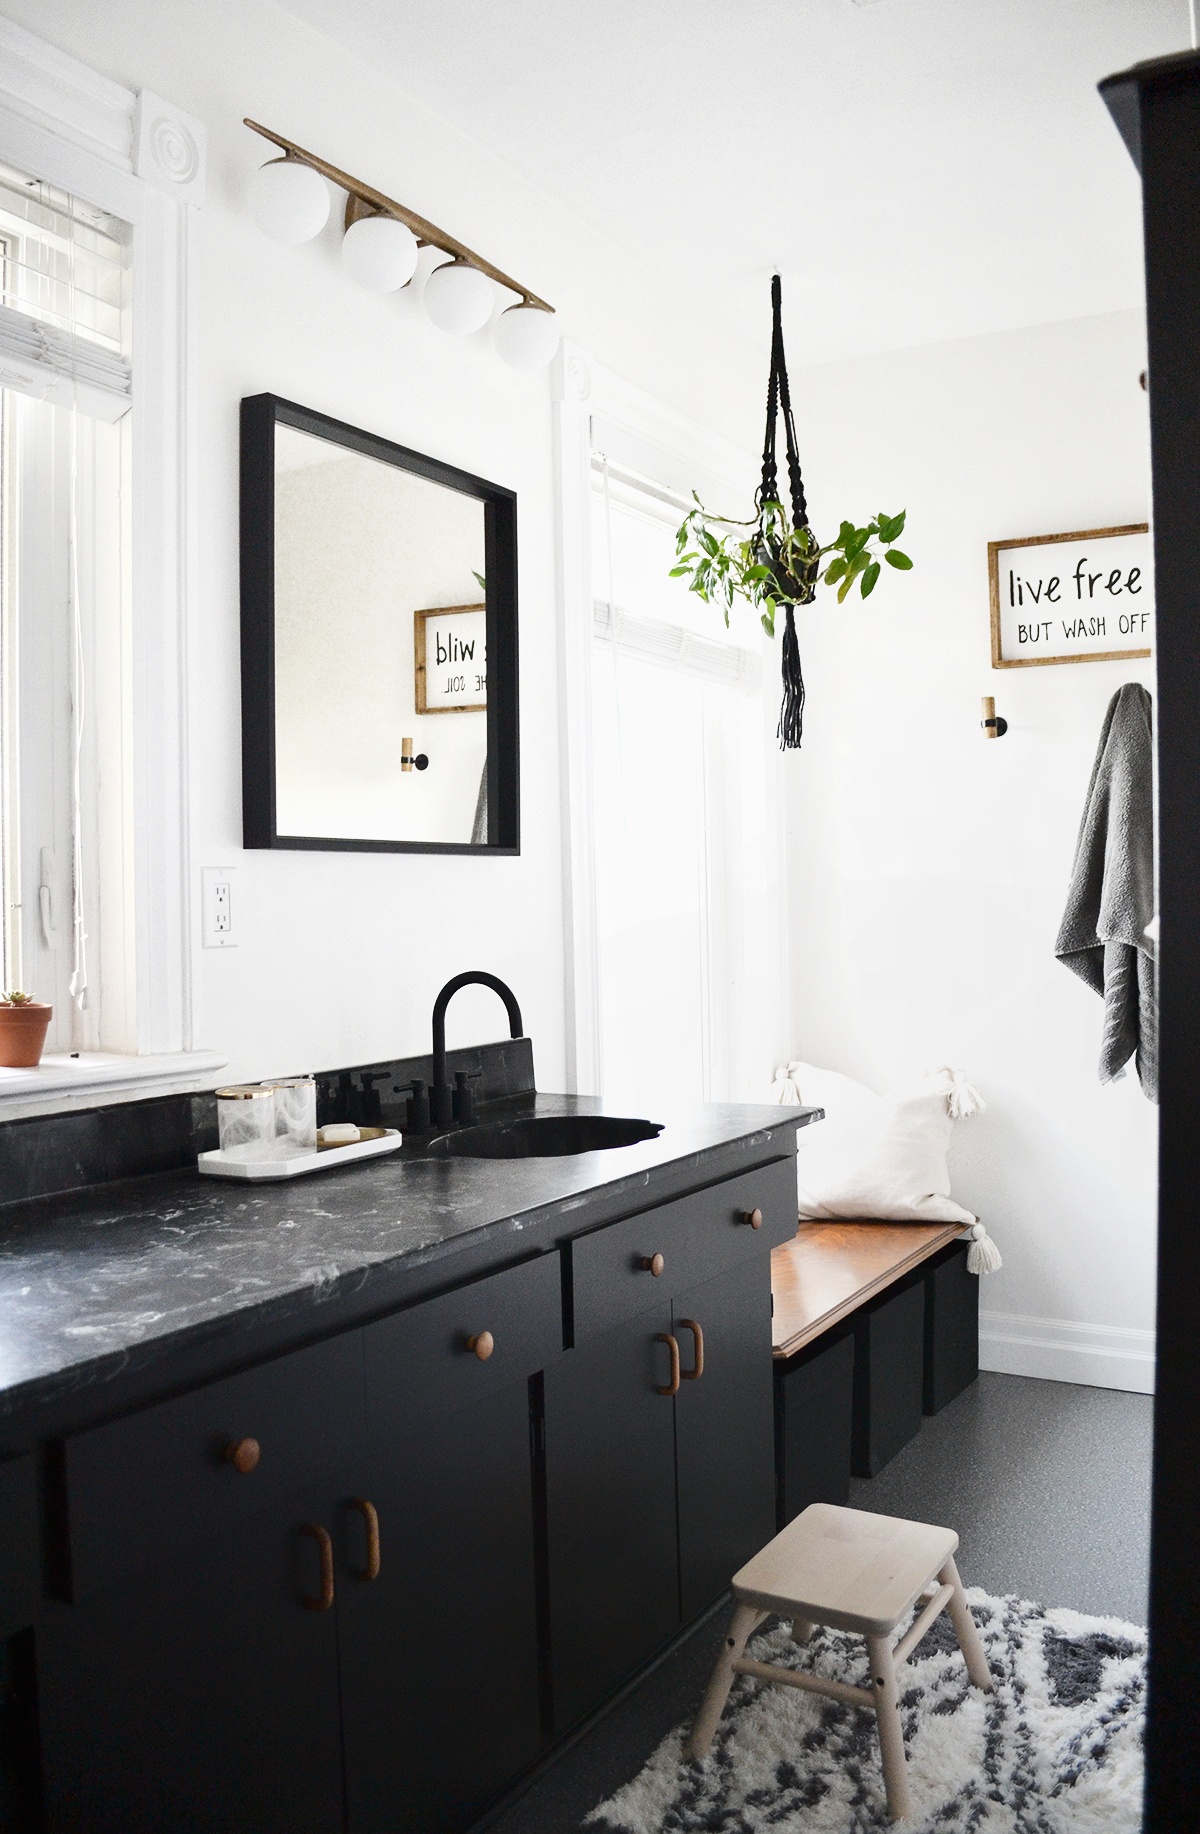
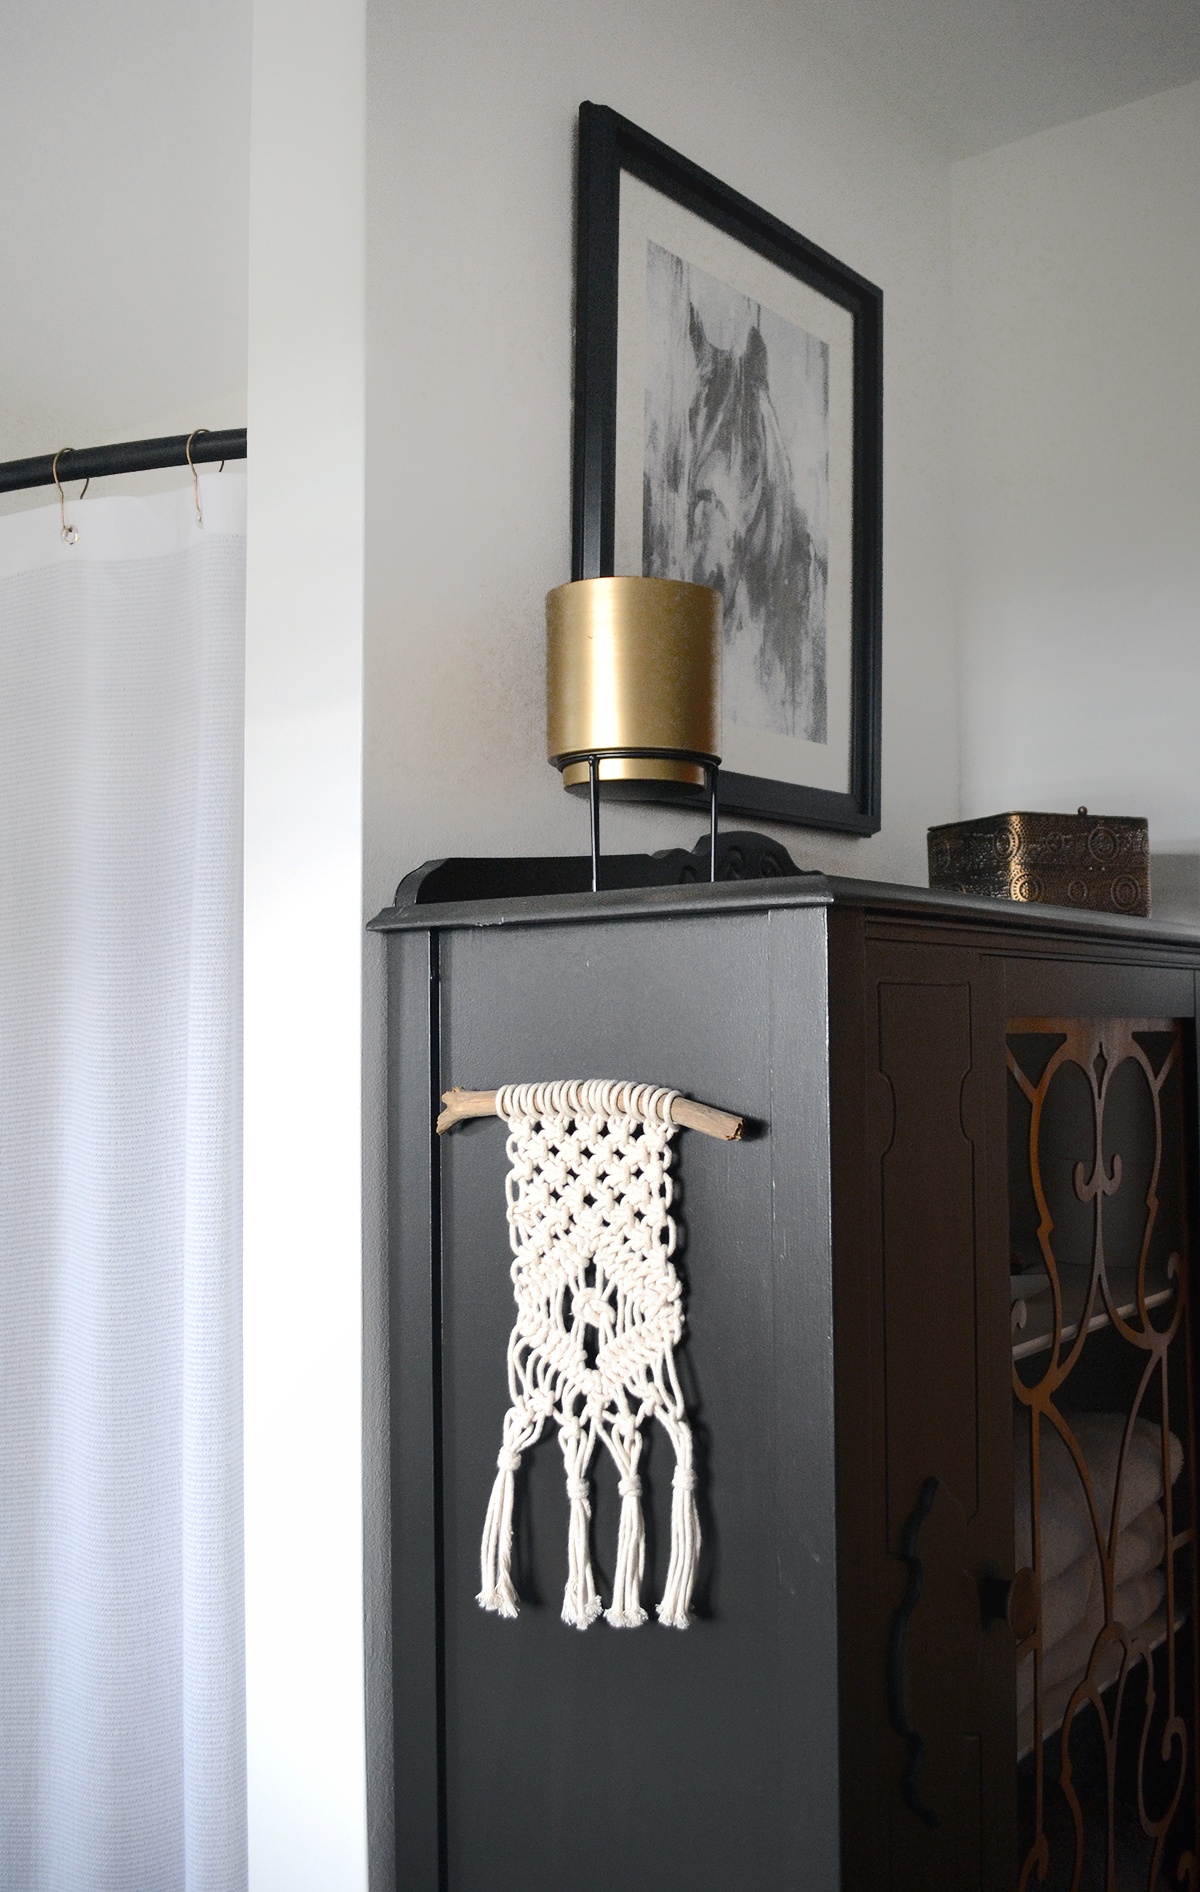
The answer was that I could give this space a whole new life with a moody black and wood look. I counted on black, white and wood to mask the scalloped sink and a fun modern bath rug to spruce up the bland grey floor. Of course, the pièce de résistance, a stunning natural brass light fixture from Kichler, was going to be the blinding sparkle that turned the bathroom from rough to diamond.
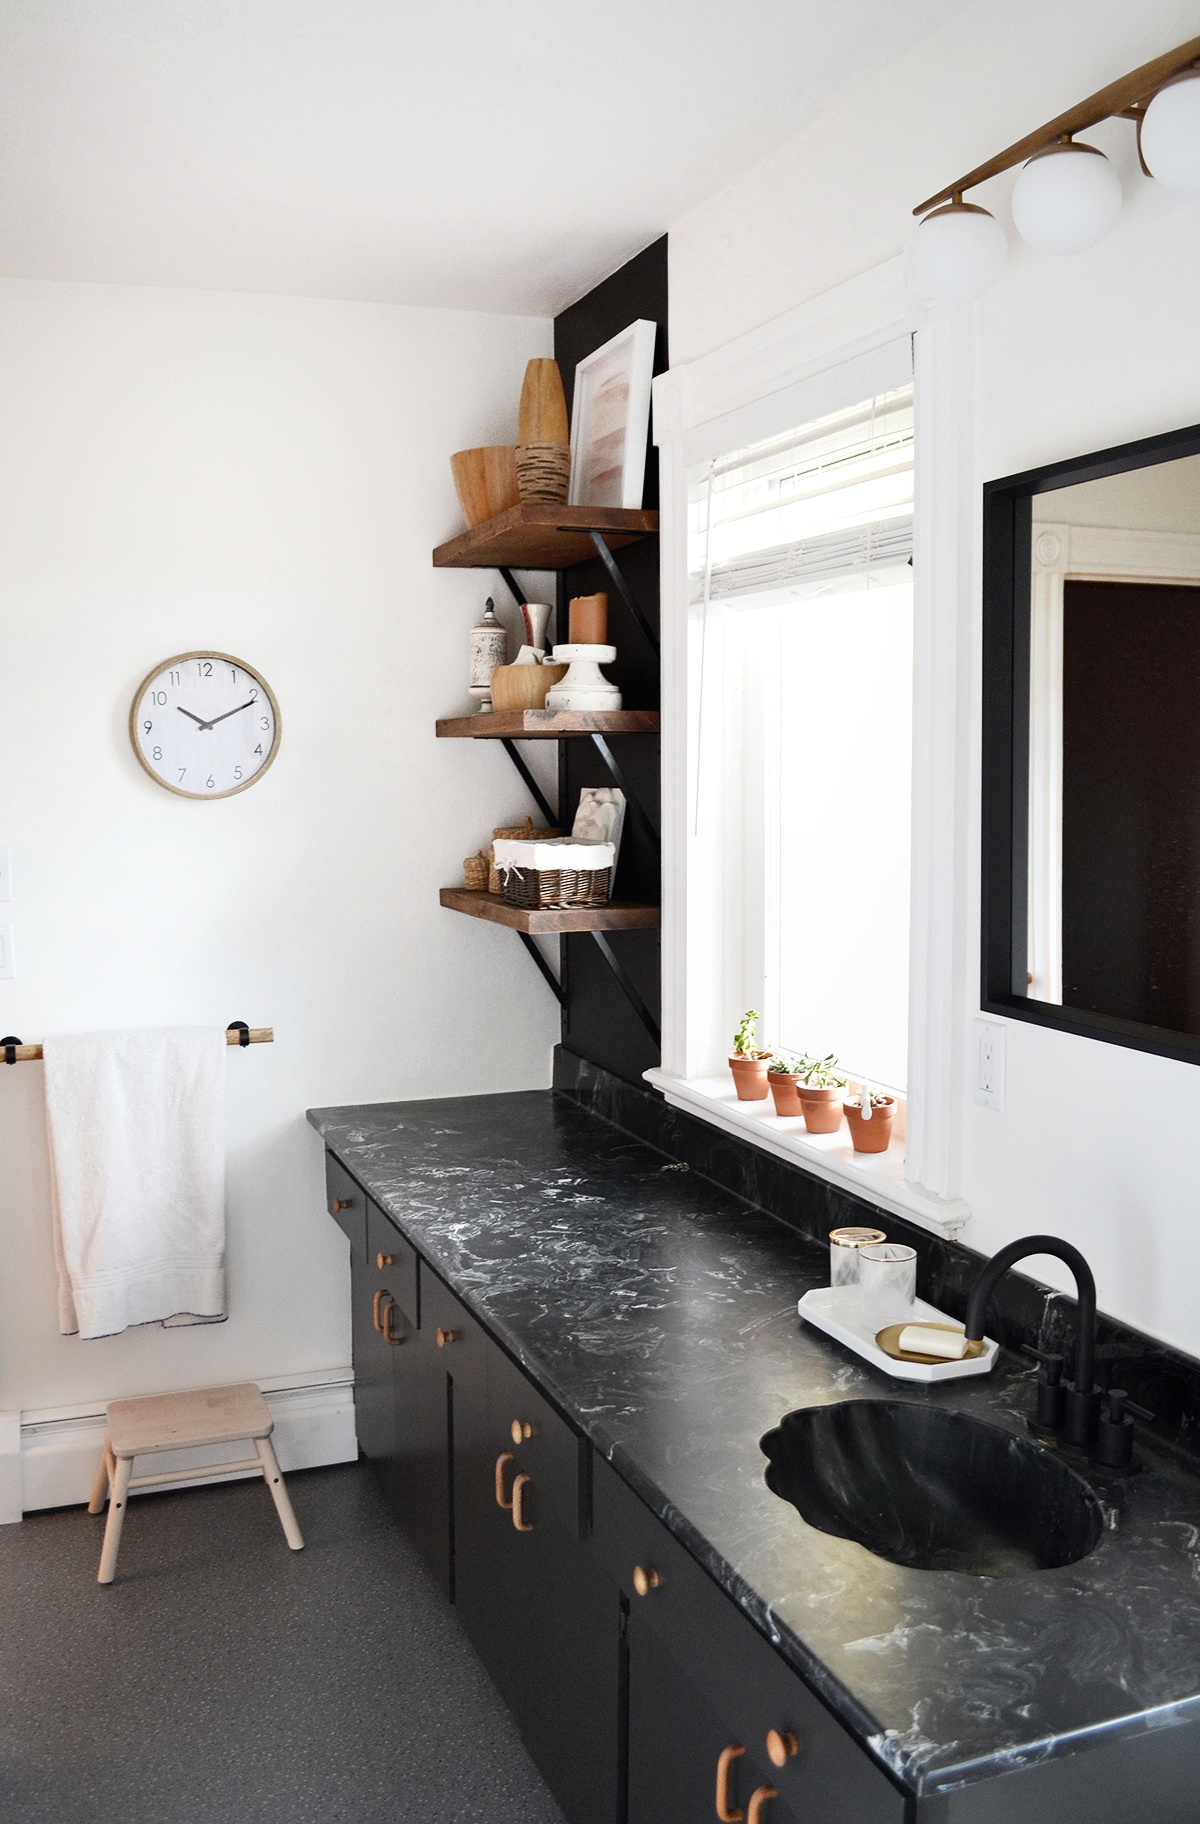
I can’t even you guys. It’s a stunner in photos but they don’t even begin to do the vanity light justice. It’s so gorje in real life and the finish is spectacular. The halogen lightbulbs it came with are excellent for a bathroom — not too soft, not to daylight and perfectly bright. Kichler knows their stuff.
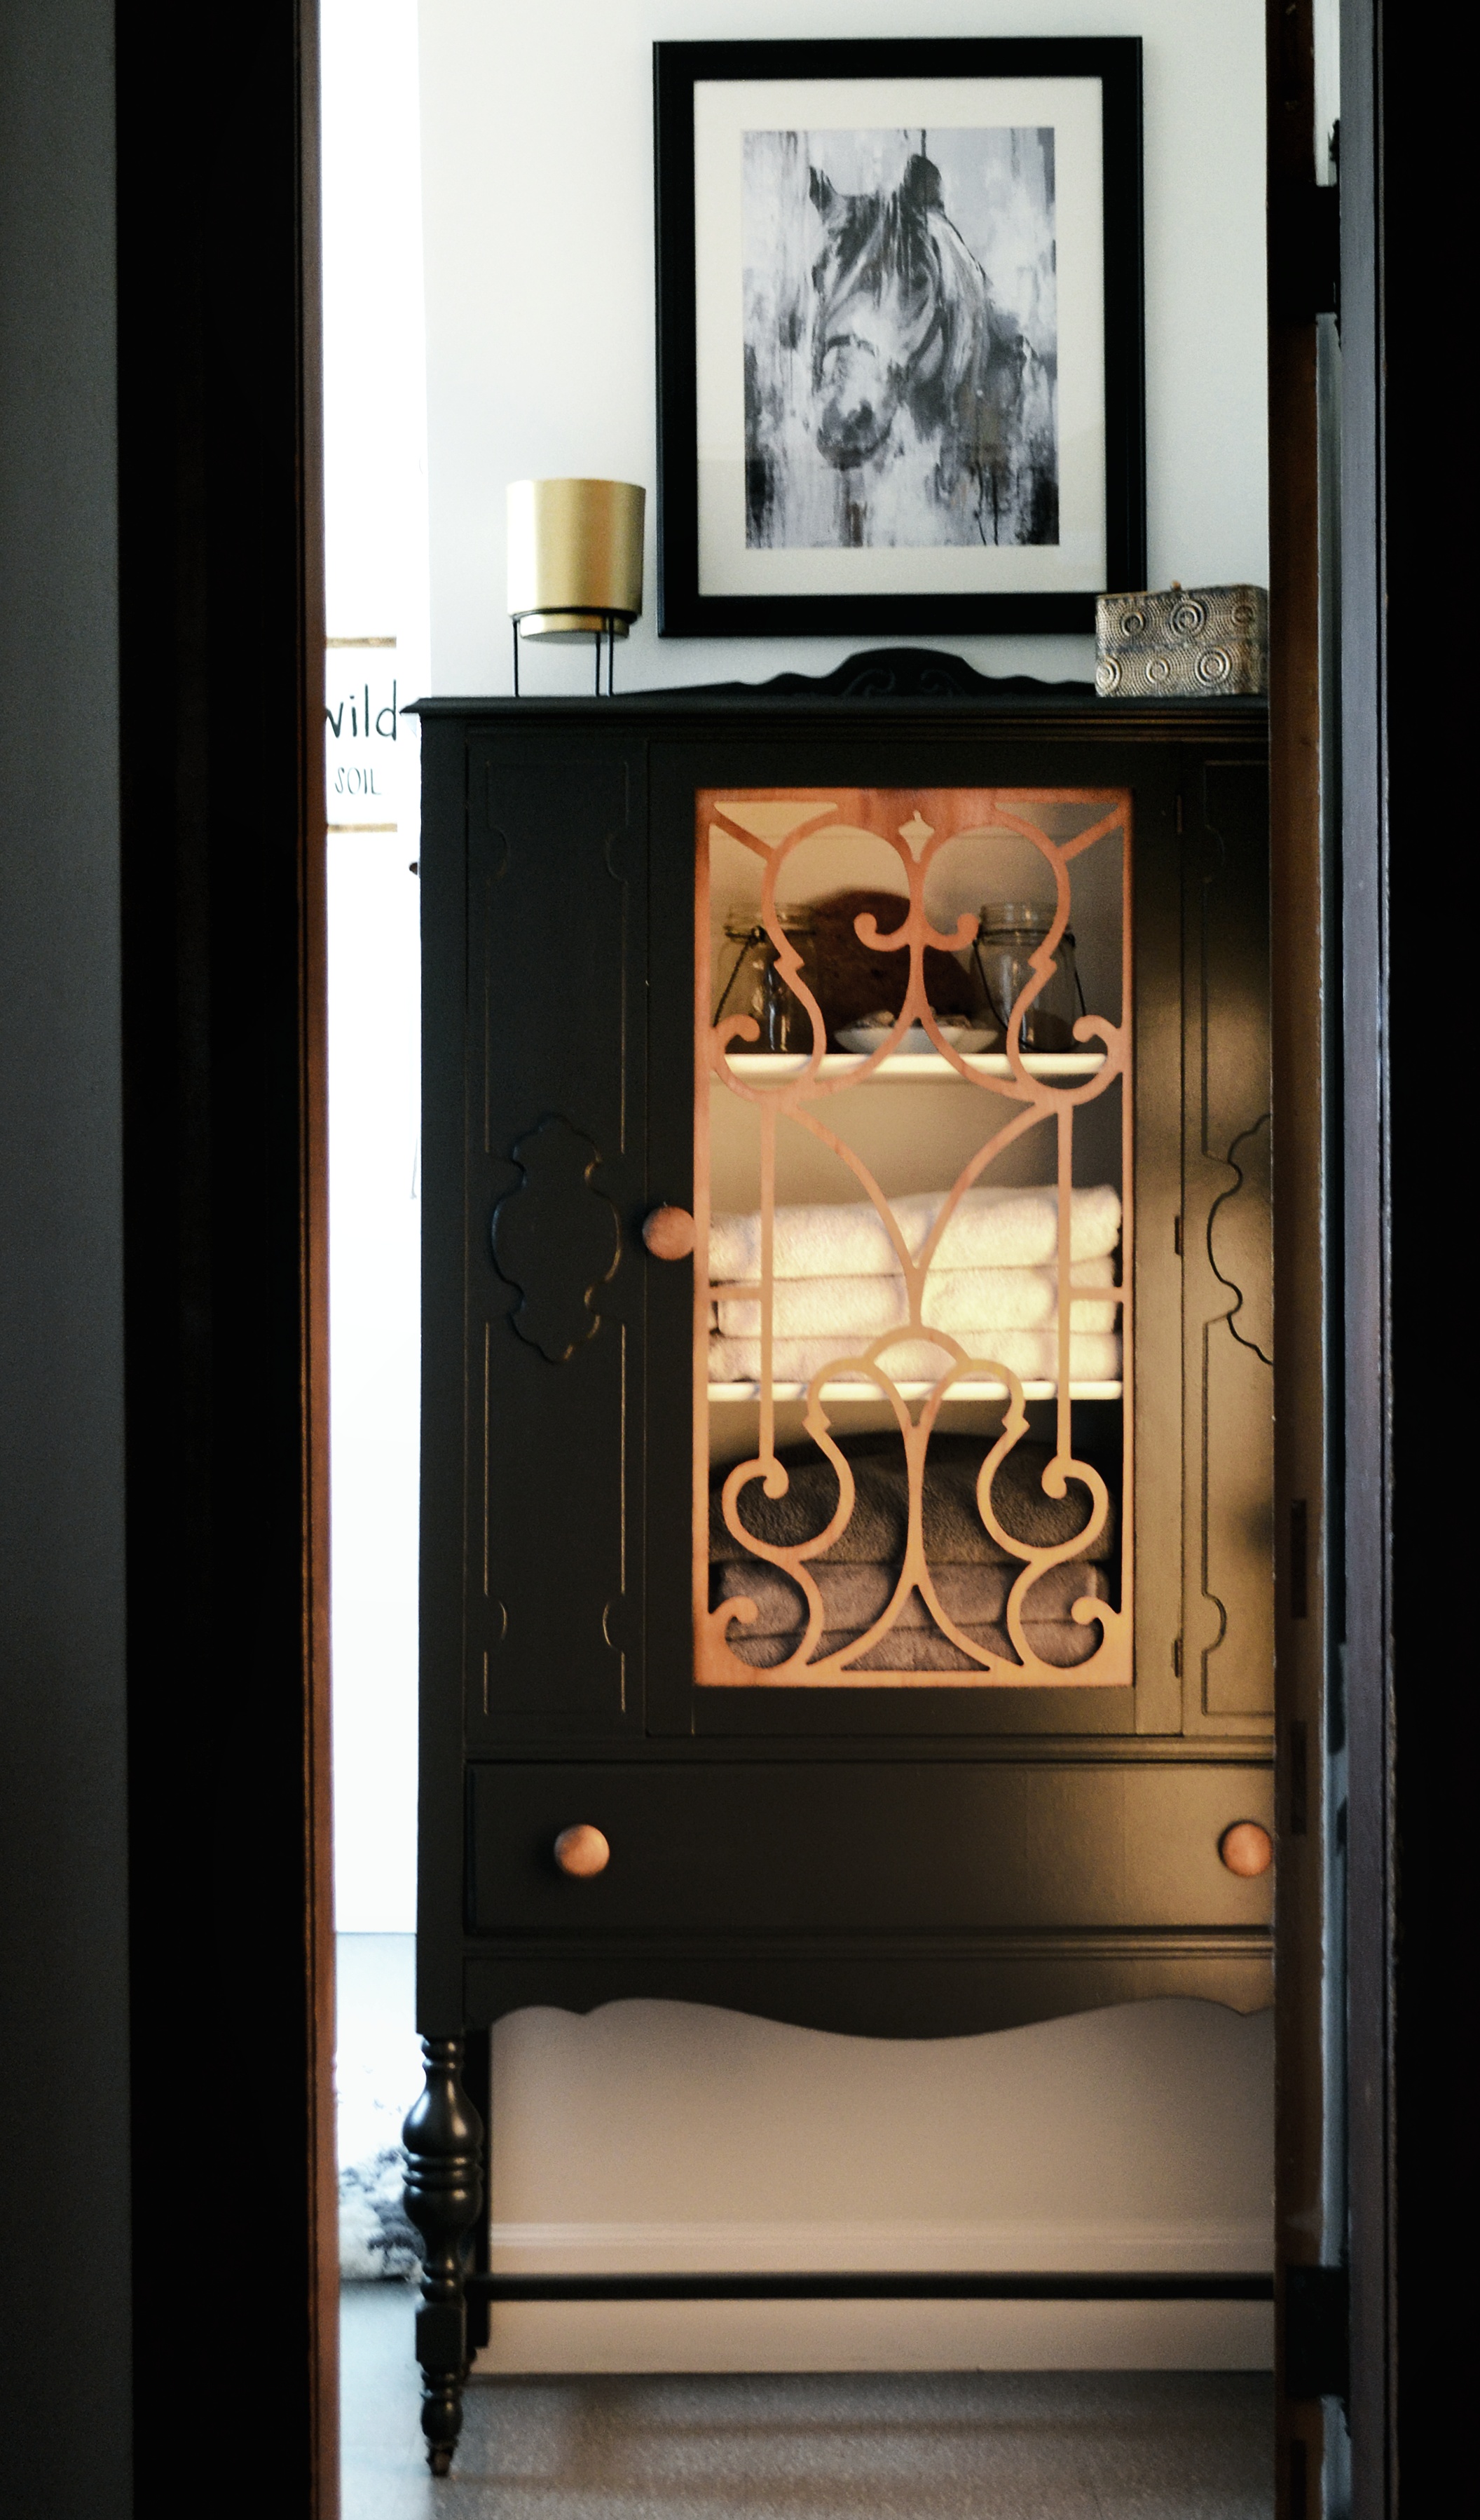
This makeover is exactly what our family needed for our main bathroom. We were incredibly short on storage and now we are overflowing with storage and organization. Thank you One Room Challenge for spurring me on to get this project done!

Sources
Cabinetry Paint – Black Magic by PPG Paints in the Kitchen and Bathroom Trim line (buy it locally at House Rules Design Shop). | See ORC Week 2.
Vanity Light – Jasper 4-Light Halogen Bath Light fixture by Kichler Lighting.
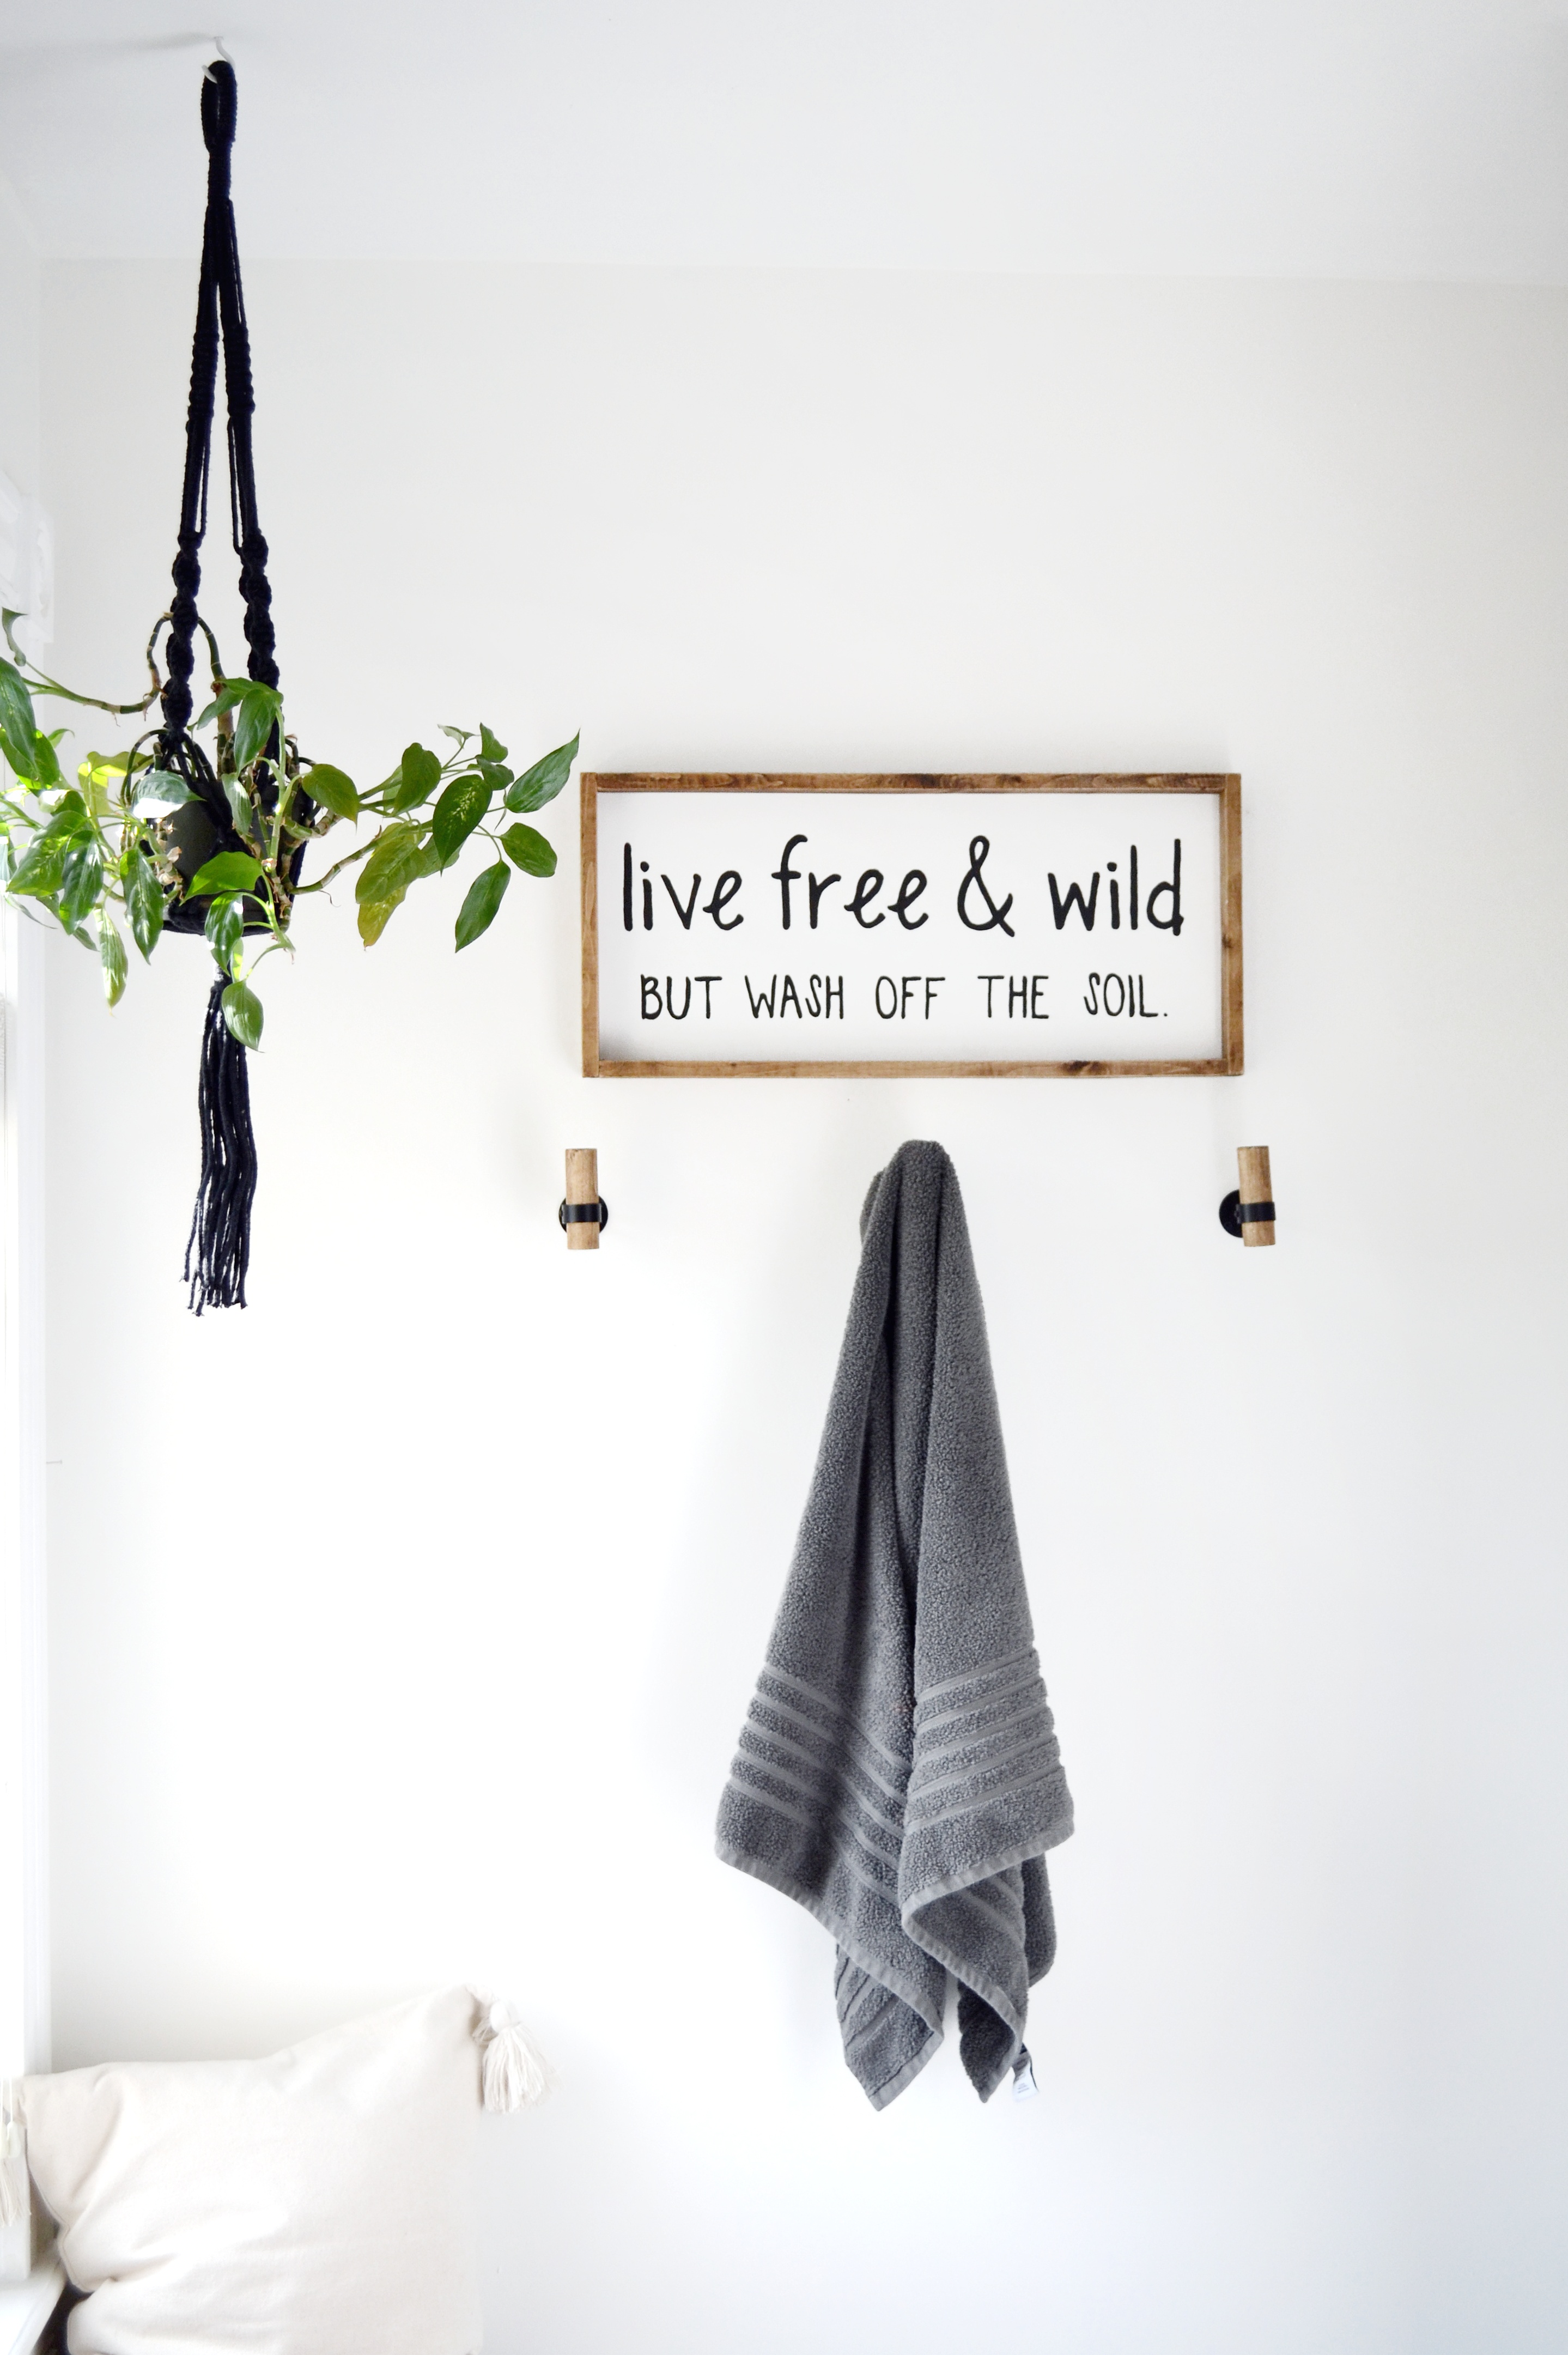
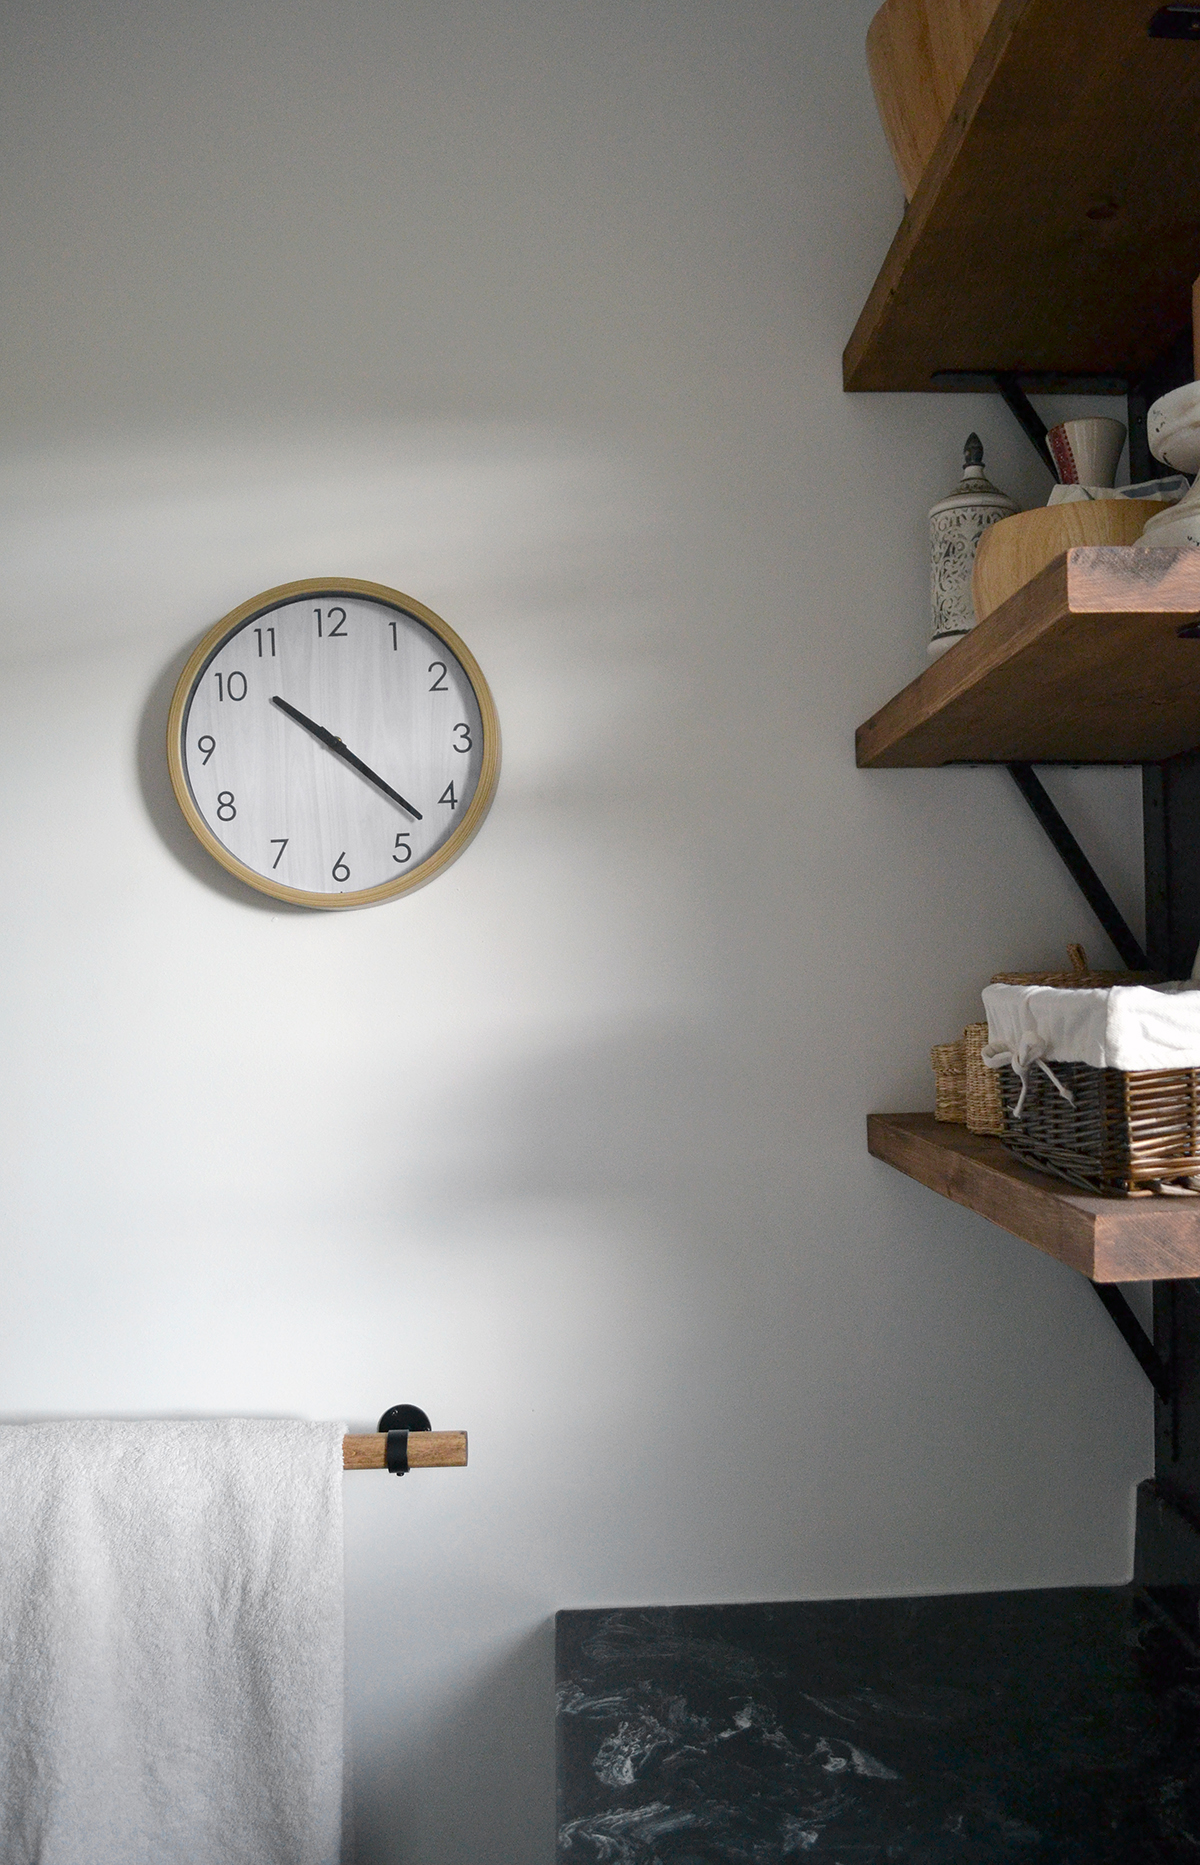
DIY Towel Bar, Hooks and Toilet Paper Roll Holder – Hardware from Urbanest Living and wood dowels | See ORC Week 4.
Open Shelving Brackets – Everbilt 12″ Heavy Duty Bracket.
Shelves – Pine 2x12s stained with Verethane Gel Stain in Provincial. | See ORC Week 3.
Pullout Garbage – Knape & Vogt from Home Depot. | See ORC Week 5.
Bath Rug – Winners
Shower Curtain – Winners
Curtain Rings – H&M Home Gold Shower Curtain Rings
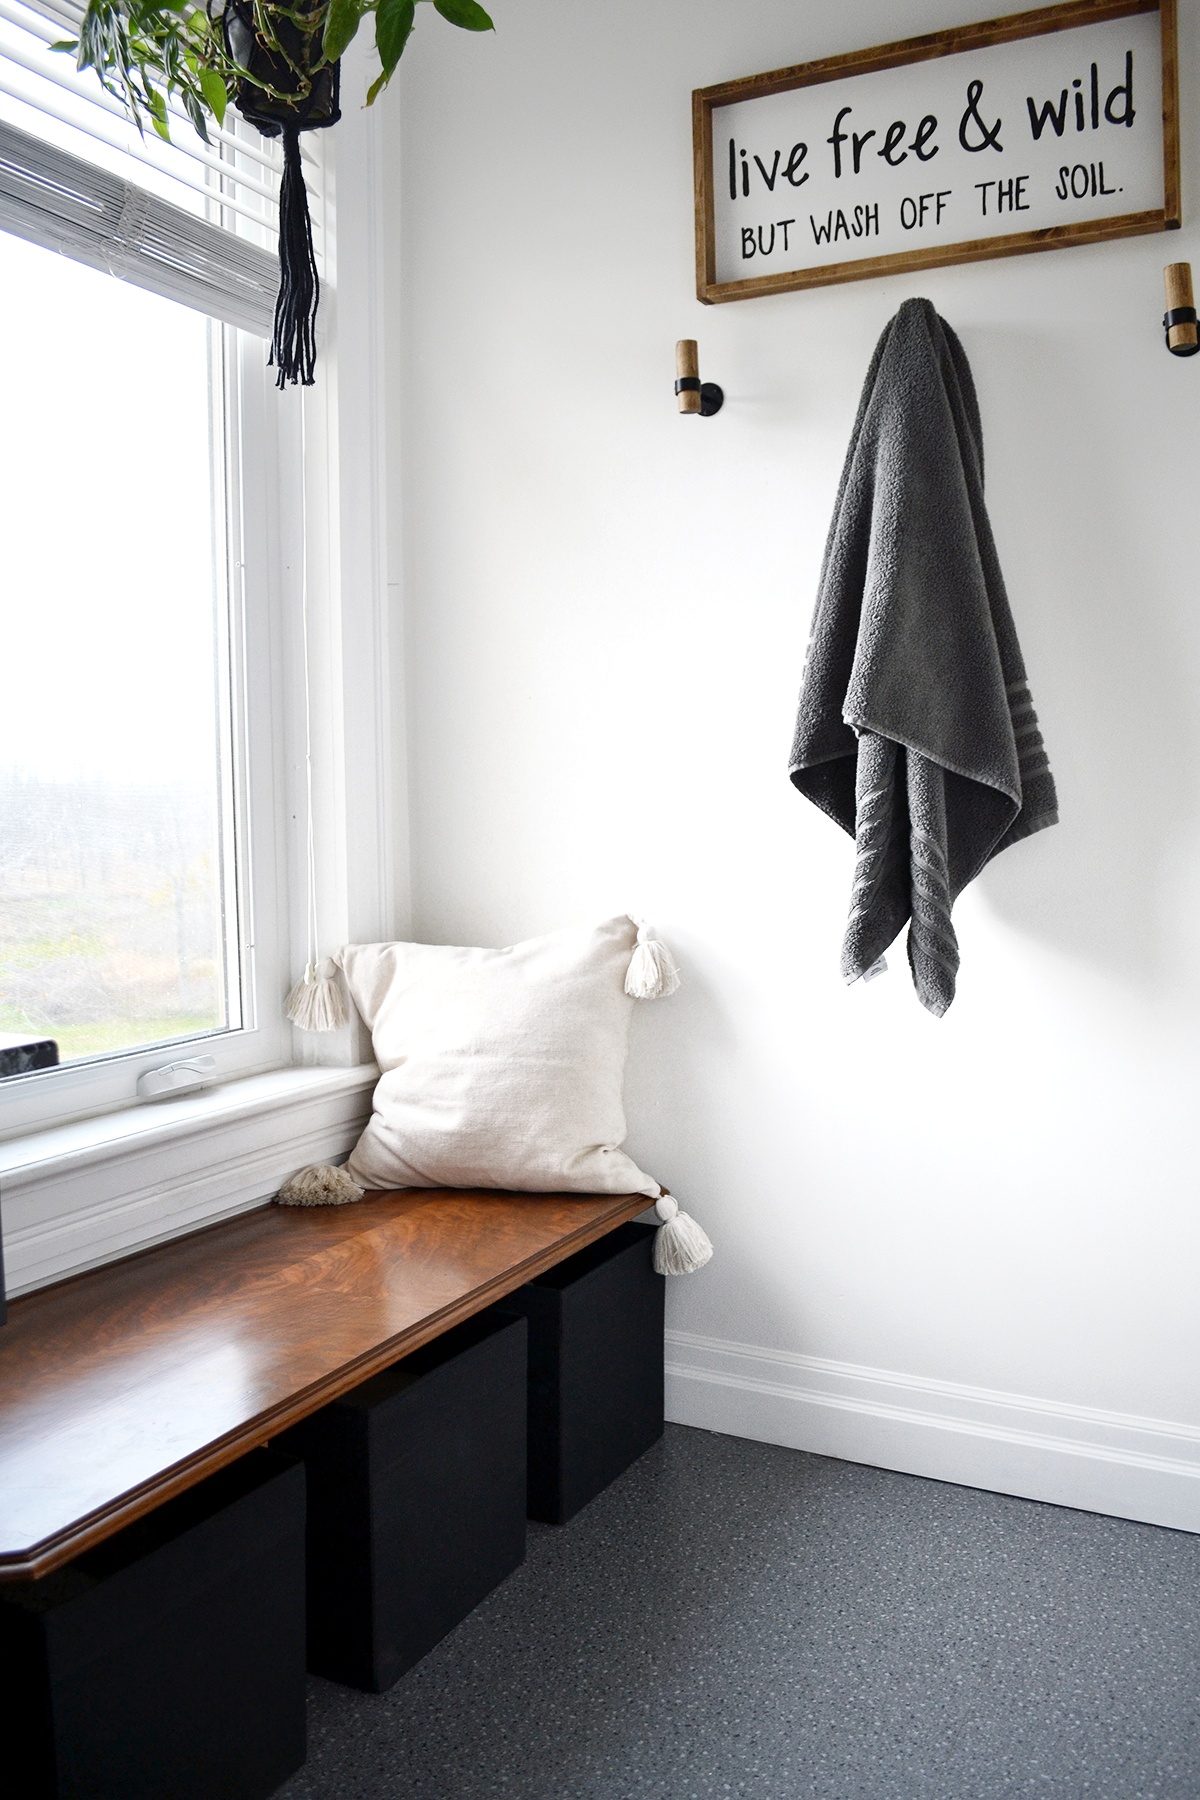
Pillow Cover – H&M Home
Wood Framed Sign – DIY
Baskets Under Bench – Ikea Dröna Bin
Vanity Mirror – Ikea Nissedel
Stool – Ikea Vilto Stepstool
Clock – Walmart
Various art, storage and accessories – Thrifted

-
Hideaway Garbage Can | Week 5
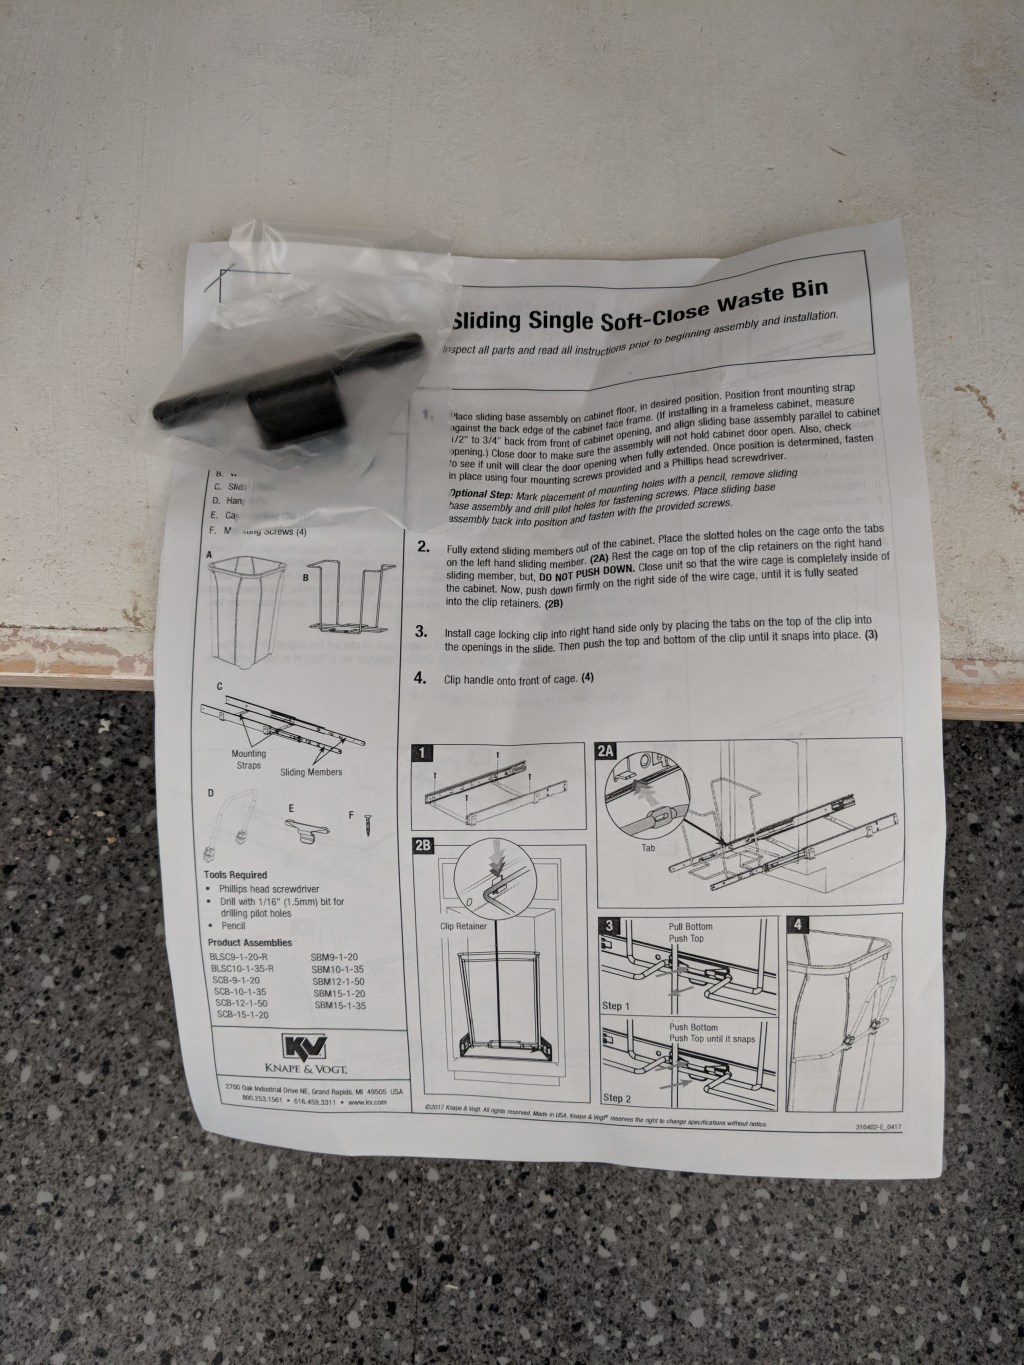
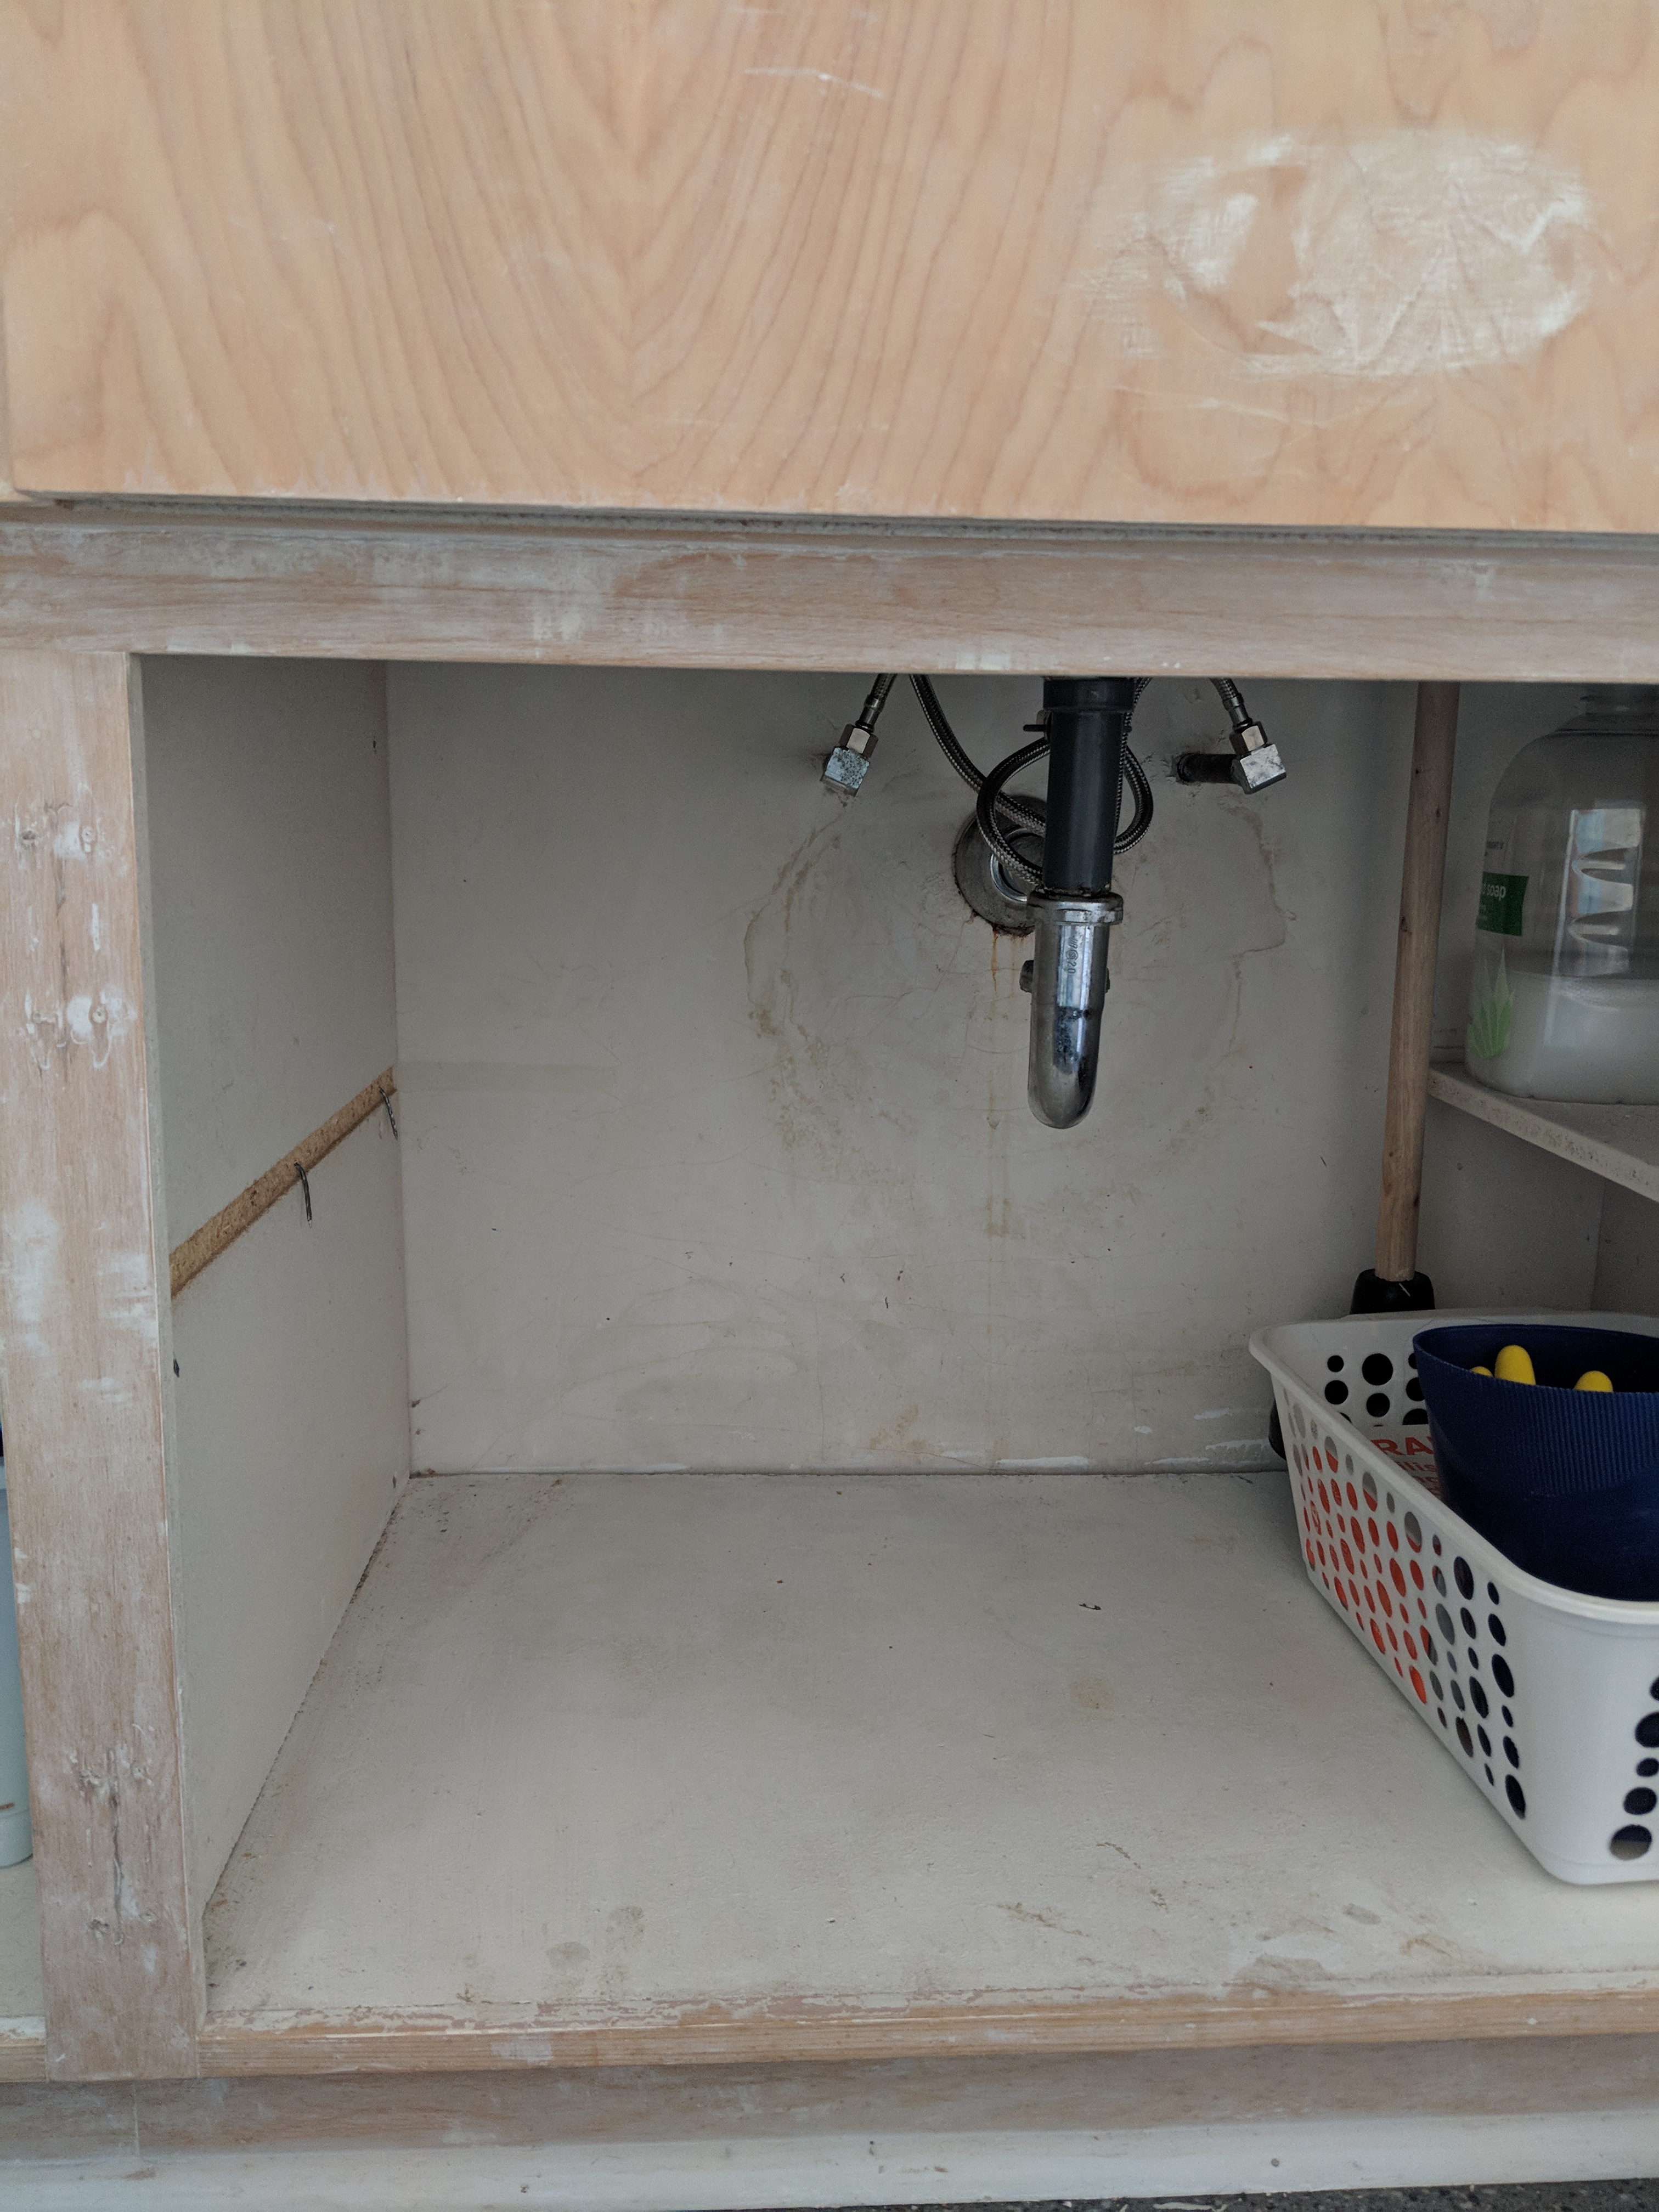
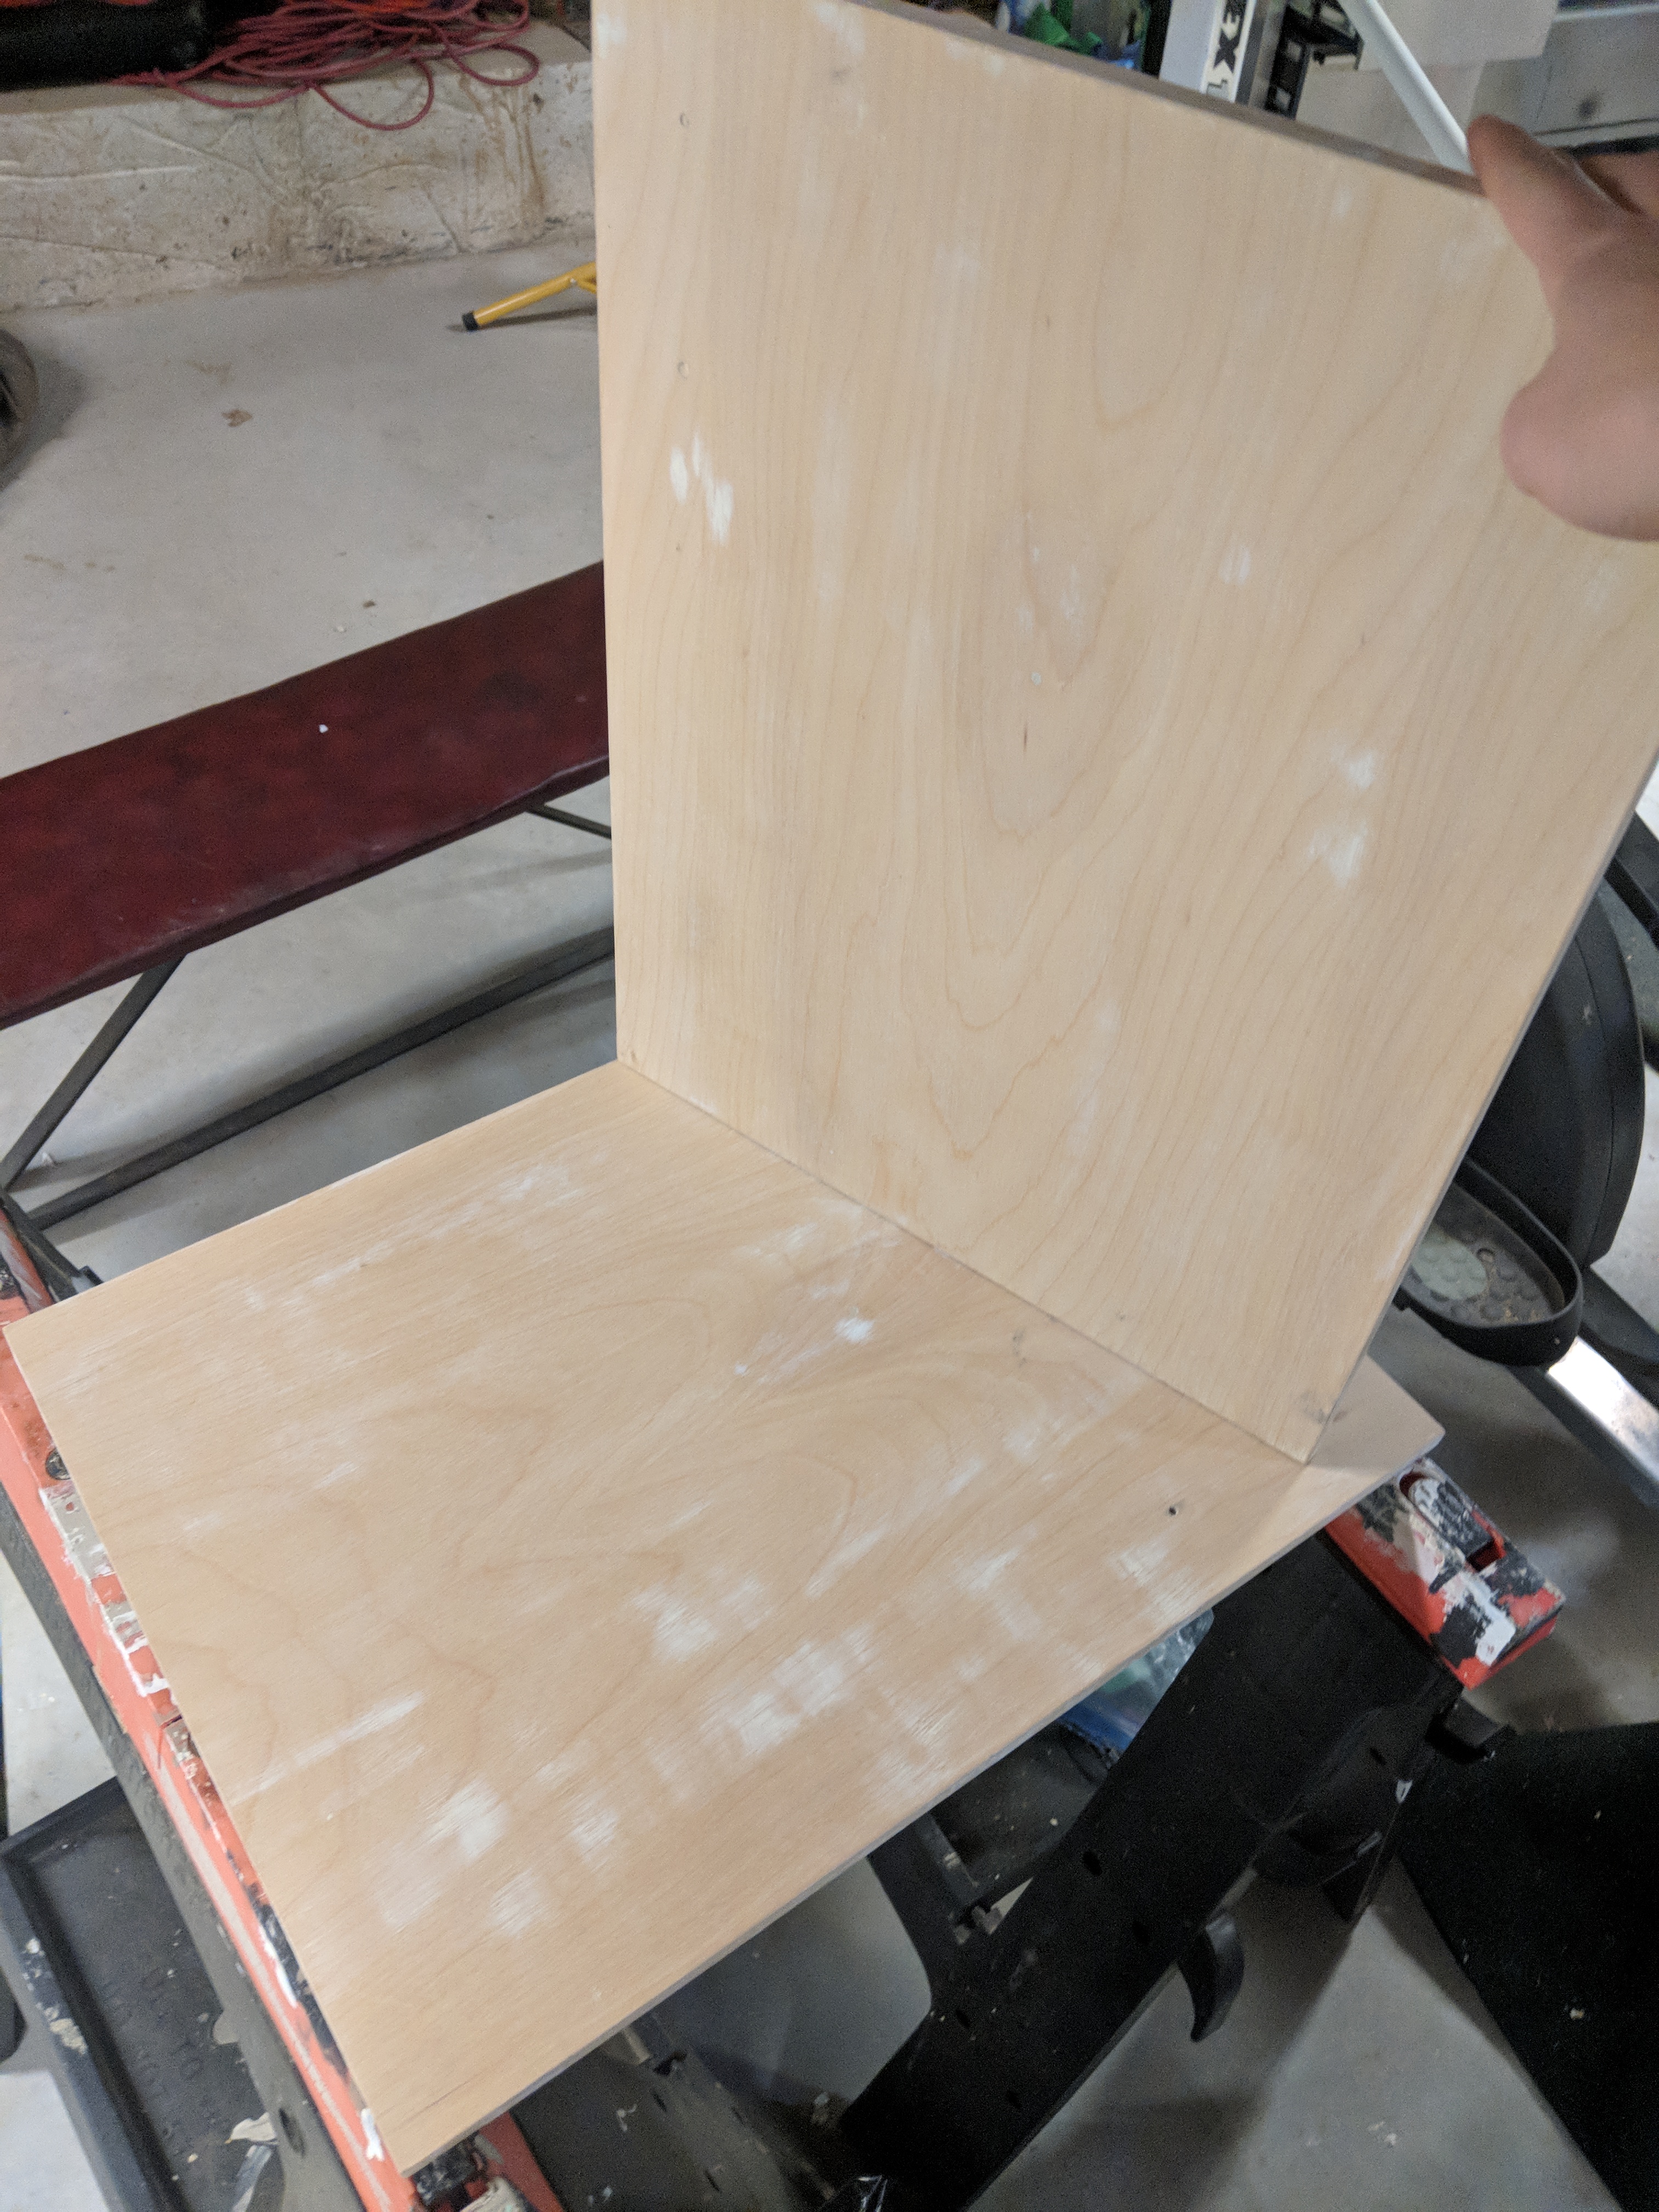
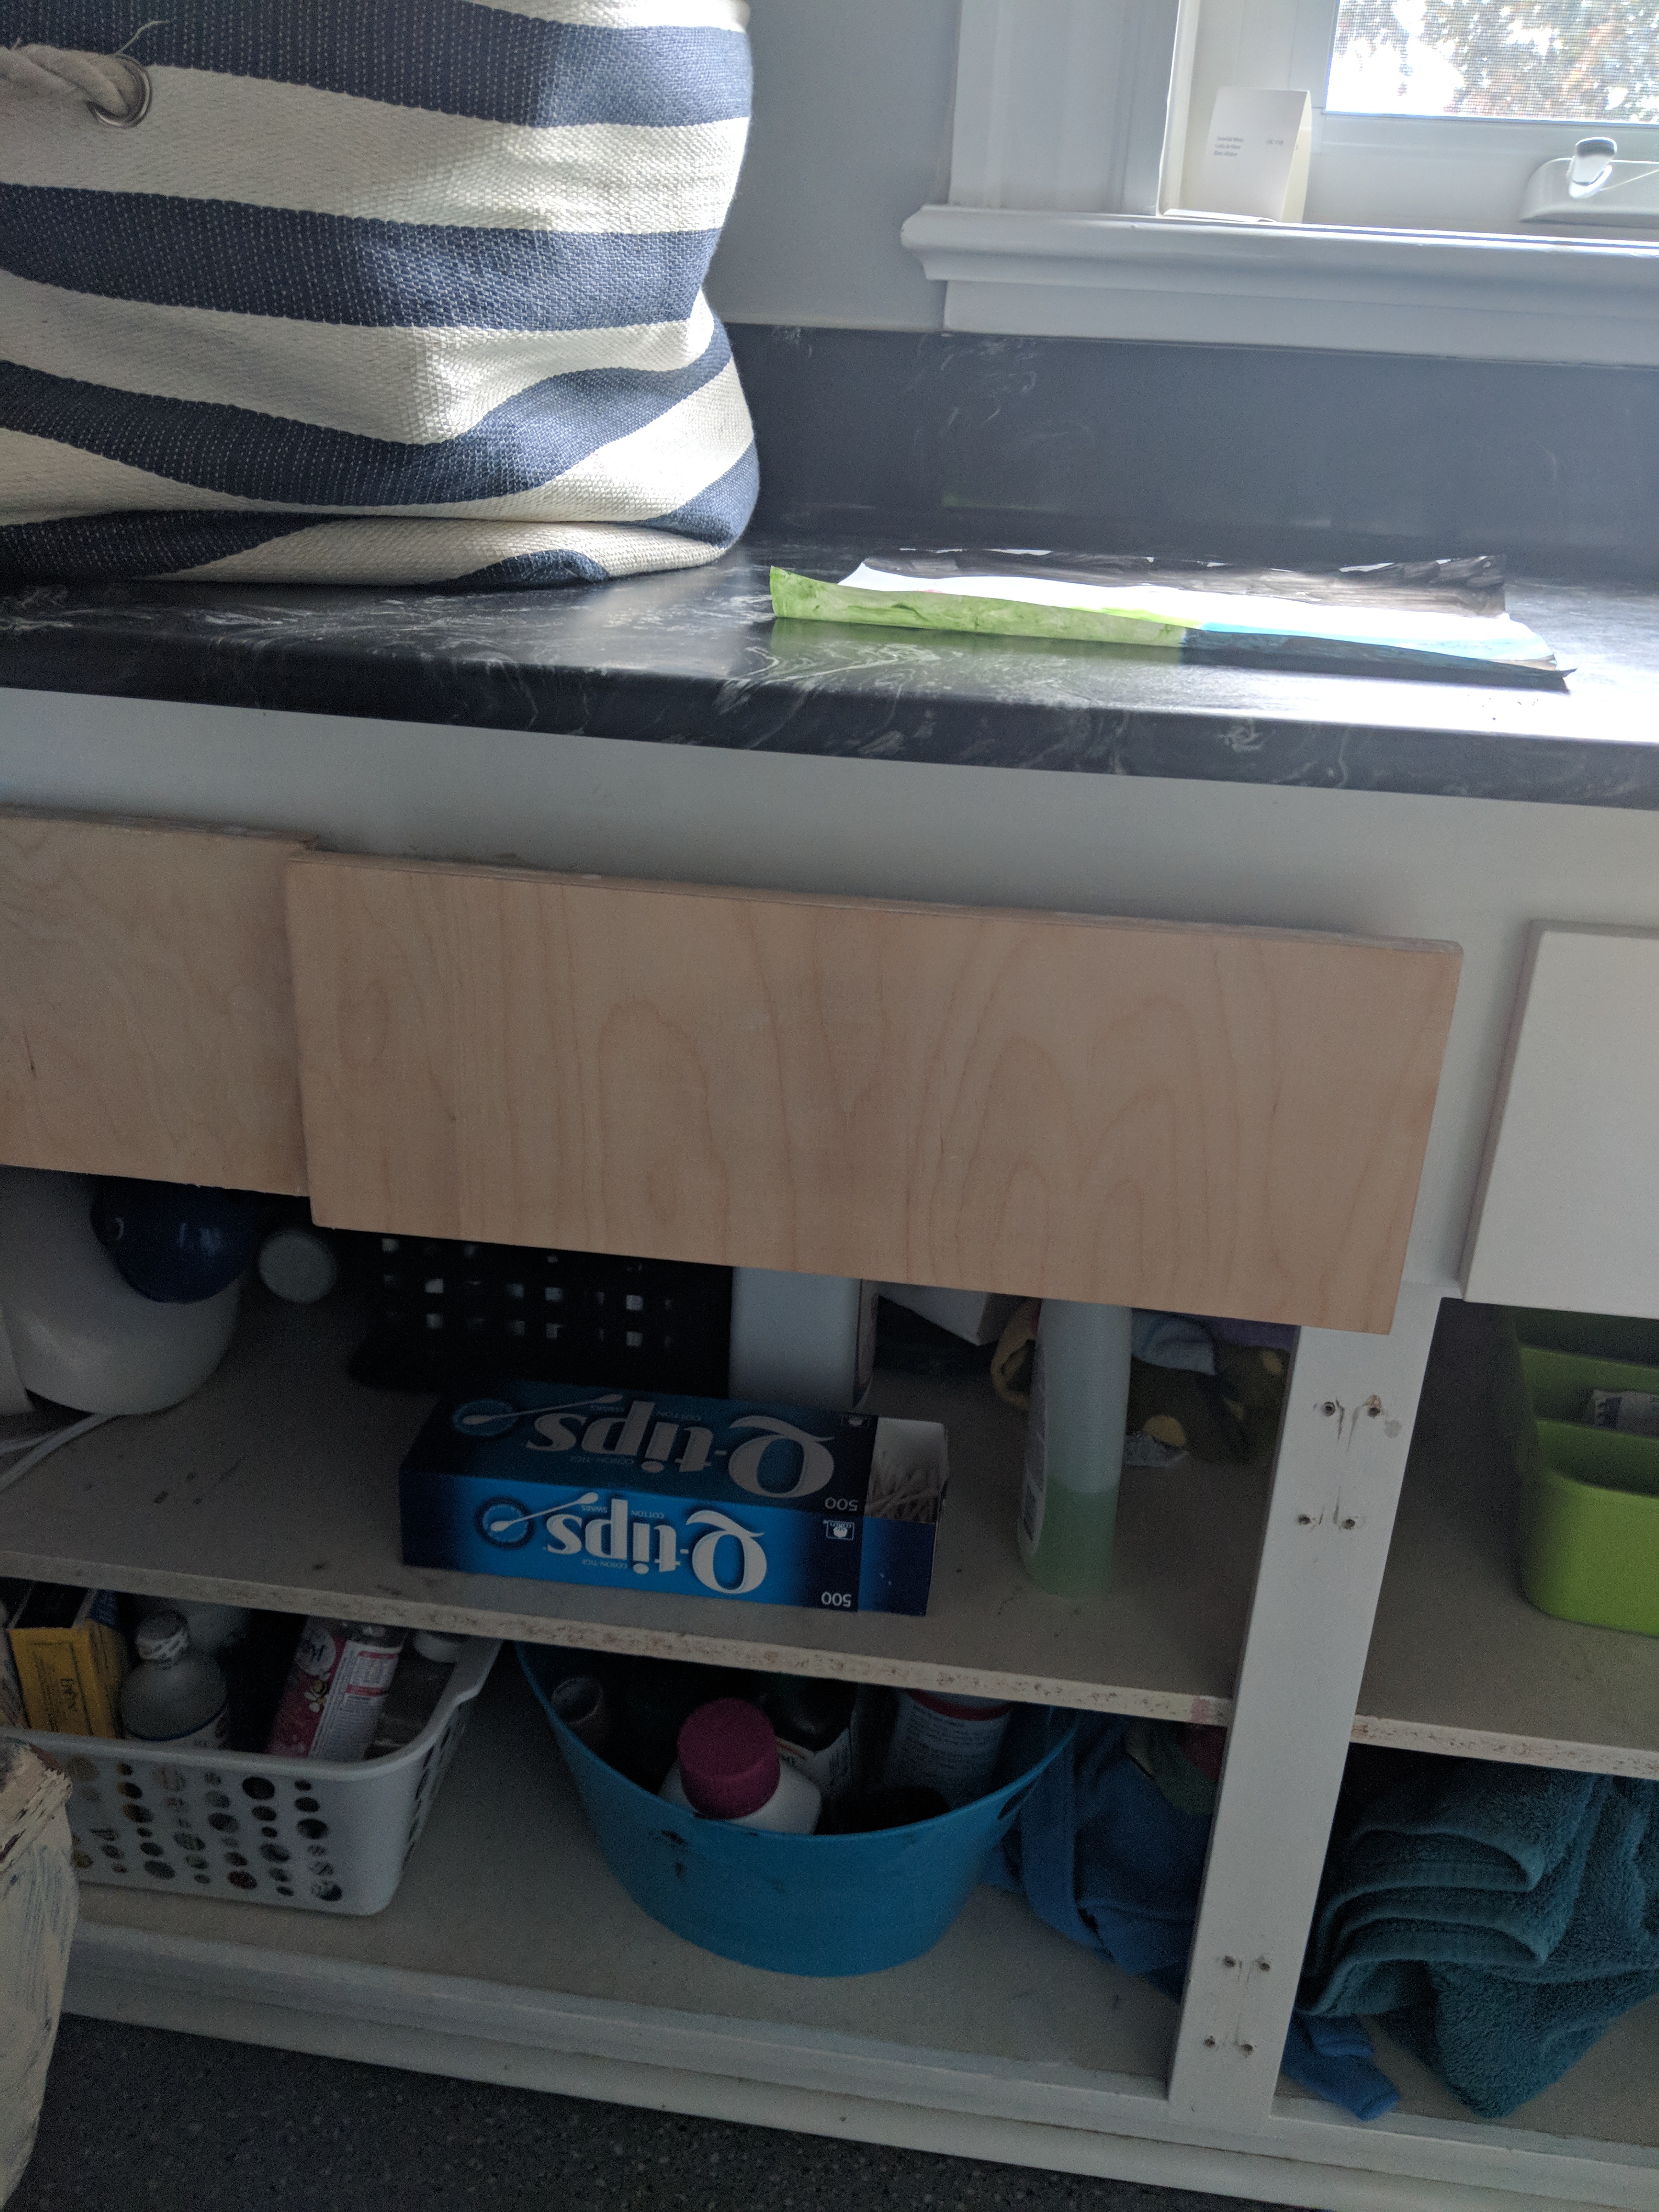
One of my big must-haves for my One Room Challenge bathroom makeover was installing a window seat in a wide open space at the far end of the room. To make that happen I needed to relocate the bathroom garbage from a bin on the floor to inside the cabinetry.
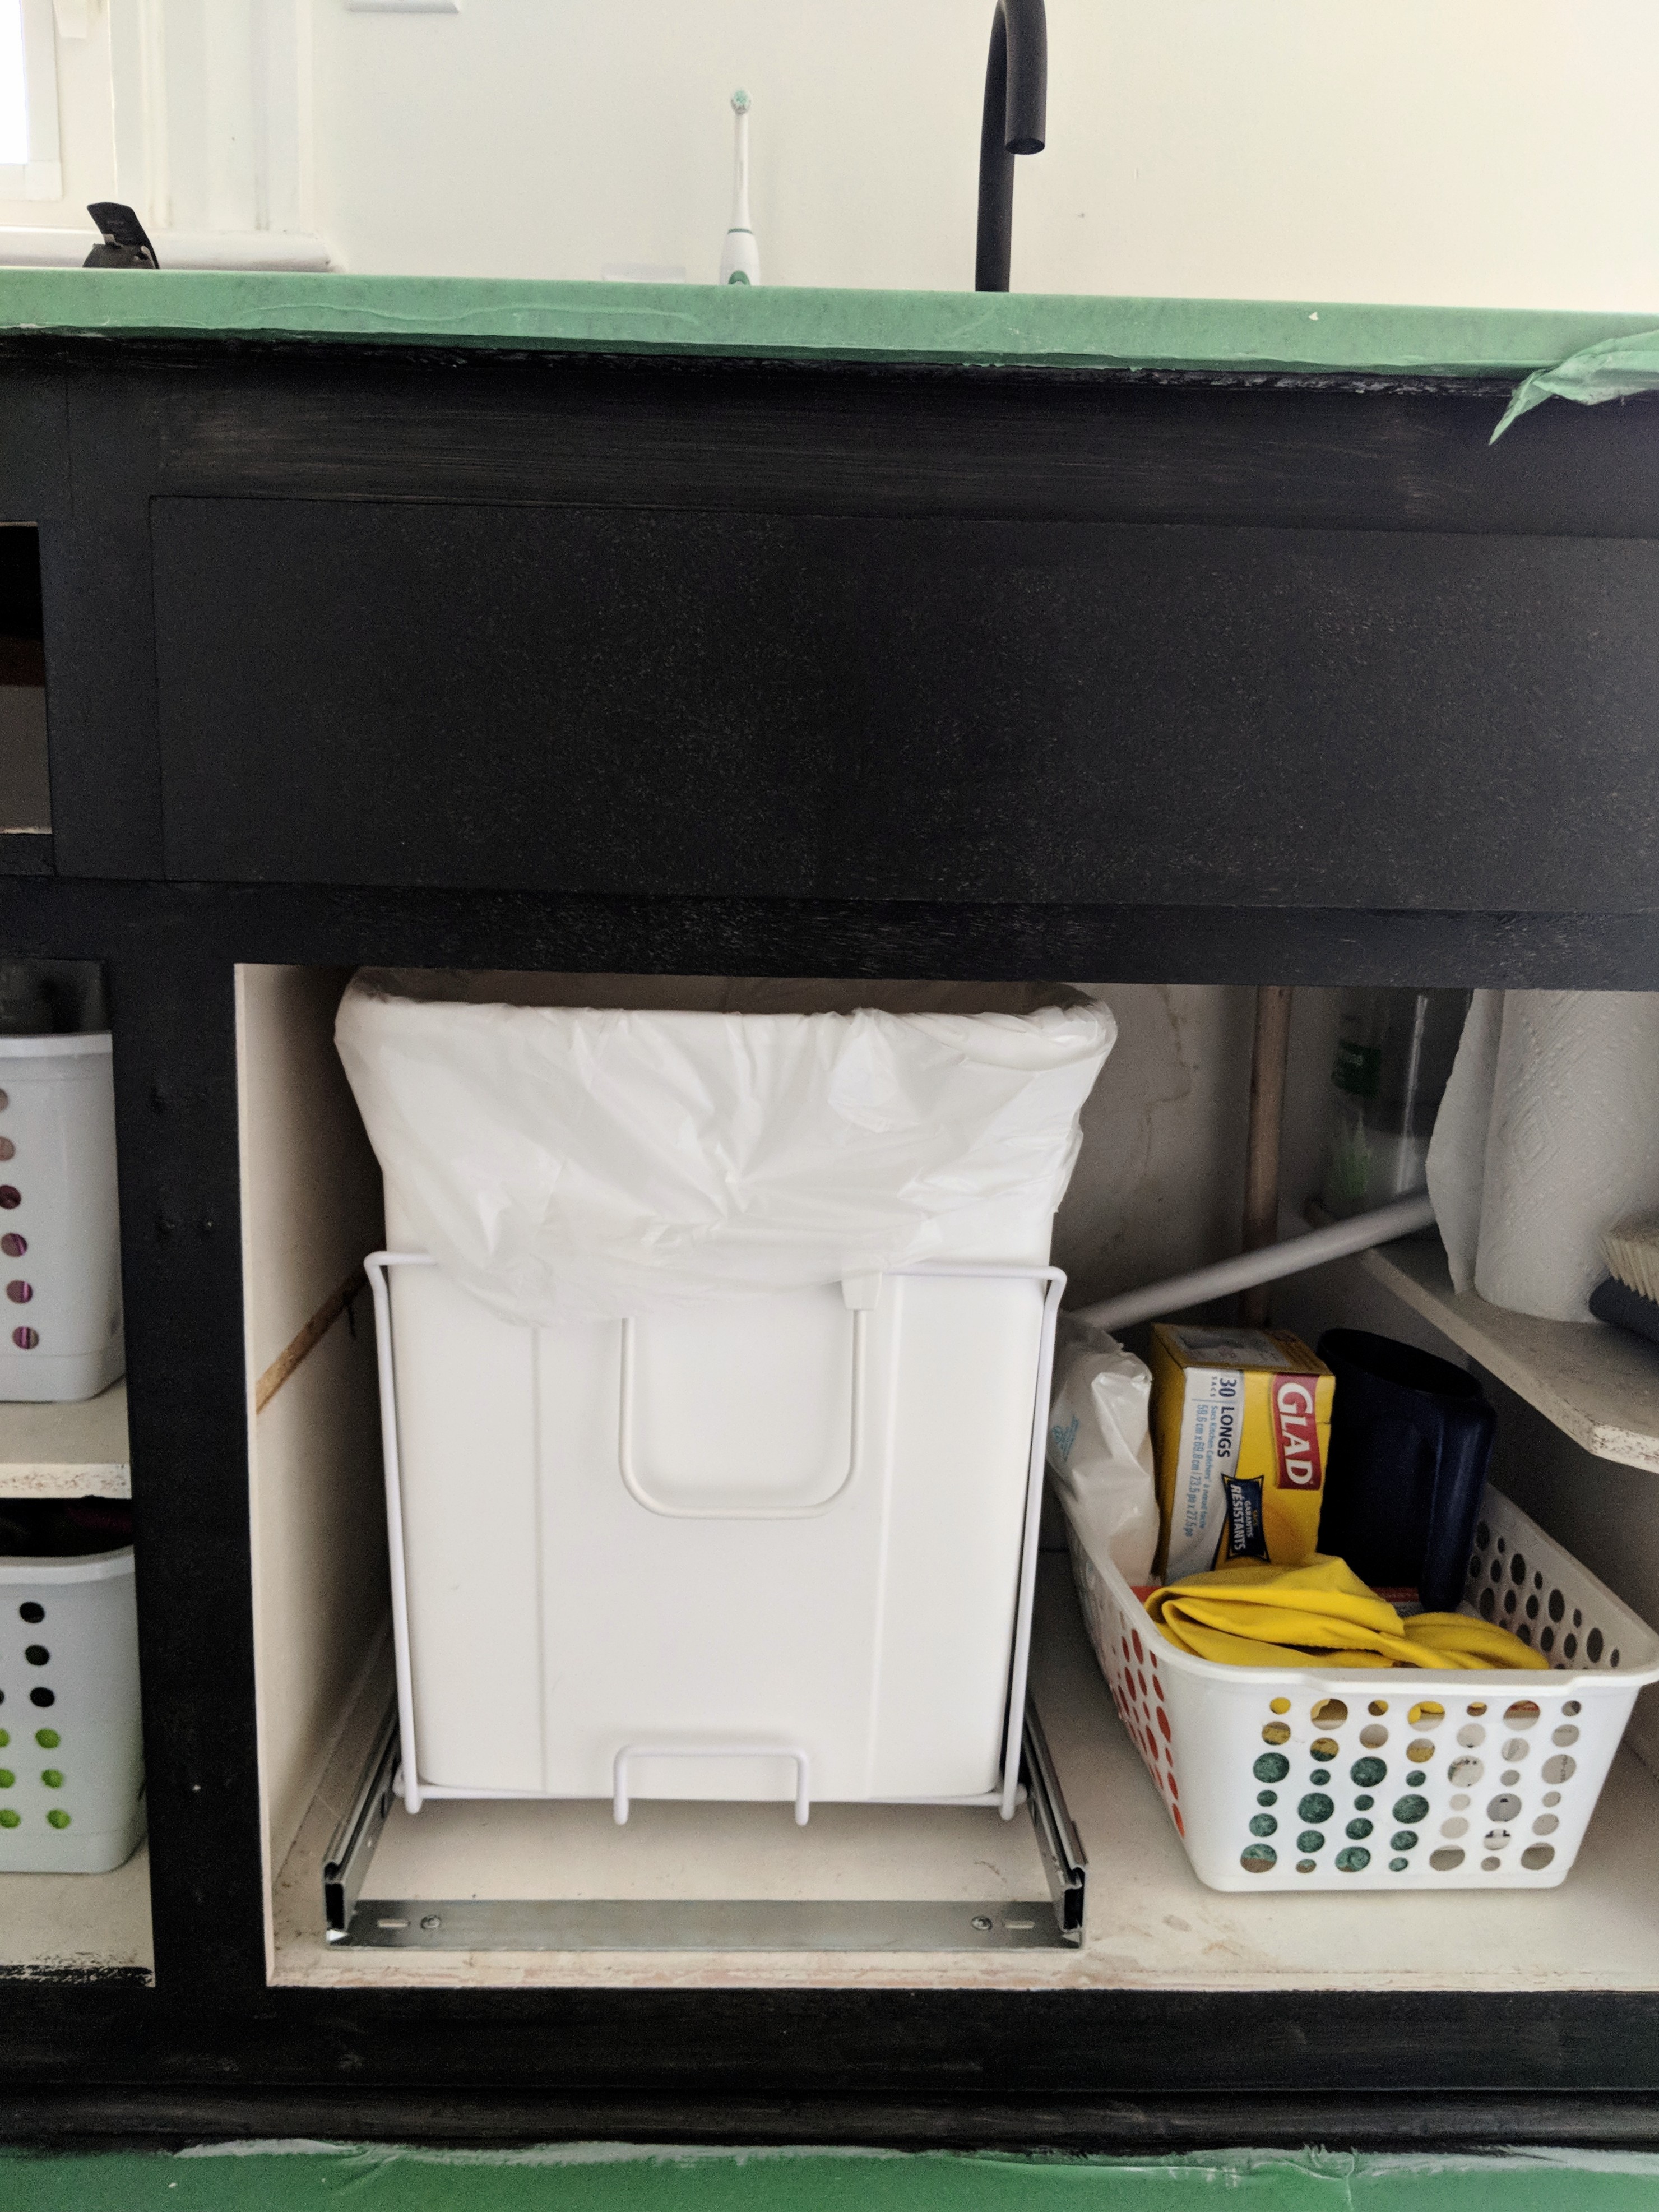
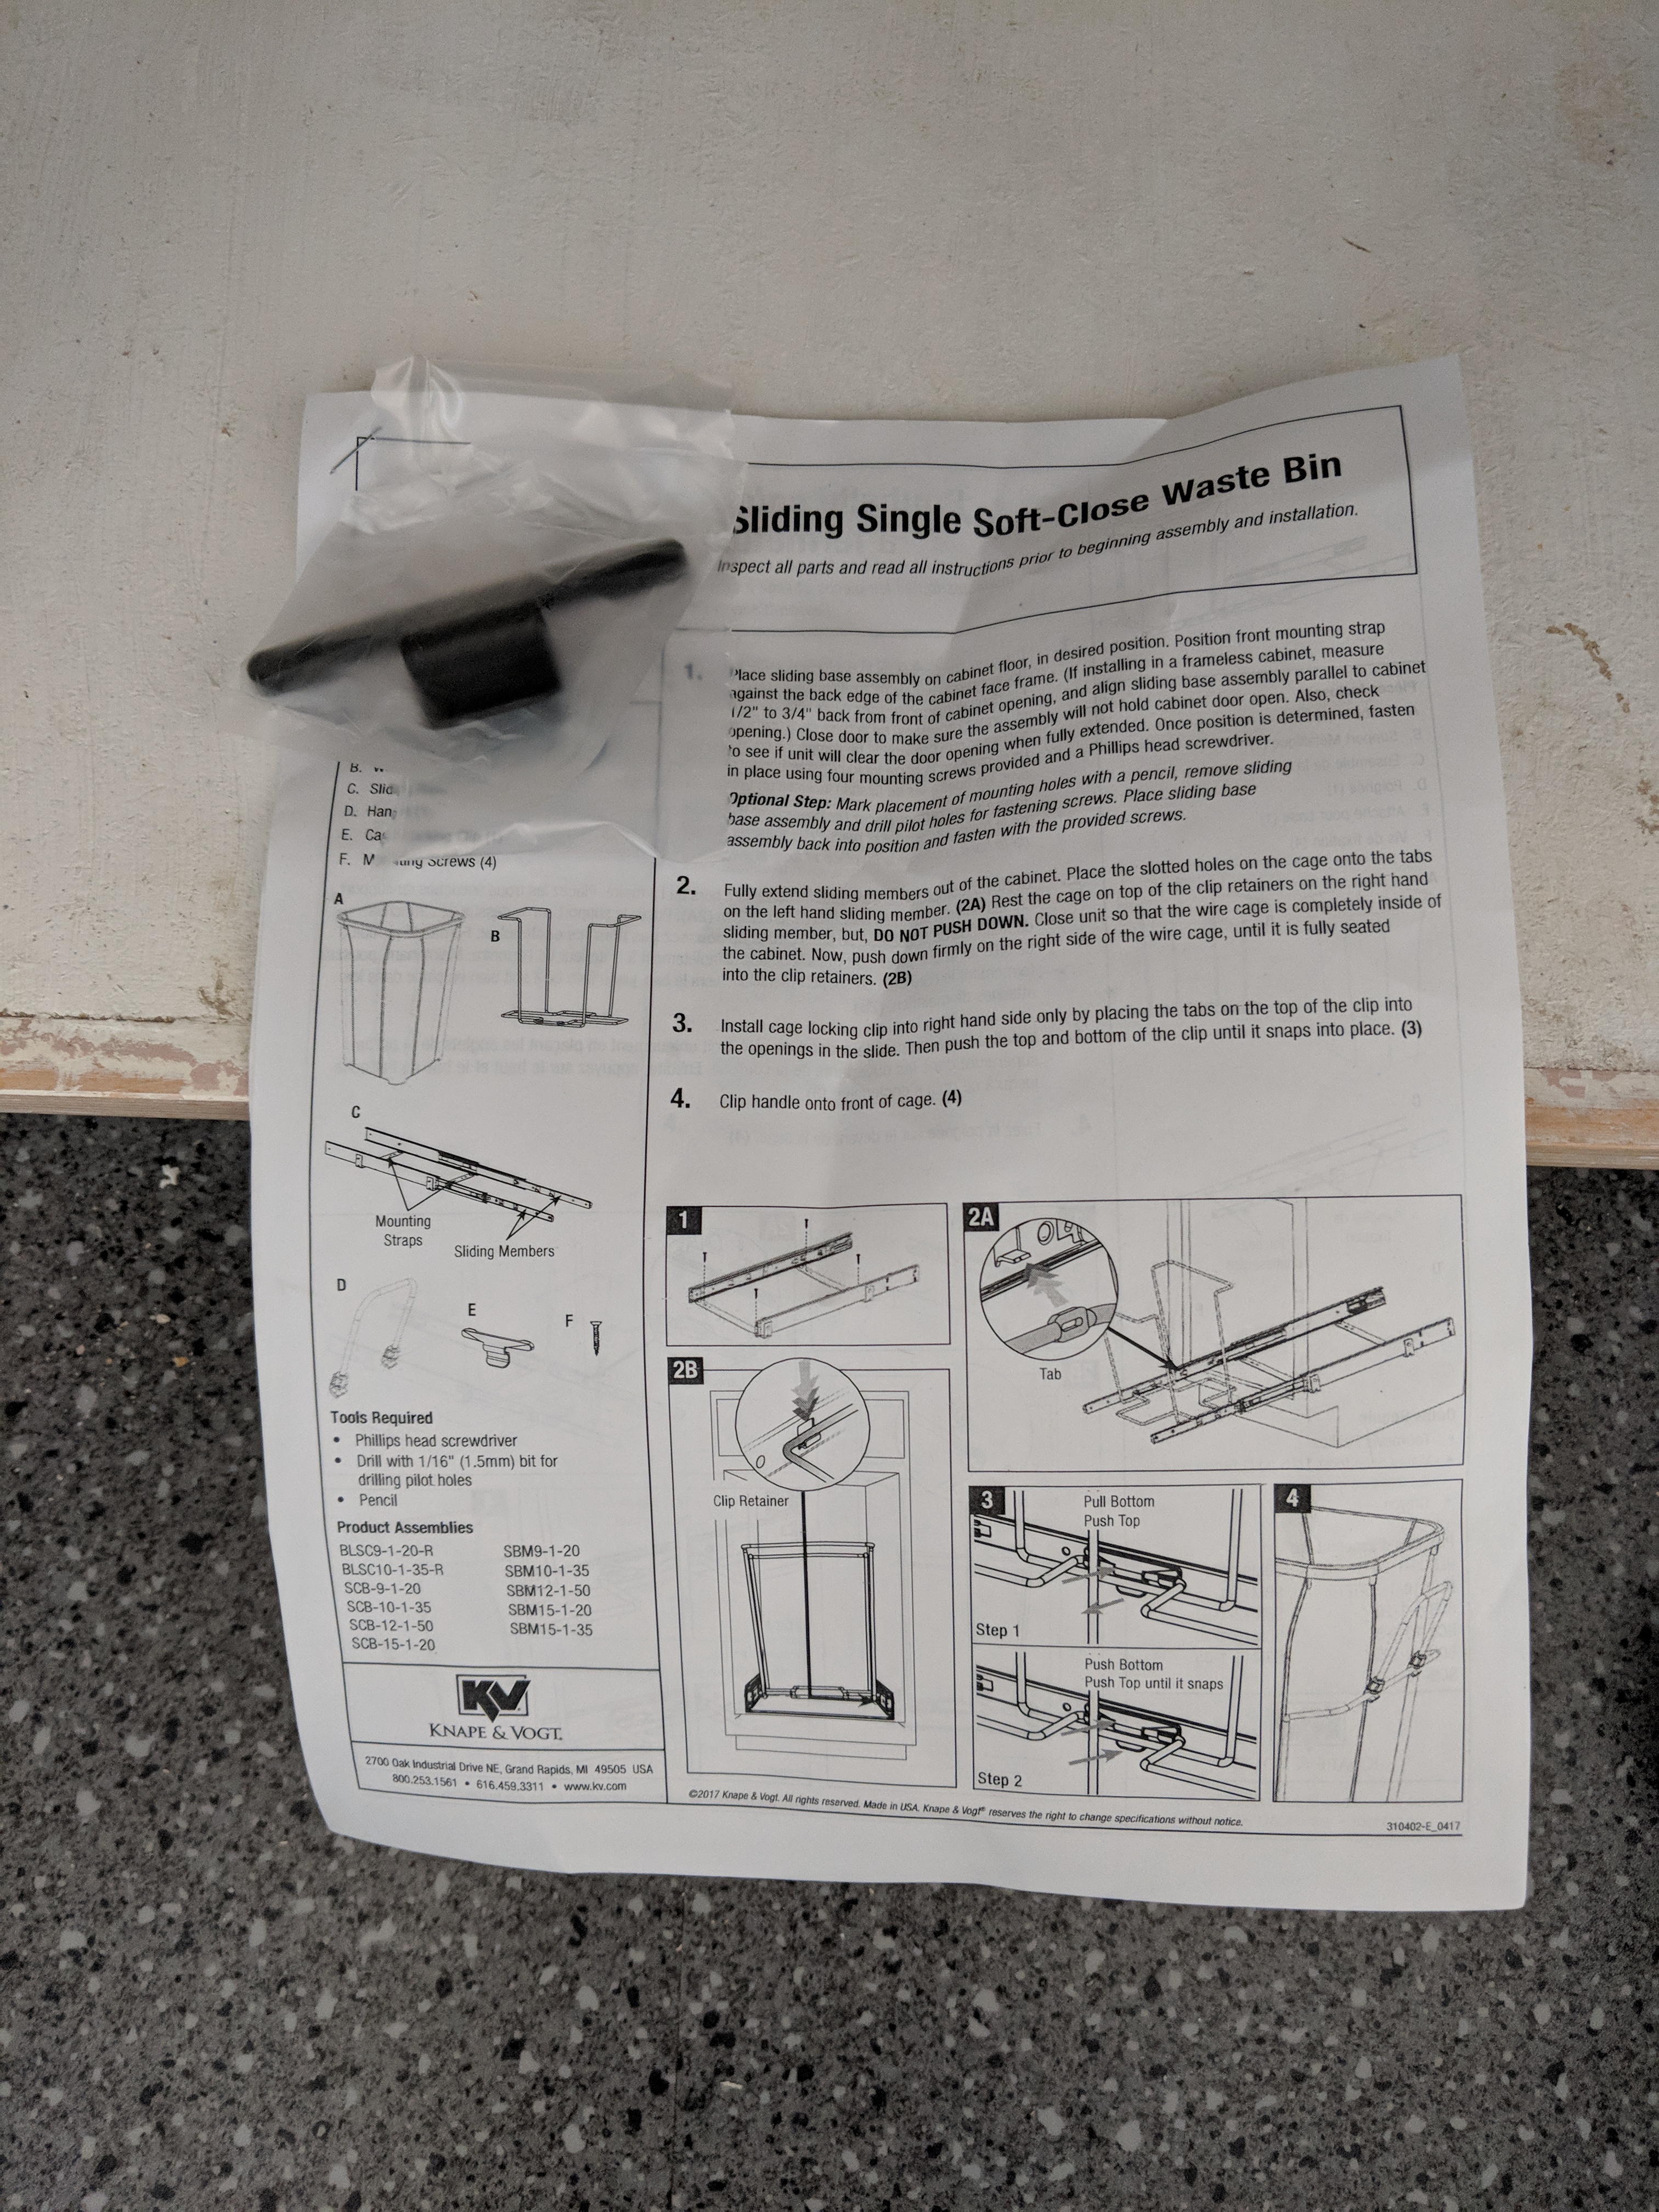
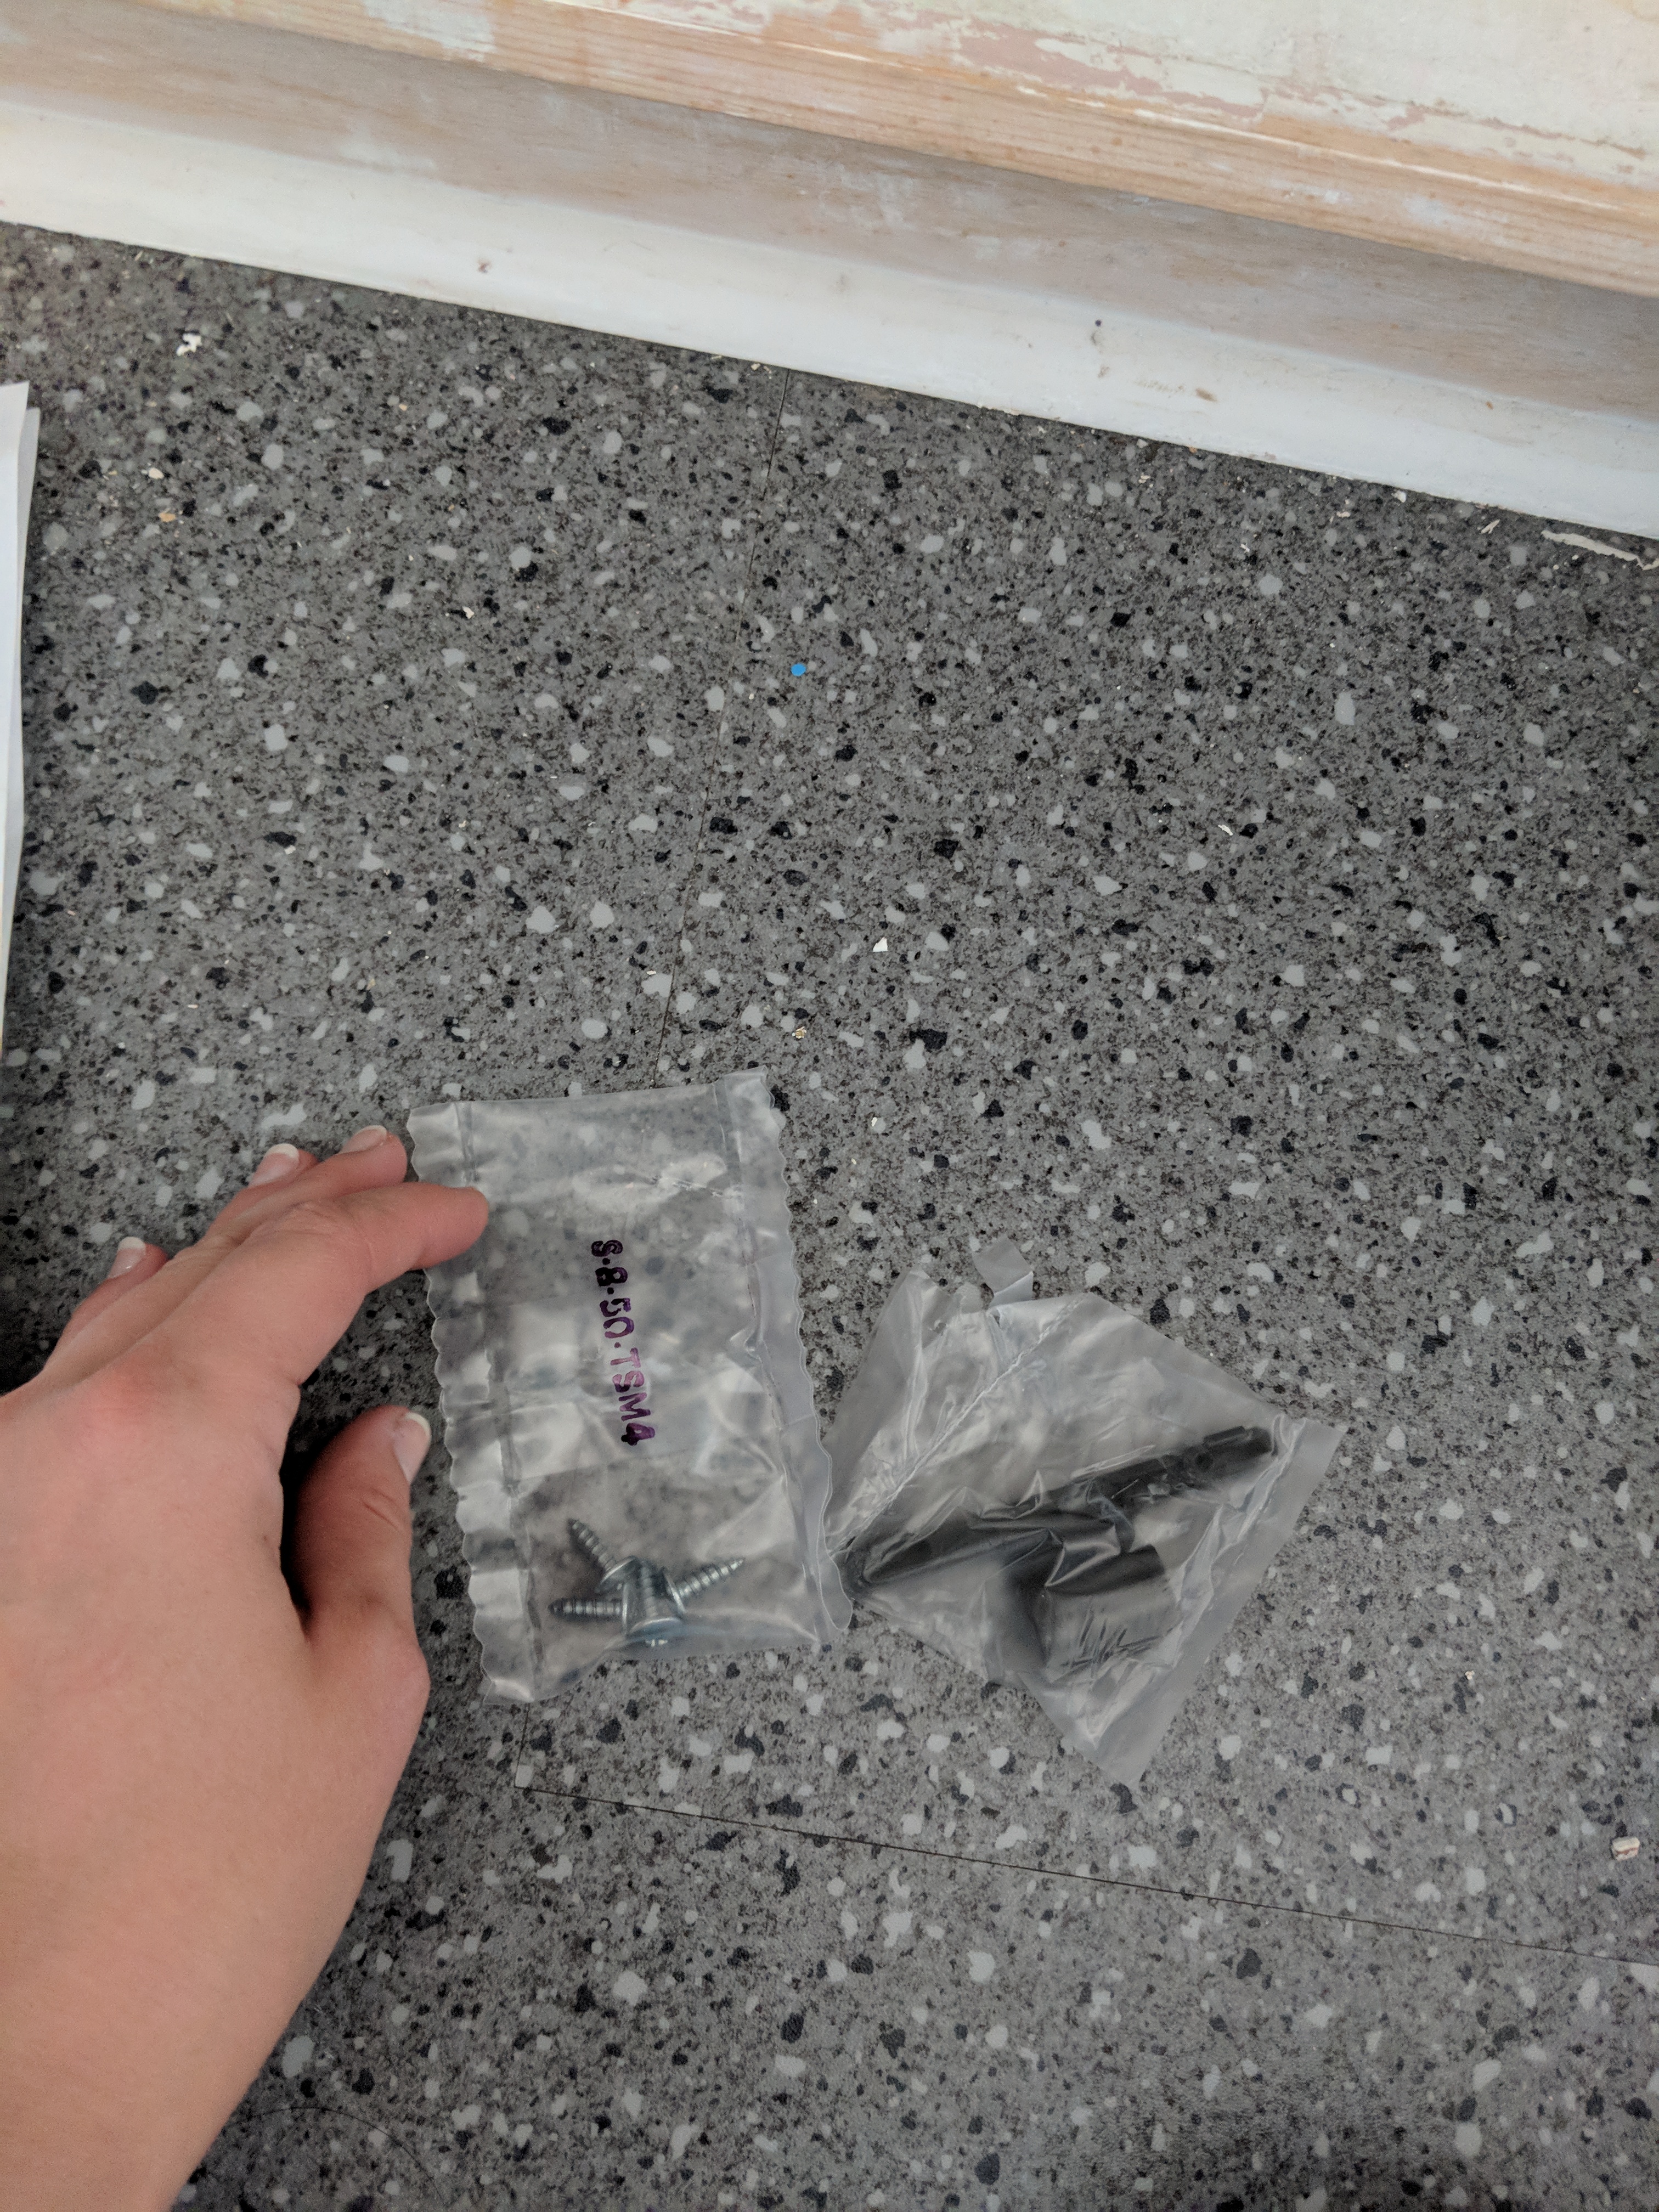
I shopped around a settled on a pullout garbage from Knape & Vogt, which are carried by Home Depot. I liked this garbage bin because the rack and track were all metal construction.
The installation was so easy. You just screw down the track in four places and snap the rack to the track. The bin easily lifts out for emptying and it slides very nicely on the track. I’m trés happy!
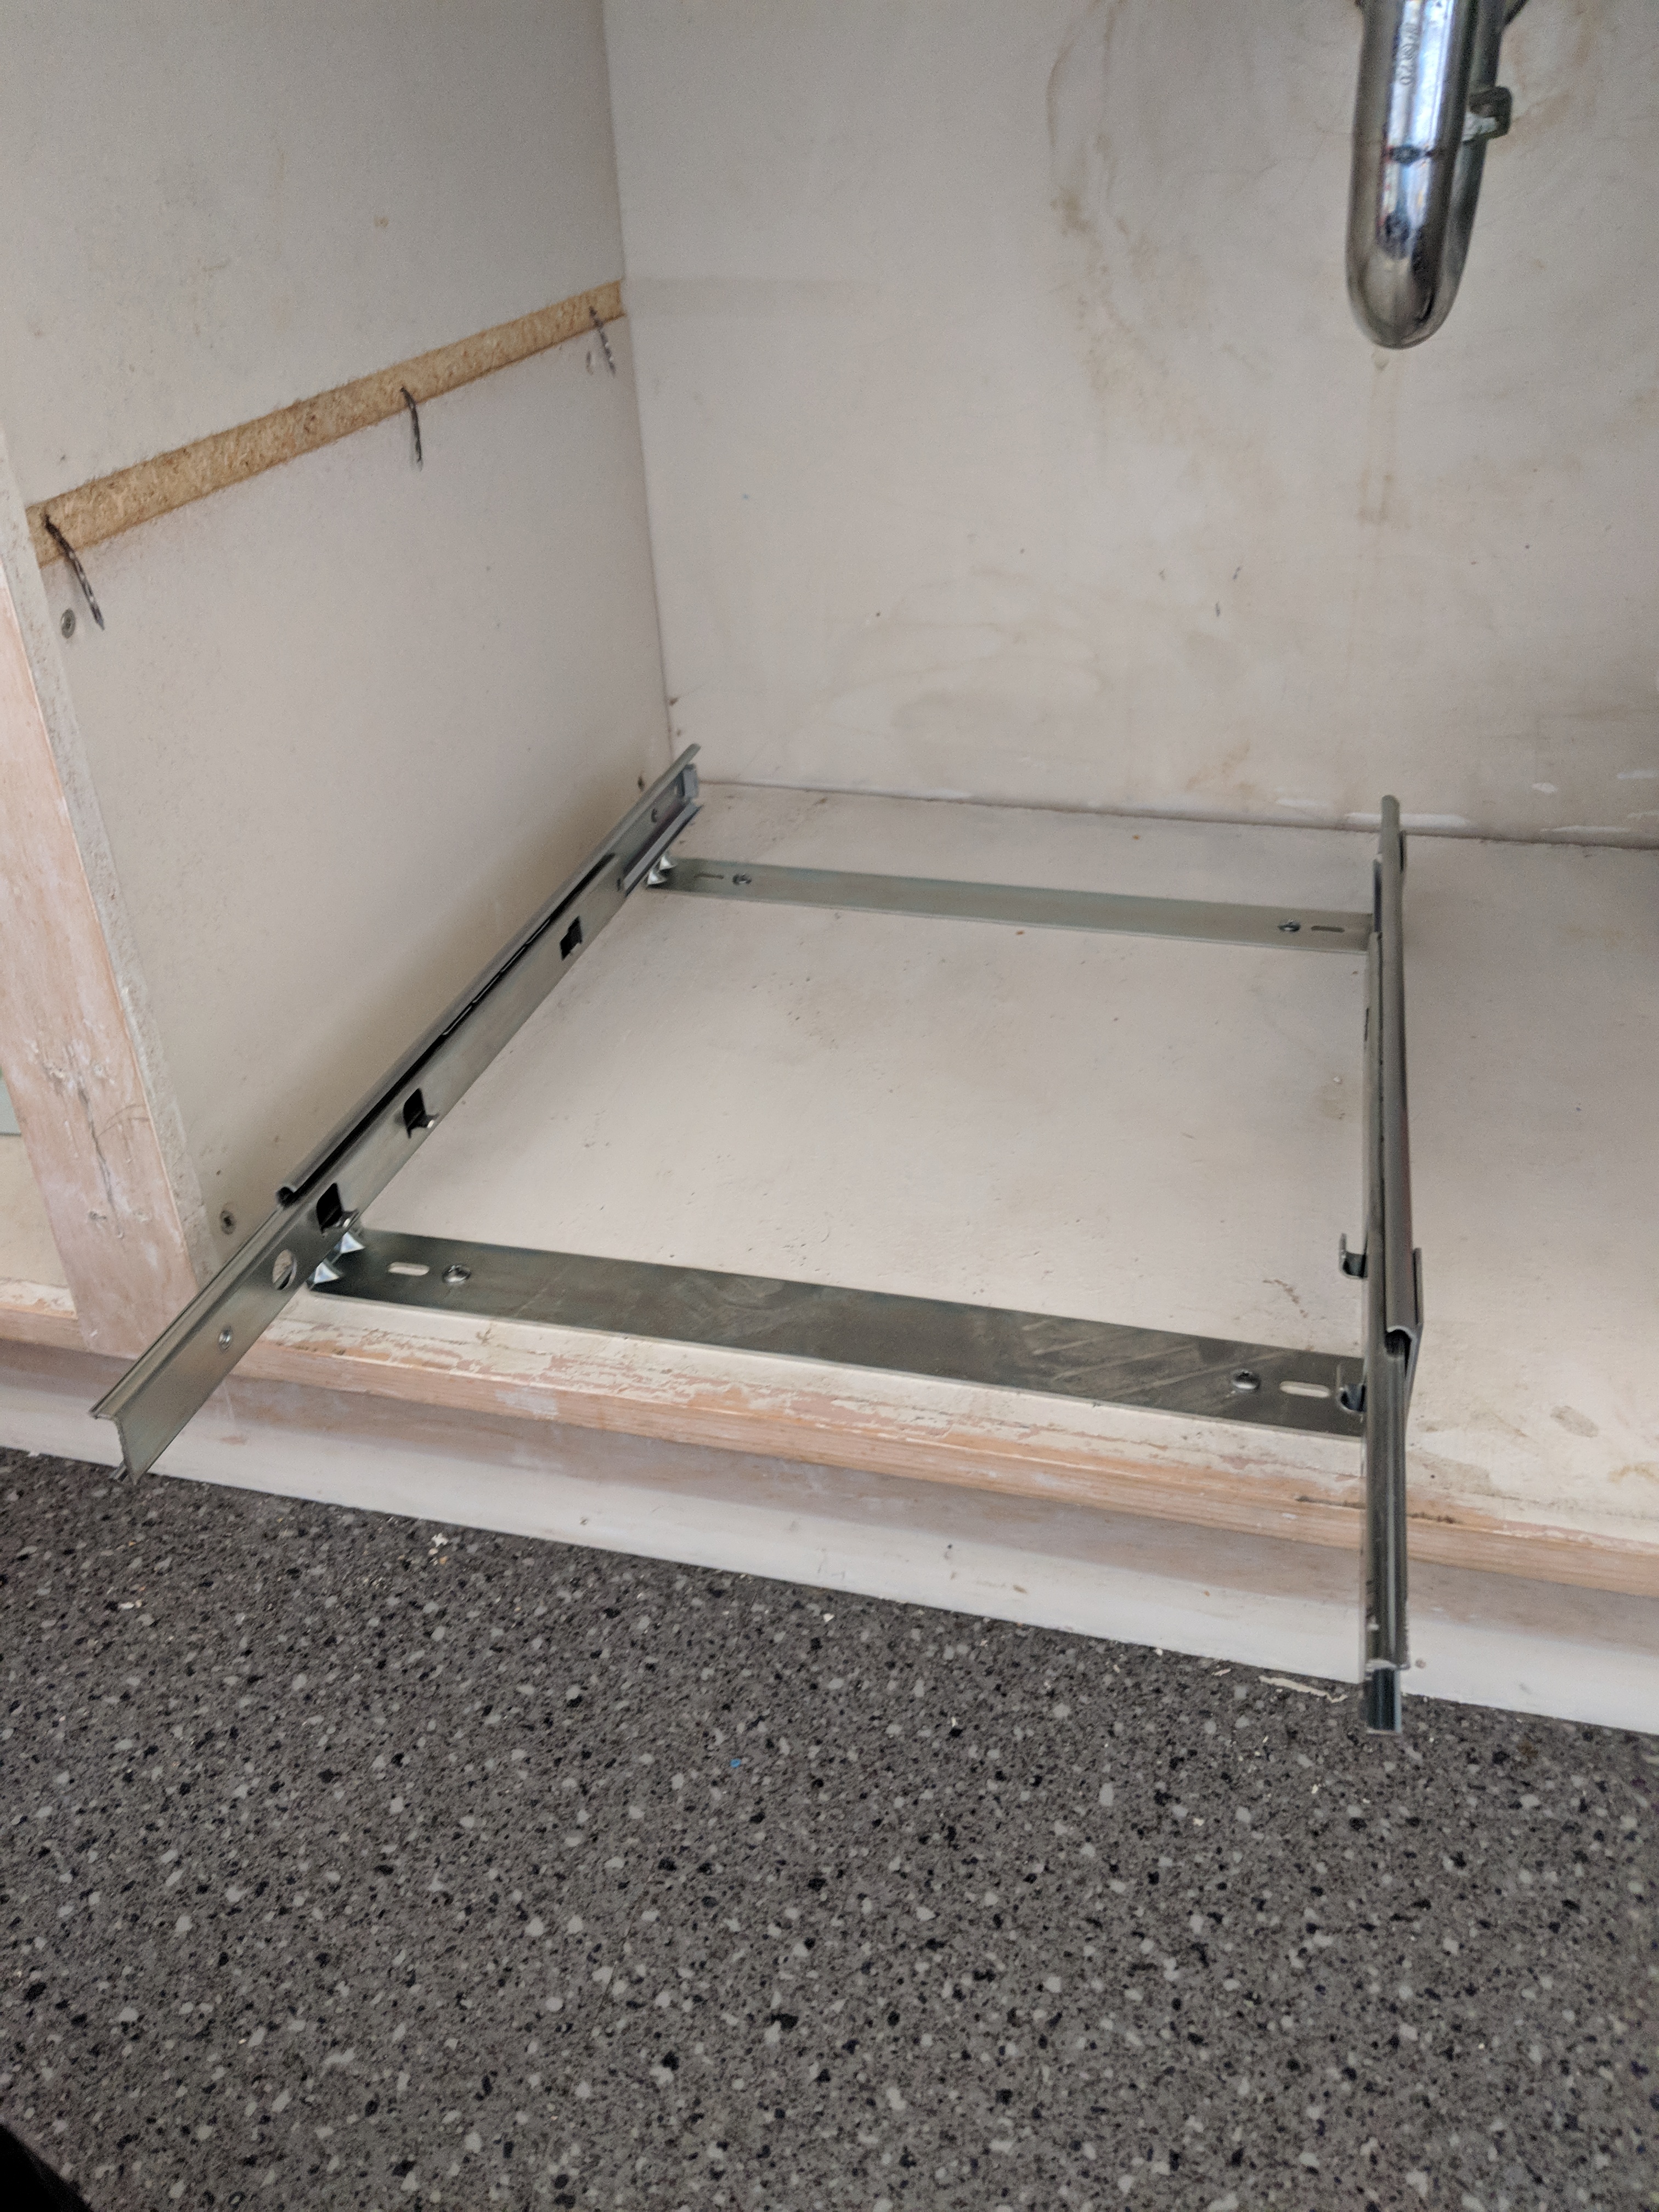
Easy peasy lemon squeezey! Thank you Vogt & Knape for making me bathroom dreams come true.
-
DIY Towel Bar and Toilet Paper Holder | Week 4
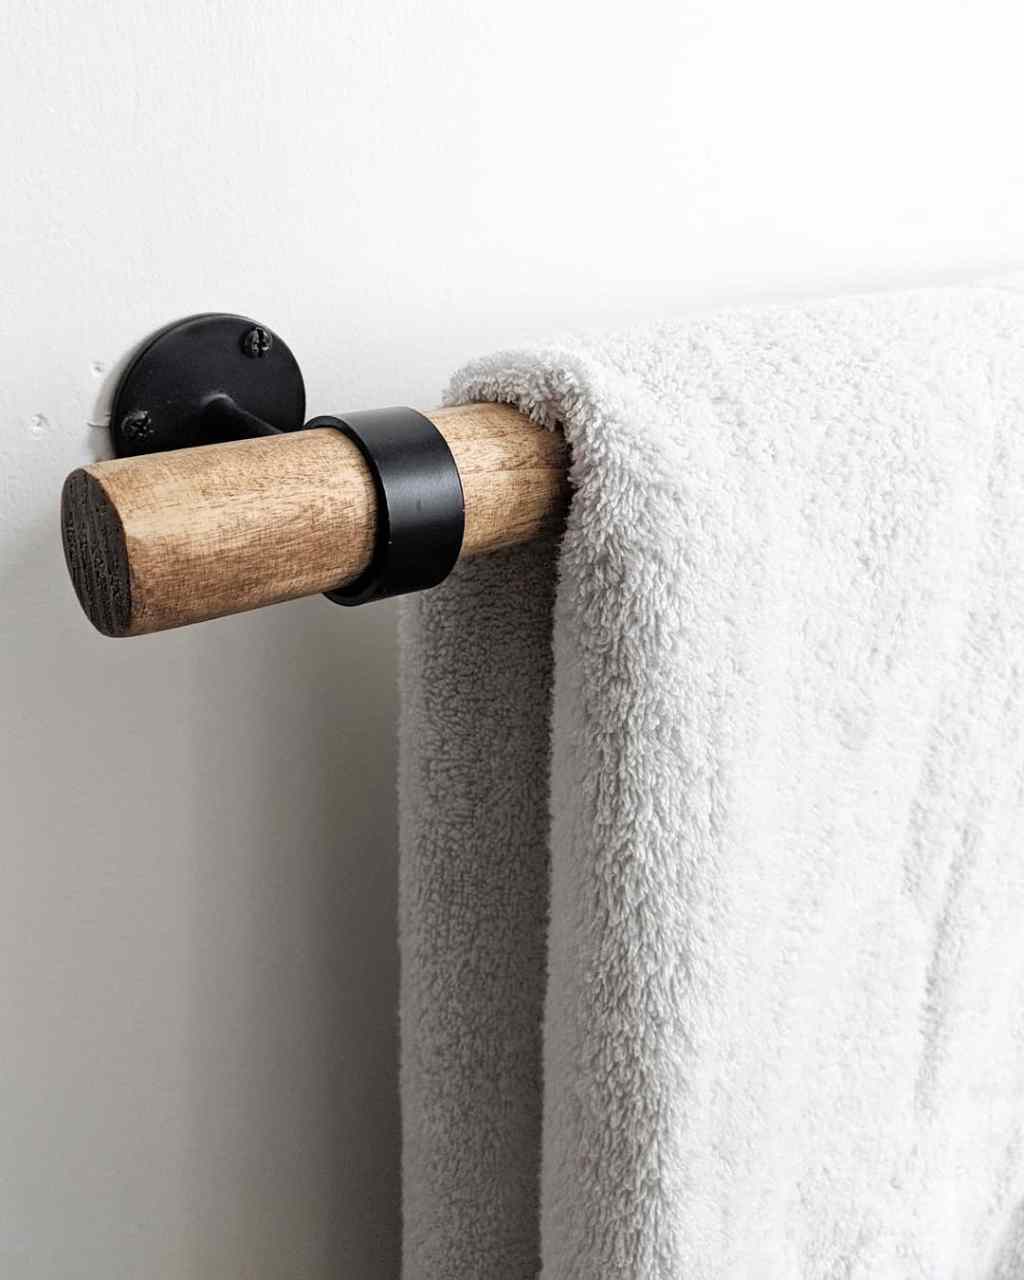
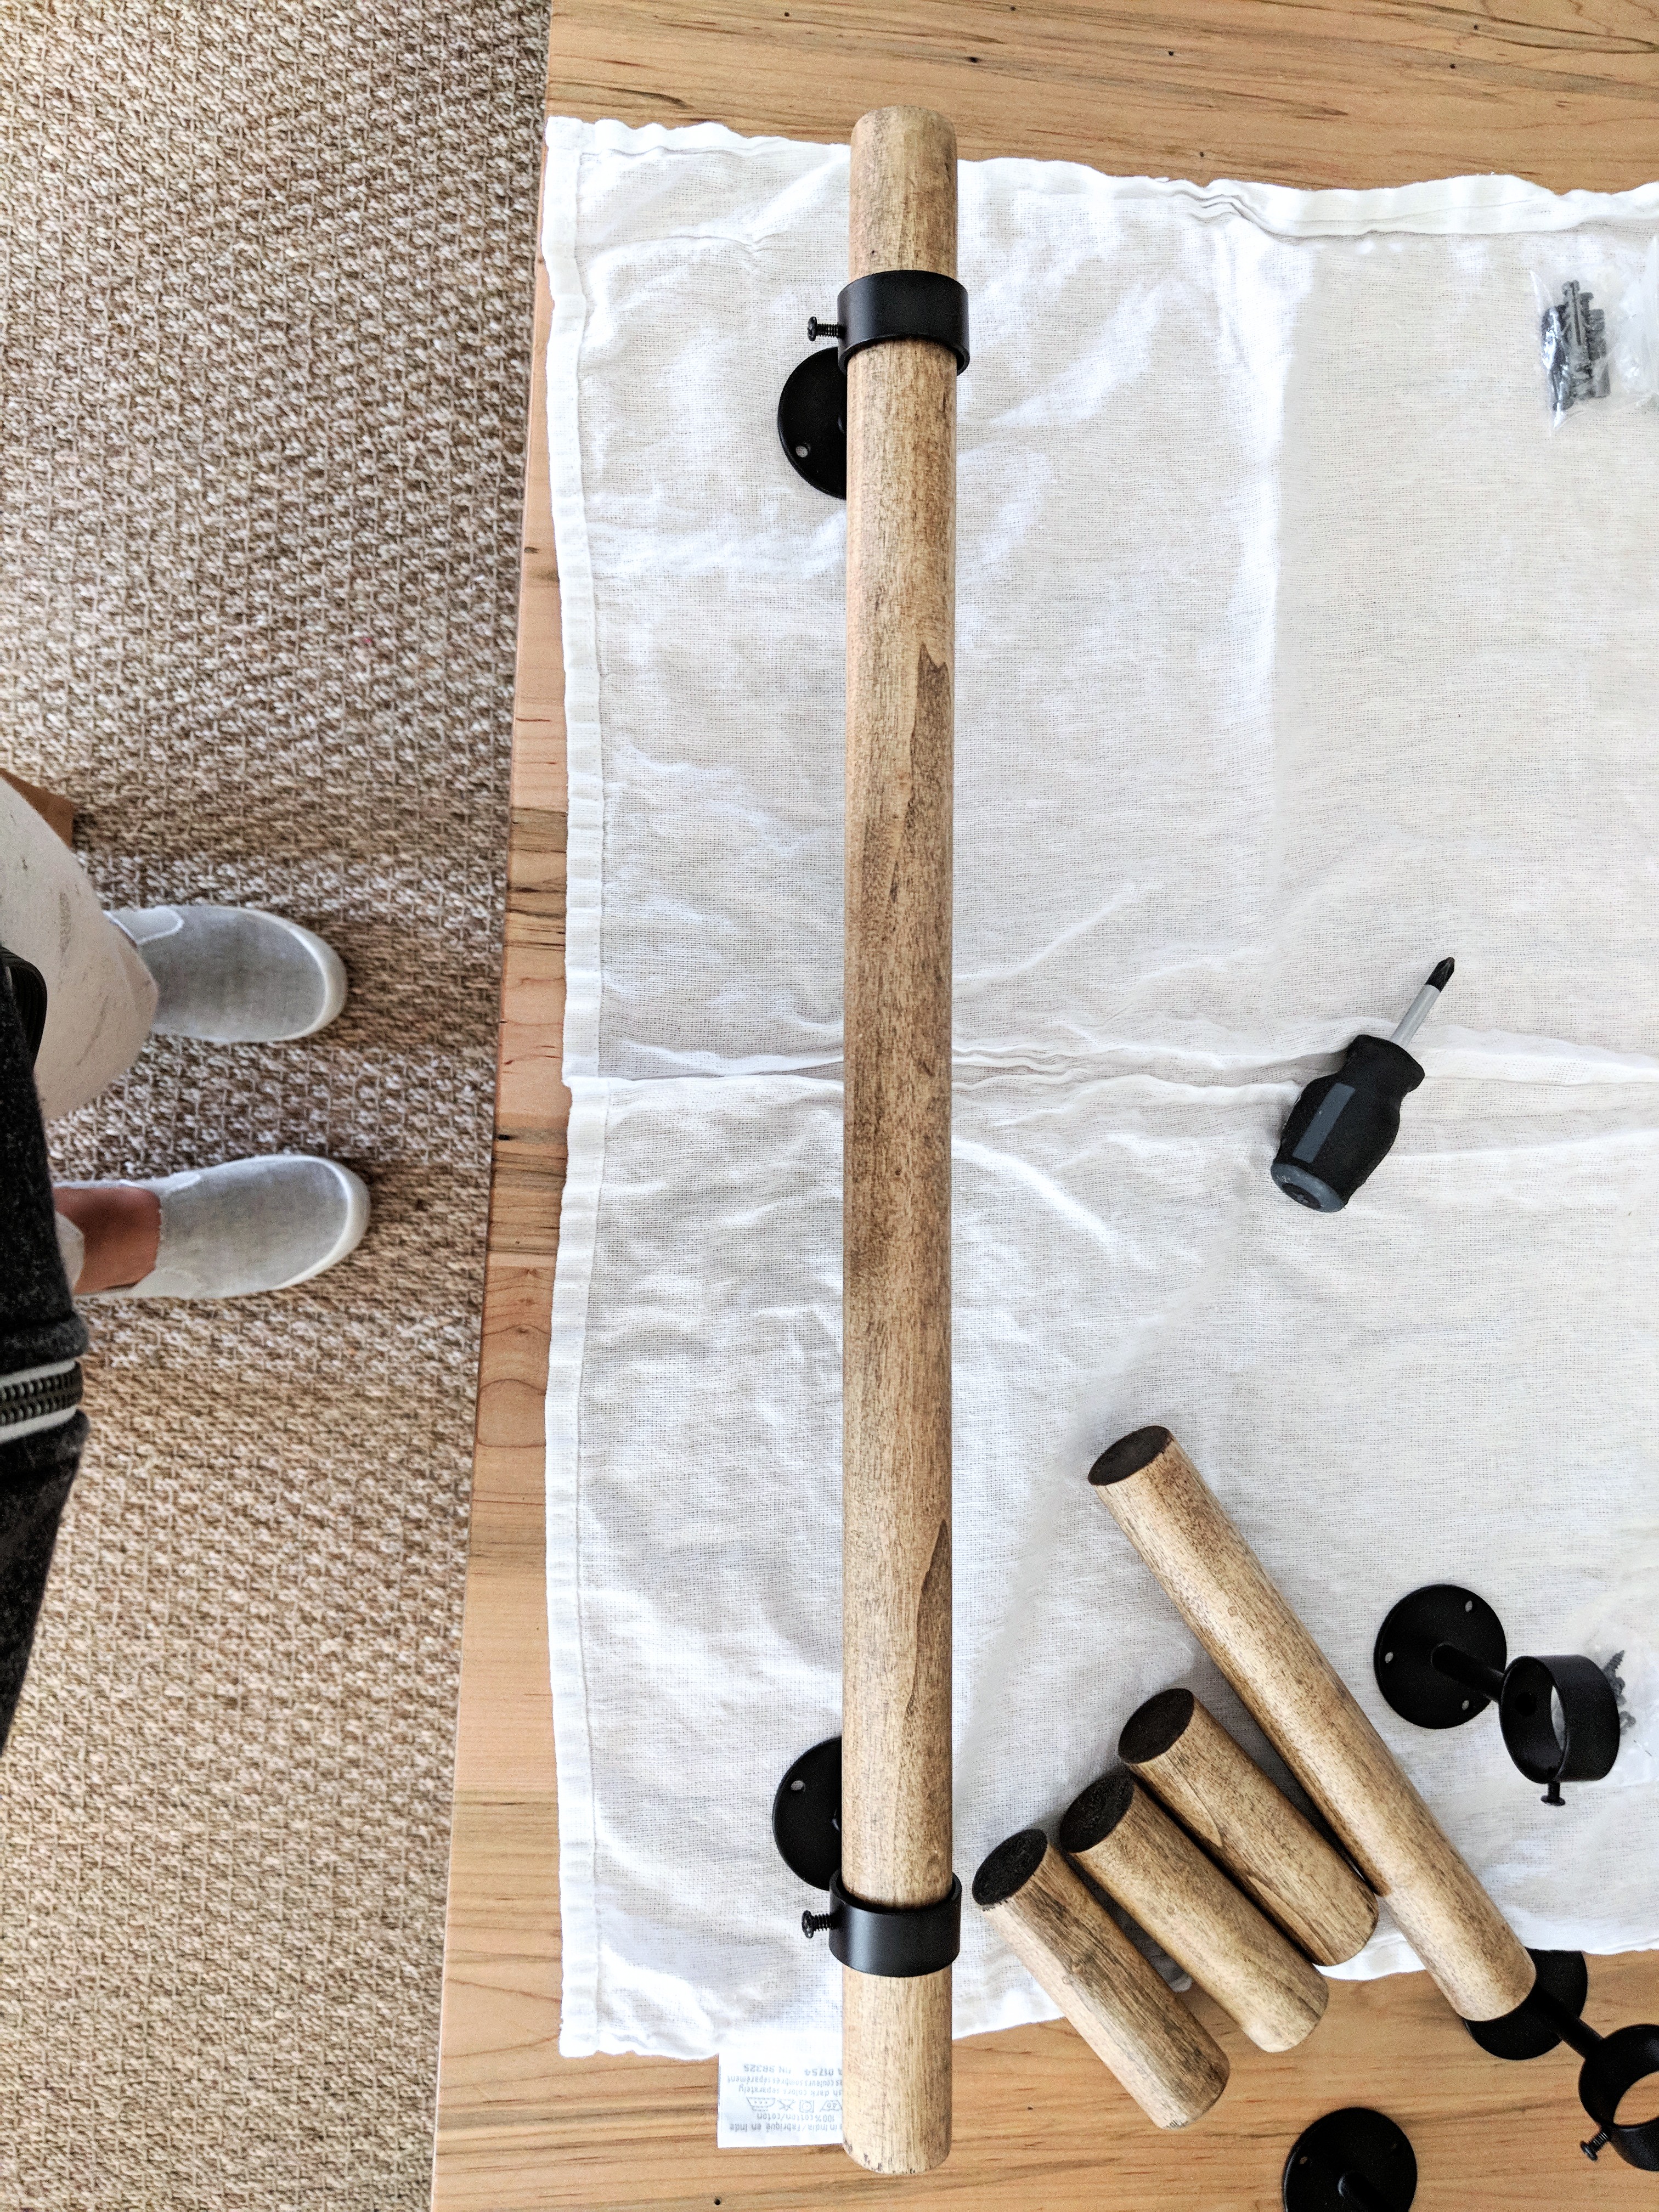
It’s a wrap on week four of the One Room Challenge and this week I’m sharing a DIY project for you guys. This DIY towel bar, hook and toilet paper holder project was an idea inspired by some tutorials for making your own budget-friendly lucite towel bars. I’ve given the concept a wood twist to customize the look of my bathroom makeover with some help from the folks over at Urbanest Living.
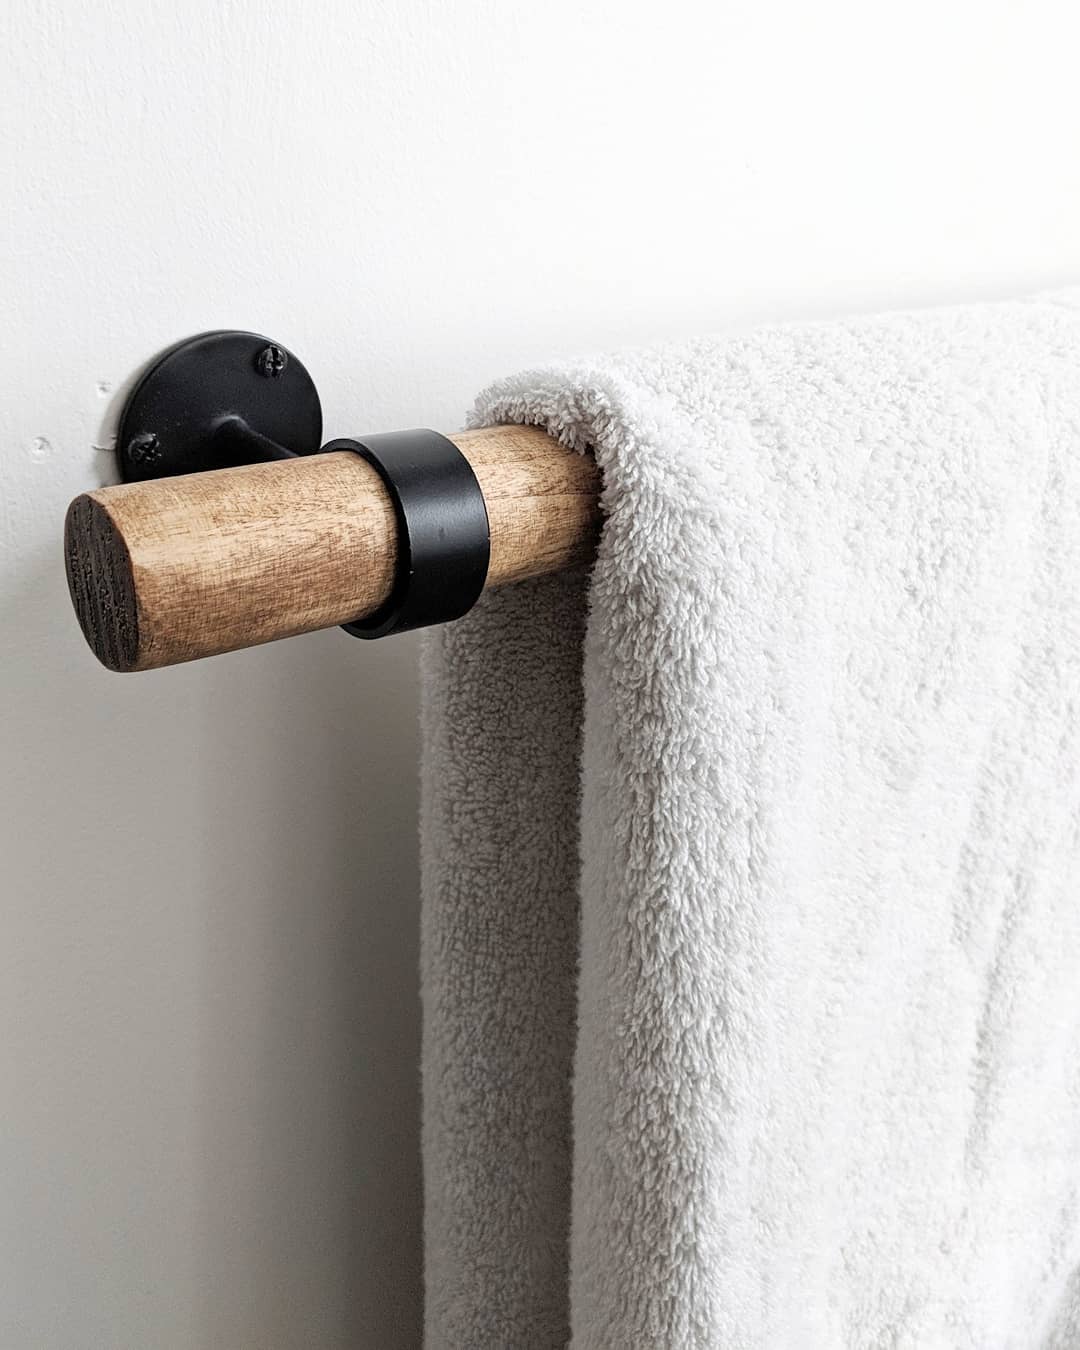
I really wanted a very specific wood and black look for my towel bar, towel hooks and toilet paper roll holder. I also wanted the wood to be stained to match the other wood elements in the bathroom makeover. To make this project happen I needed something very specific: matte black ceiling mounted curtain rod holders, which I sourced from Urbanest Living. This was such an easy DIY with huge impact for my One Room Challenge bathroom.
DIY Towel Rod and Toilet Paper Holder
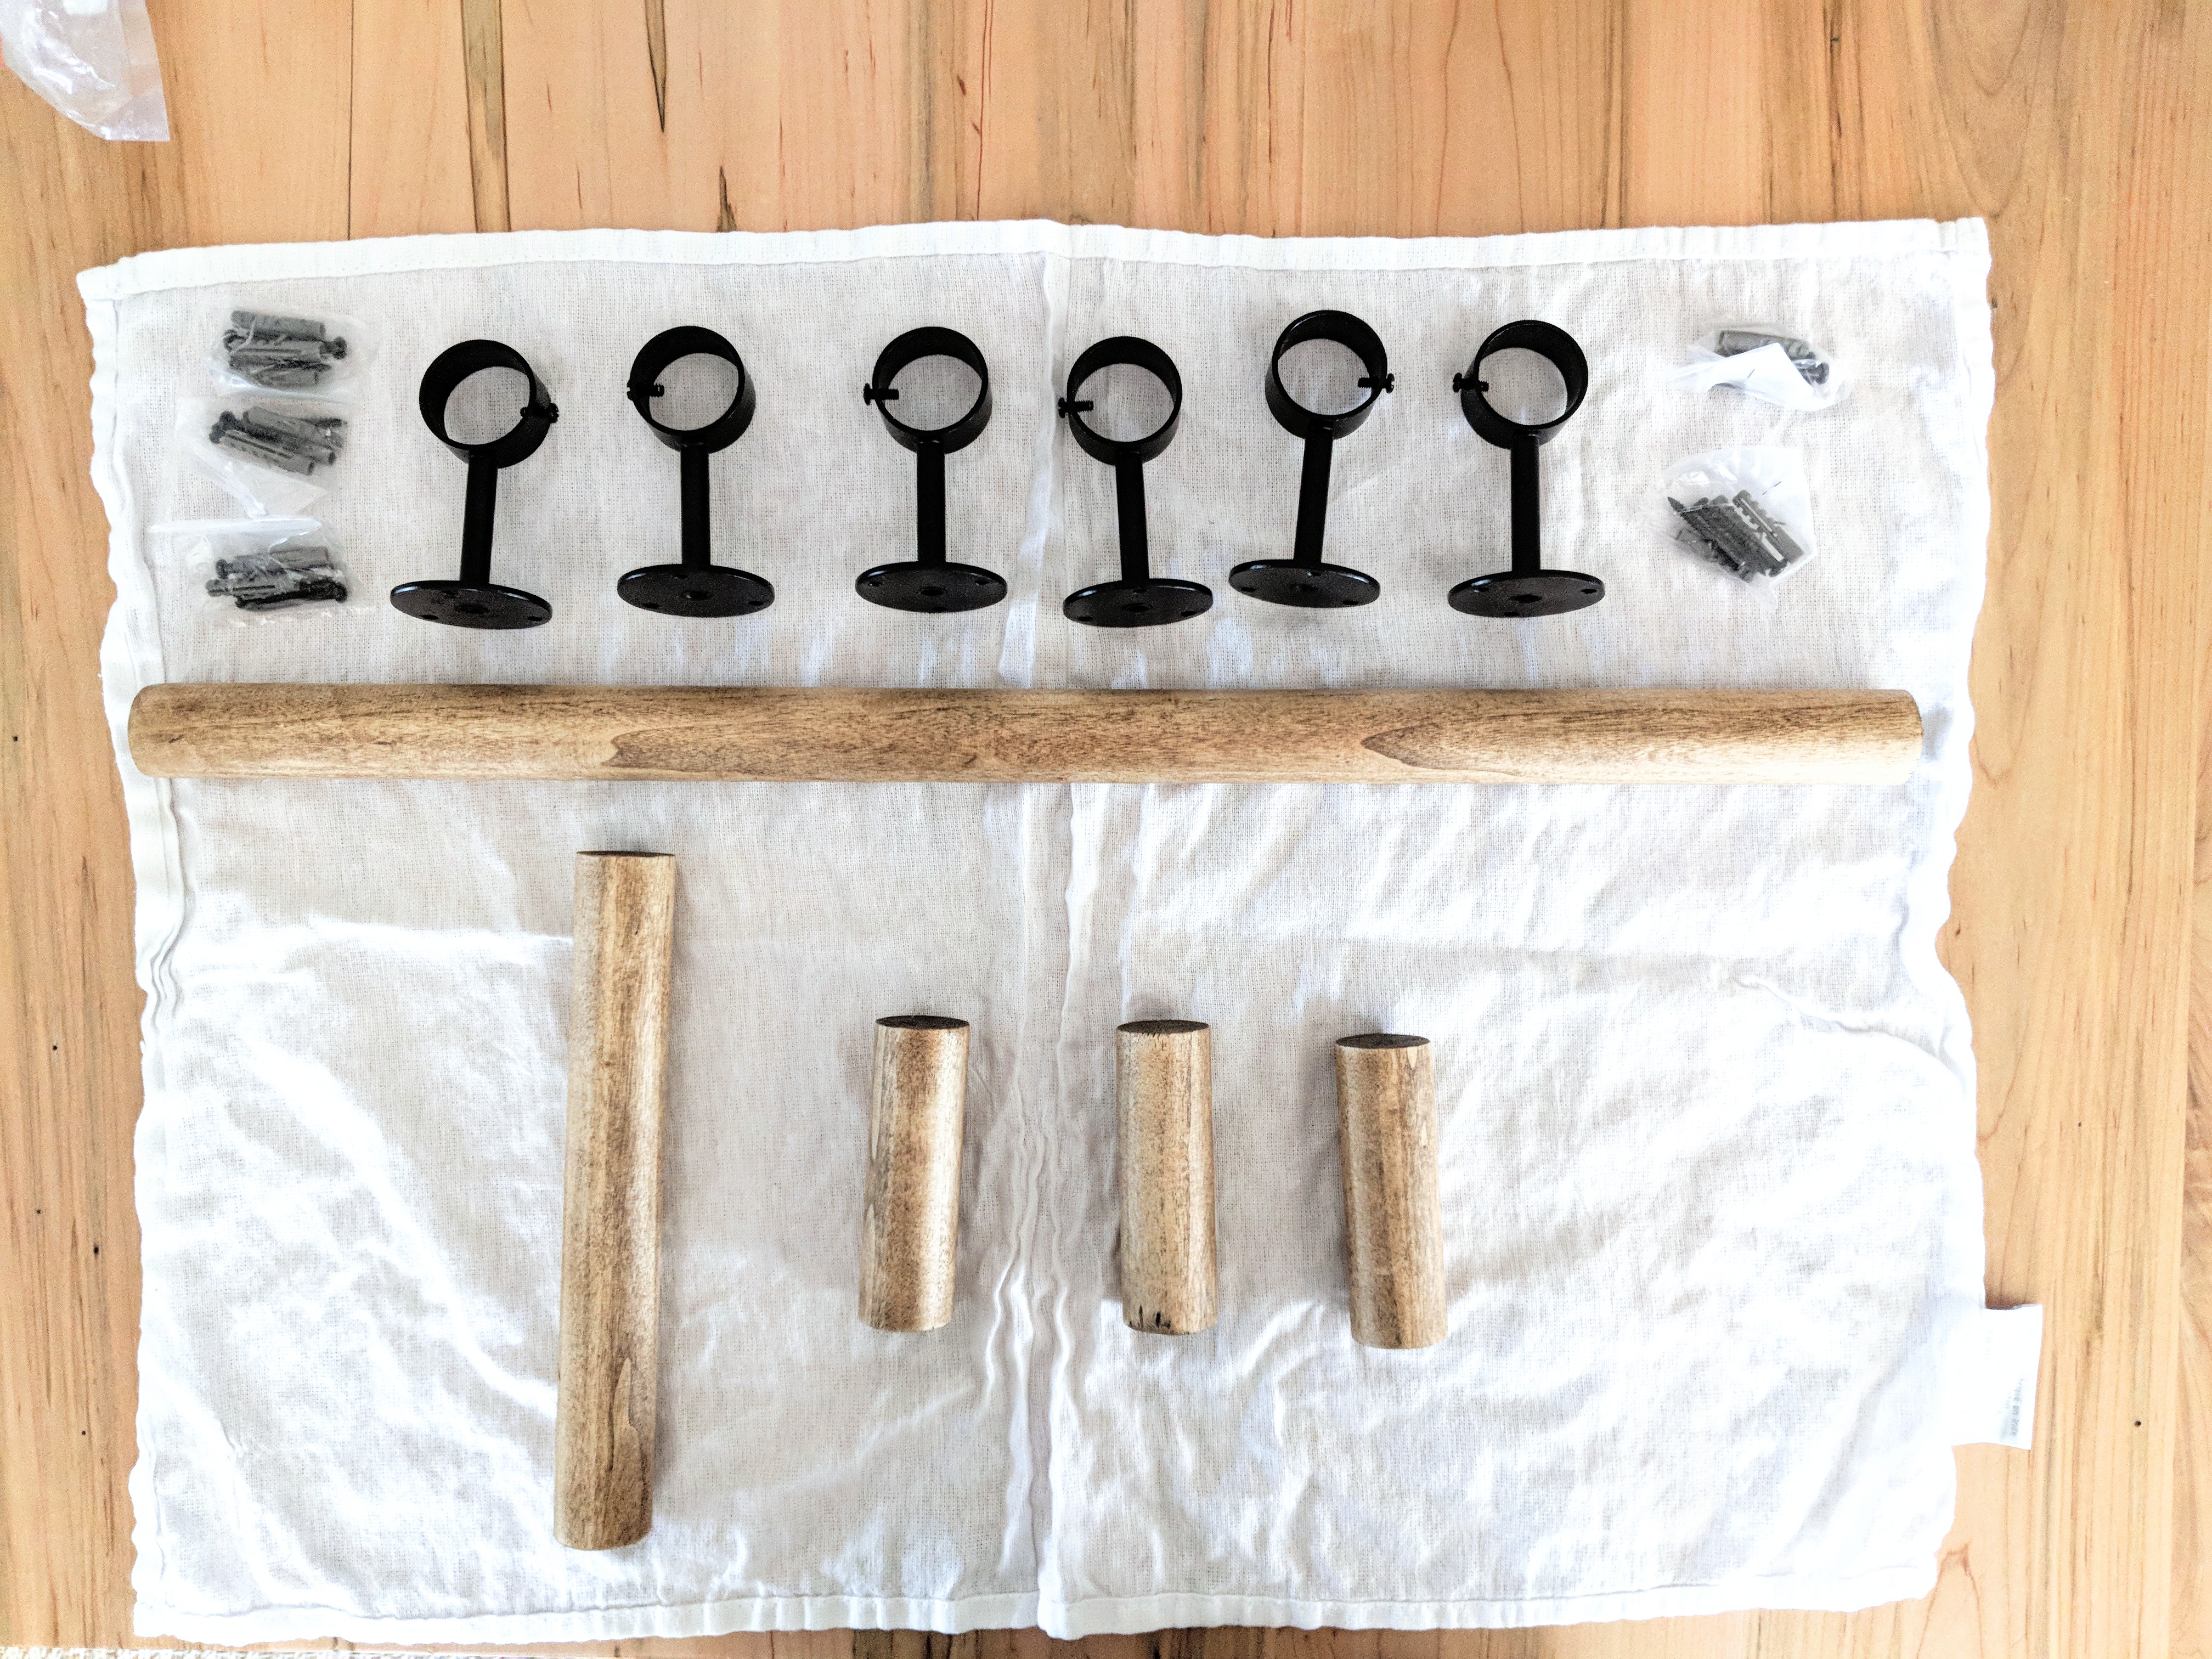
MATERIALS
- ceiling mounted curtain rod brackets in size 1 1/8″
- 1 1/8″ wood dowel
- chop saw
- measuring tape
- stain (I used Verathane gel stain in Provincial)
- wax or clearcoat
- fine grit sandpaper (220+)
- Philips screwdriver and drill
- level
INSTRUCTIONS
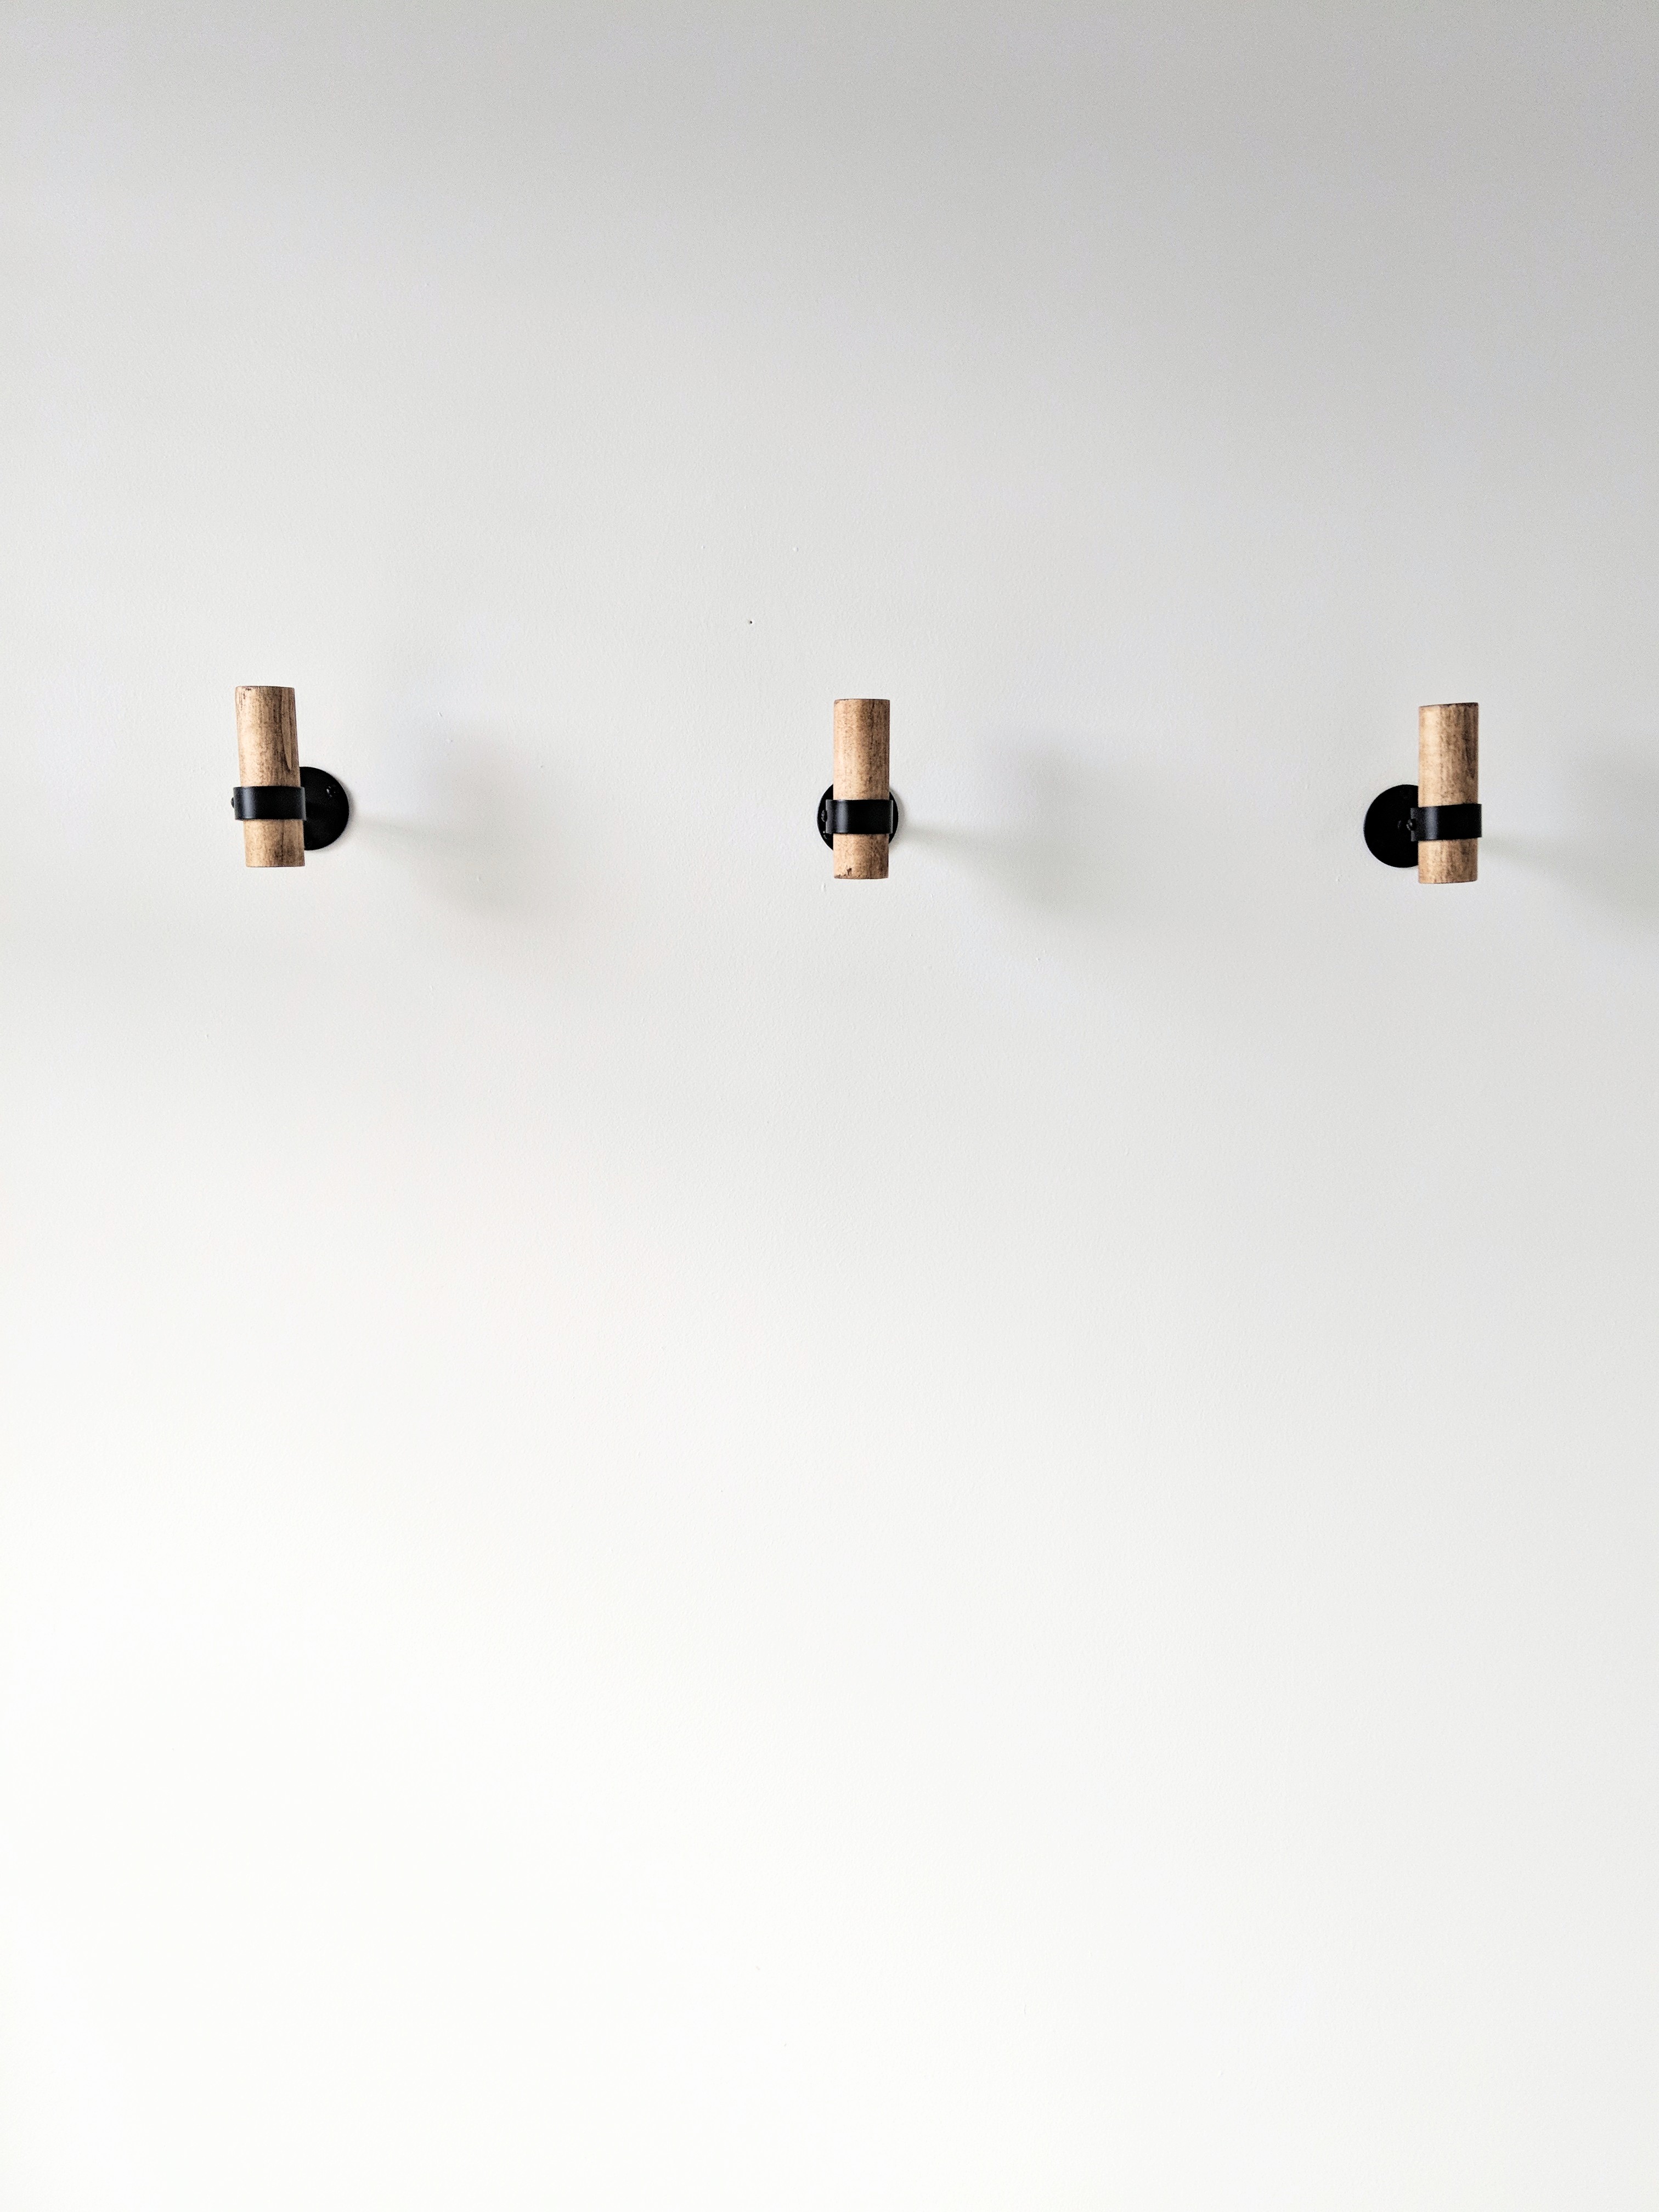
STEP 1. Decide on the length of your towel bars, hooks and toilet paper roll holder. Each of my pieces has a two inch overhang on the ends.
Towel bar: 23″
Towel hooks: 4″
Toilet paper roll holder: 9″
STEP 2. Measure, mark and cut the dowel into the correct lengths. The dowel will already be fairly smooth, but use a fine grit sandpaper to clean up the cut edges and remove any markings on the dowel pieces.
STEP 3. Stain the dowel and let dry. Follow the instructions on the can of stain. Make sure to seal the wood with a wax or poly clear coat. You don’t want any stain residue marking up your towels!
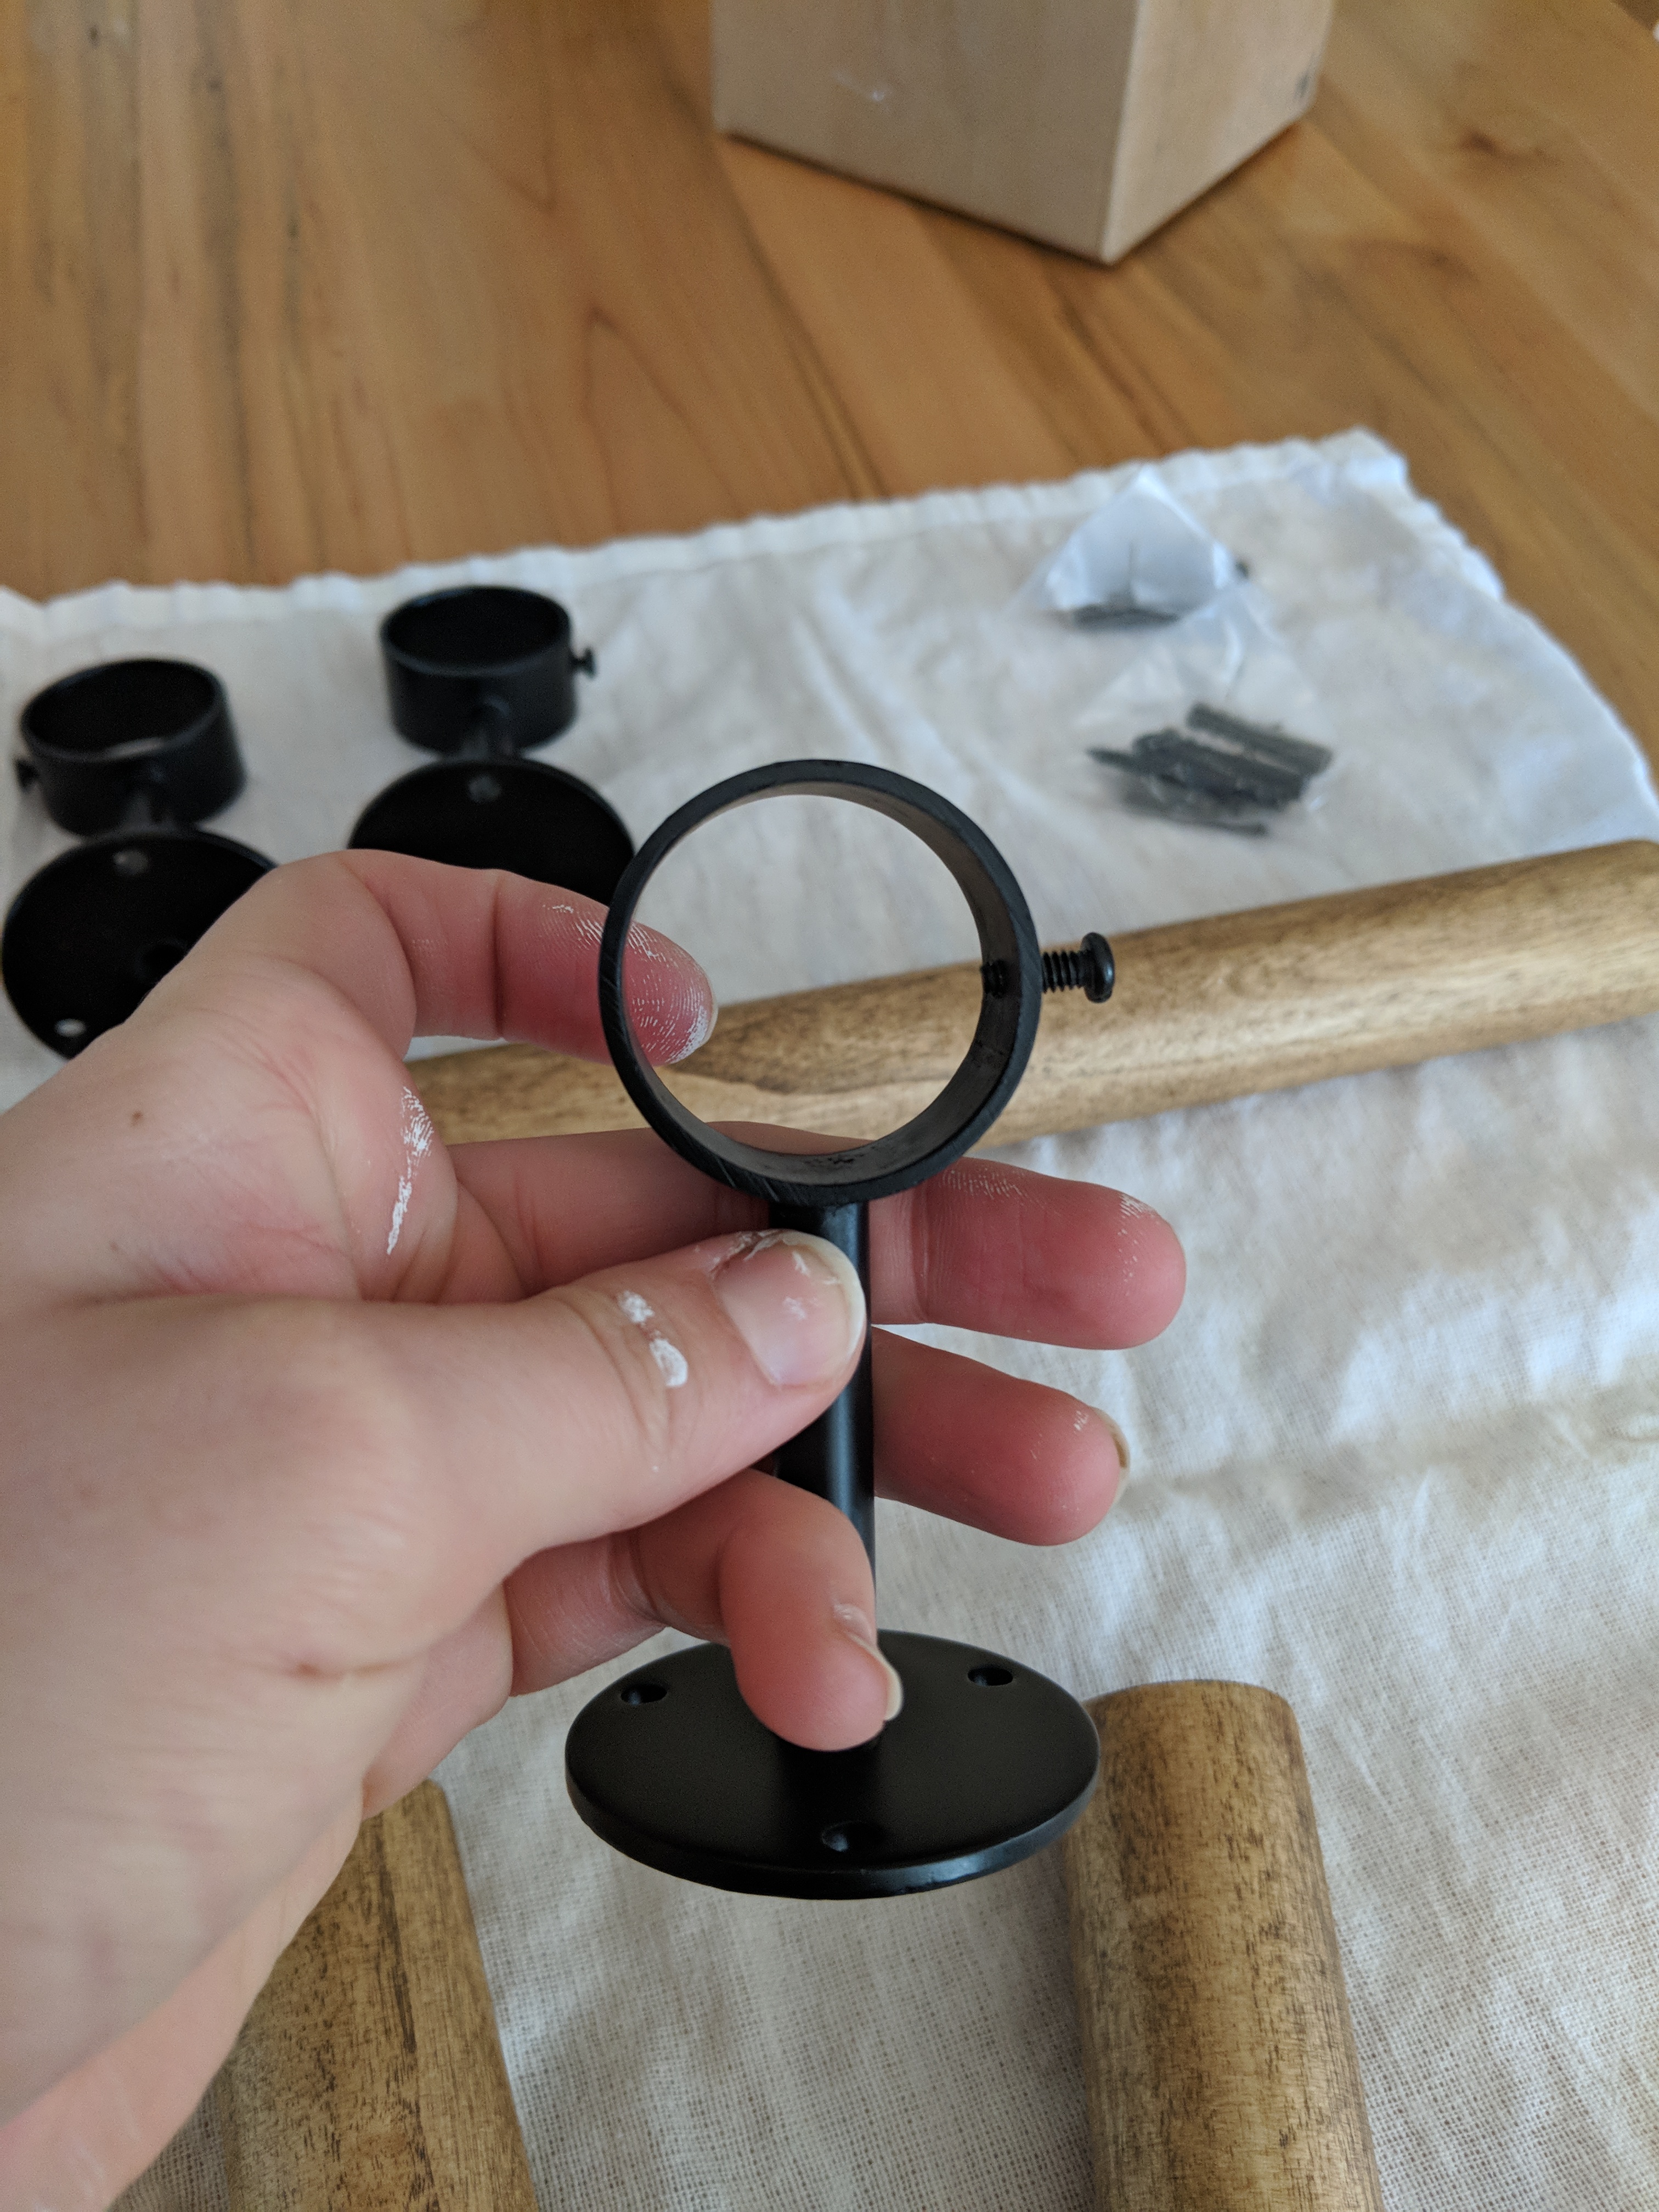
STEP 4. Take a look at your brackets. Each bracket will have a small screw set in it. This is how you will tighten your dowels in place and secure them. Because the dowel is made of soft wood you will be able to hand turn the screw into the wood with a Philips head screw driver.
Place the brackets on the dowels and figure out how much overhang you would like. As I said, I used a 2″ overhang.
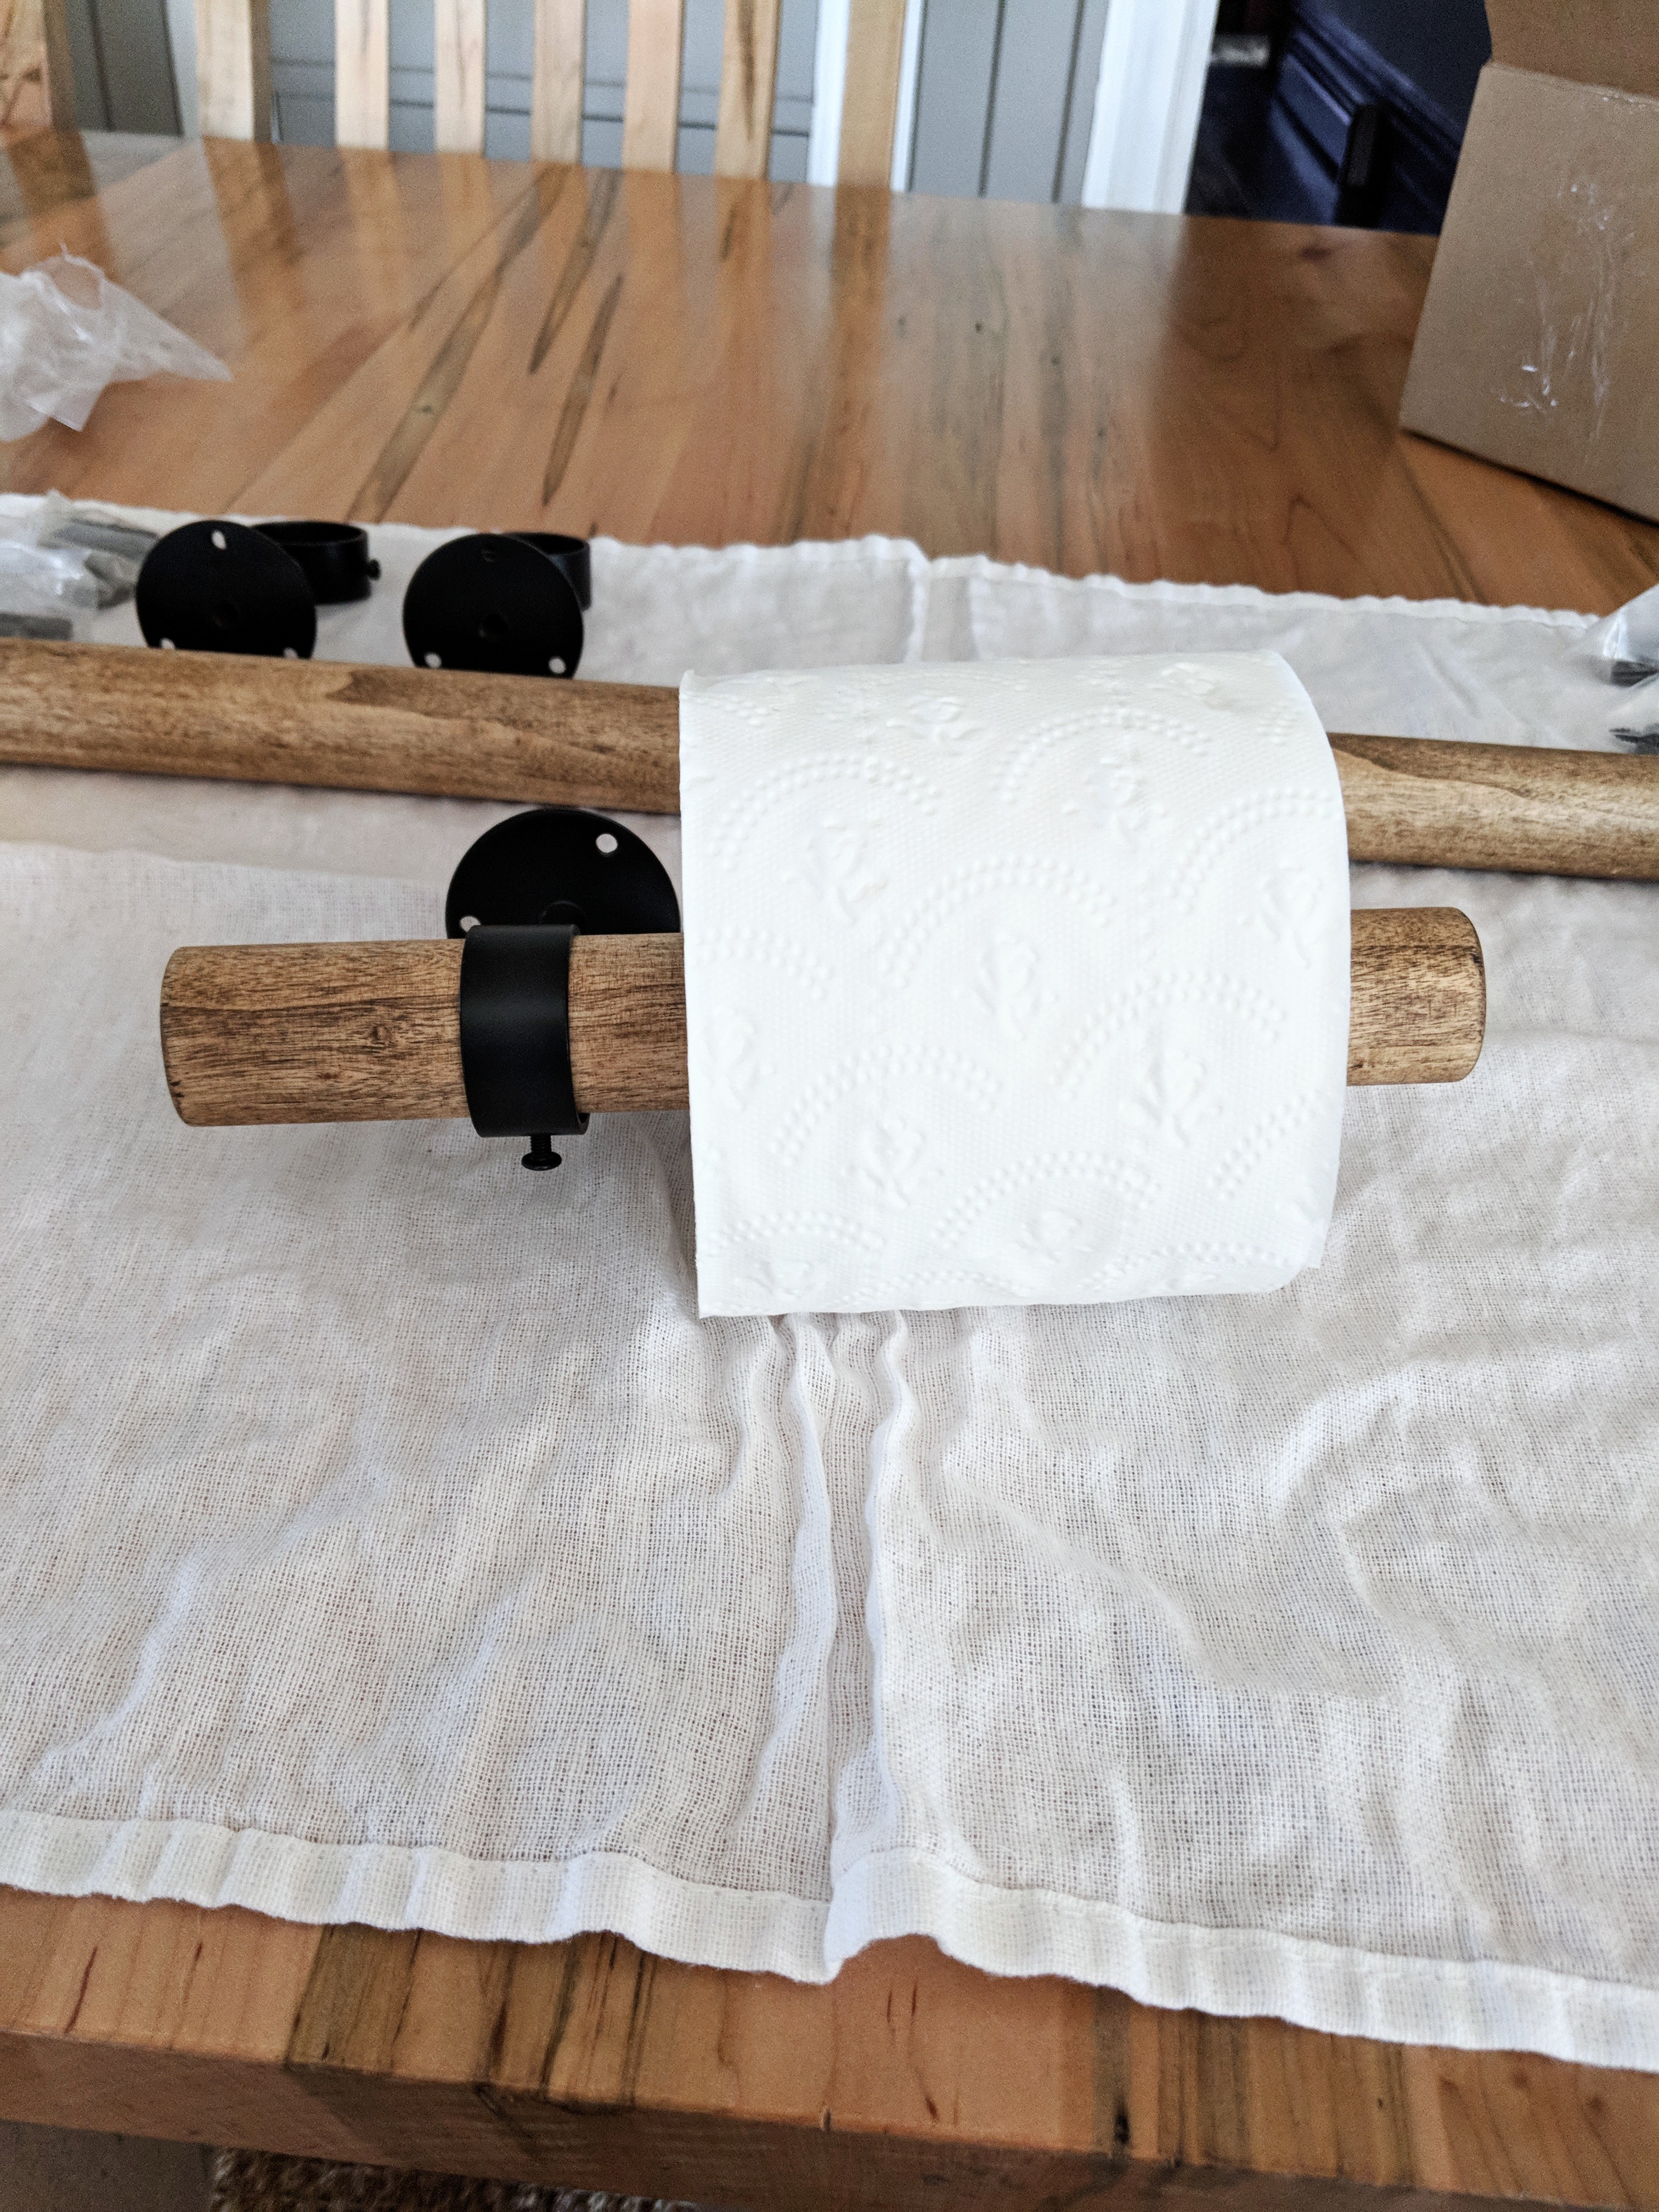
STEP 5. Mount to wall using supplied anchors and screws. You will need a long drill bit to screw the brackets to the wall. If it’s easier you can secure the dowels after your brackets have been mounted to the walls instead of before. Make sure you use a level!
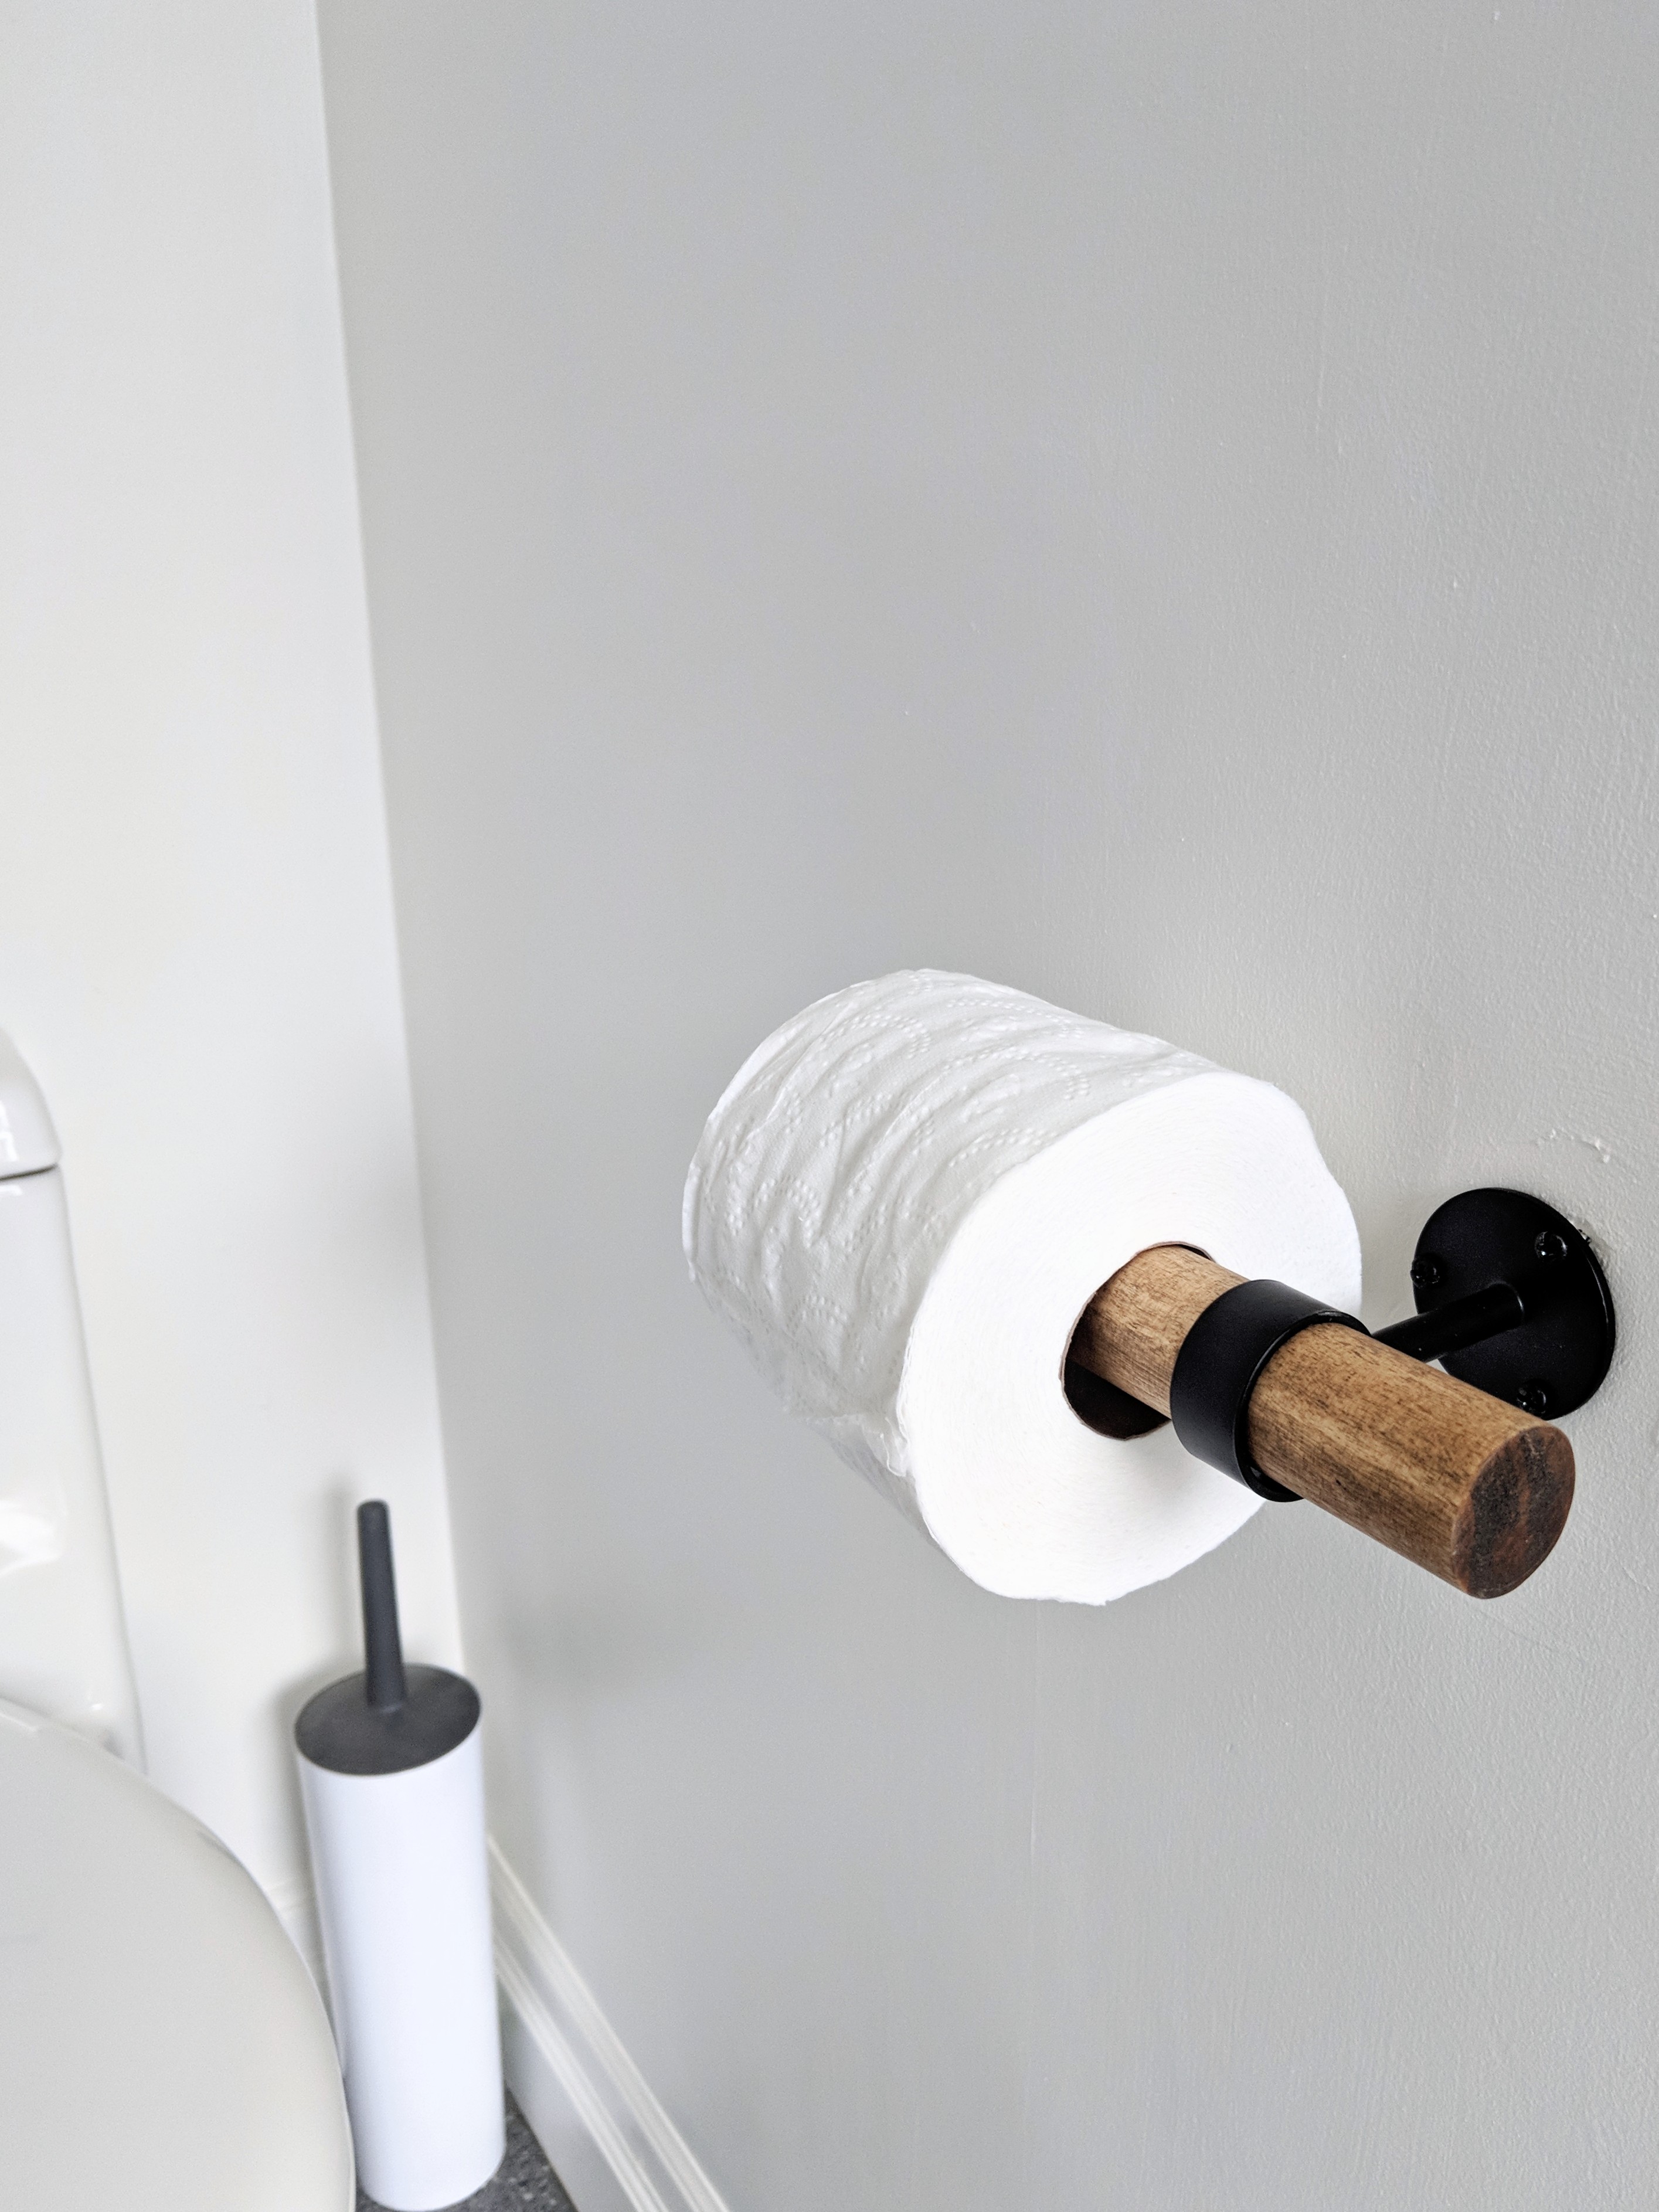
Easy peasy lemon squeezey. Make sure to follow along on Instagram!
-
One Room Challenge | Open Shelving Love | WEEK 3
Welcome to week number three of the One Room Challenge. I can’t believe that I am wrapping up the third week of the challenge already. It’s been so much fun transforming our main bathroom and painting as already had a huge impact.
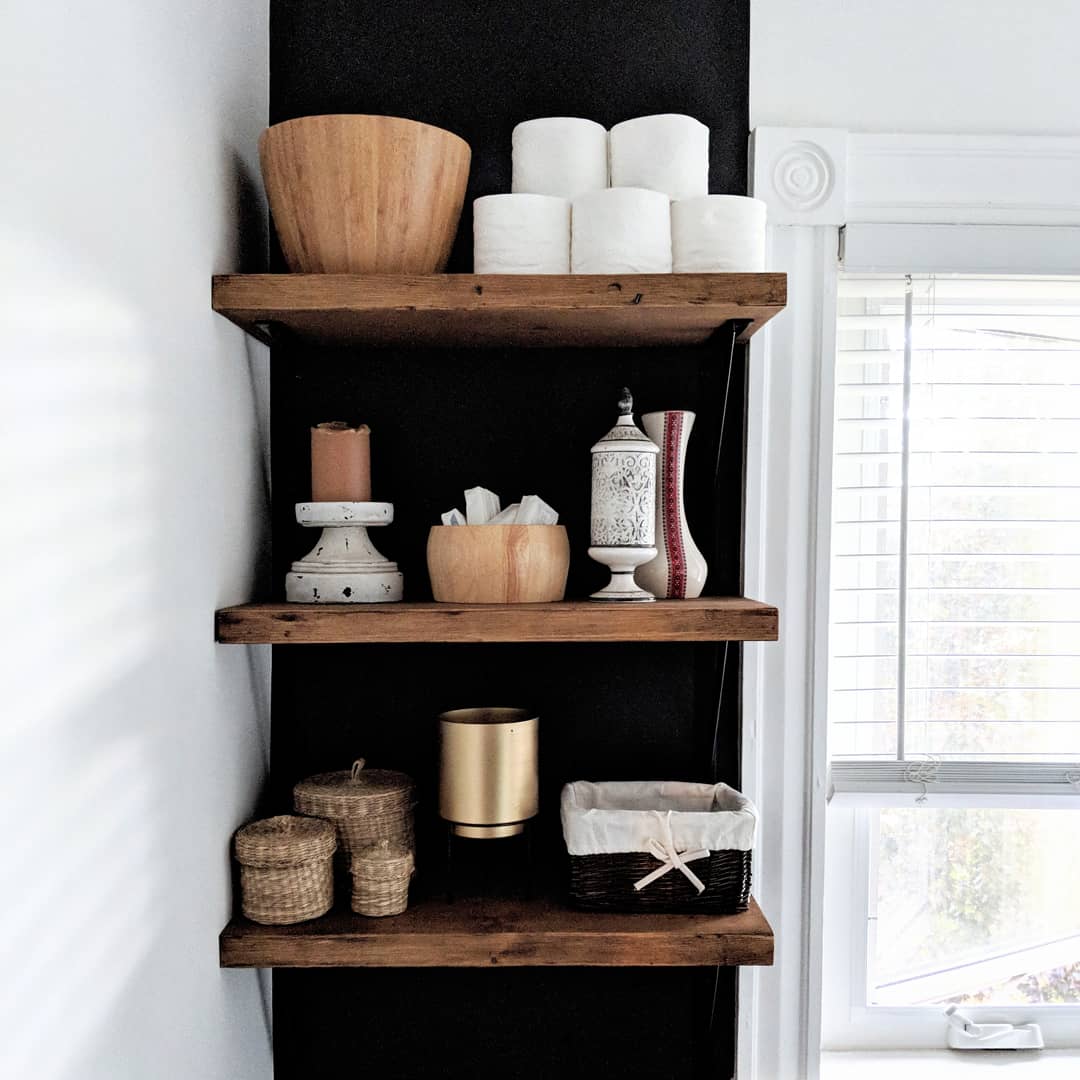
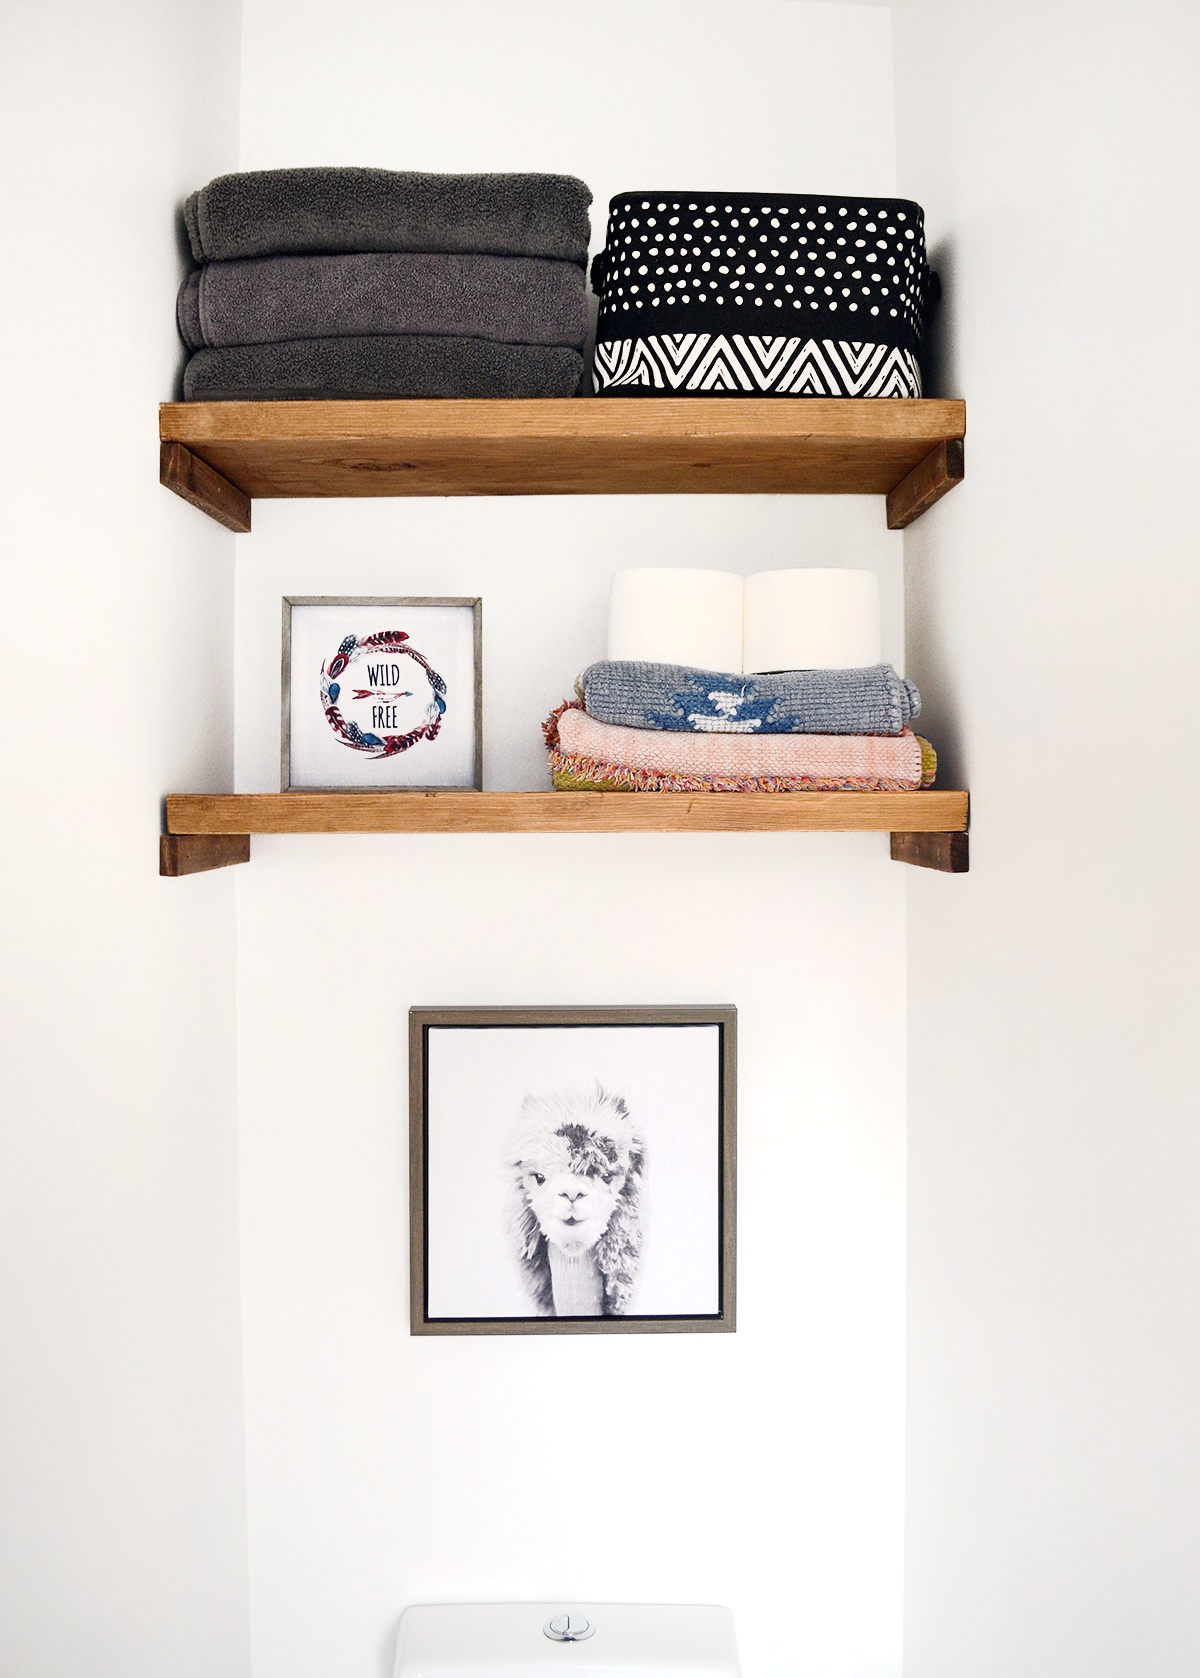
The big project on my to-do list this week was to paint, create and install these diy open shelves for the bathroom. This bathroom has some serious shortage of storage space, as there is no closet! Oh the woes.
I covered the boring grey walls with Simply White by Benjamin Moore and then used PPG Paints Manor Hall Interior in Black Magic from House Rules Design Shop for the backdrop of the shelving. What a fun name right?! How could it not be the right paint for this bathroom makeover and it went on so beautifully.
House Rules Design Shop is headed by Heather Smillie of HGTV fame and I knew that she would be able to provide a high quality paint at a smart price that would knock this project out of the park. I am also using PPG paint for the vanity, in the same colour. If you live in the Bruce – Grey area then it is worth a trip to Hanover to visit this store!
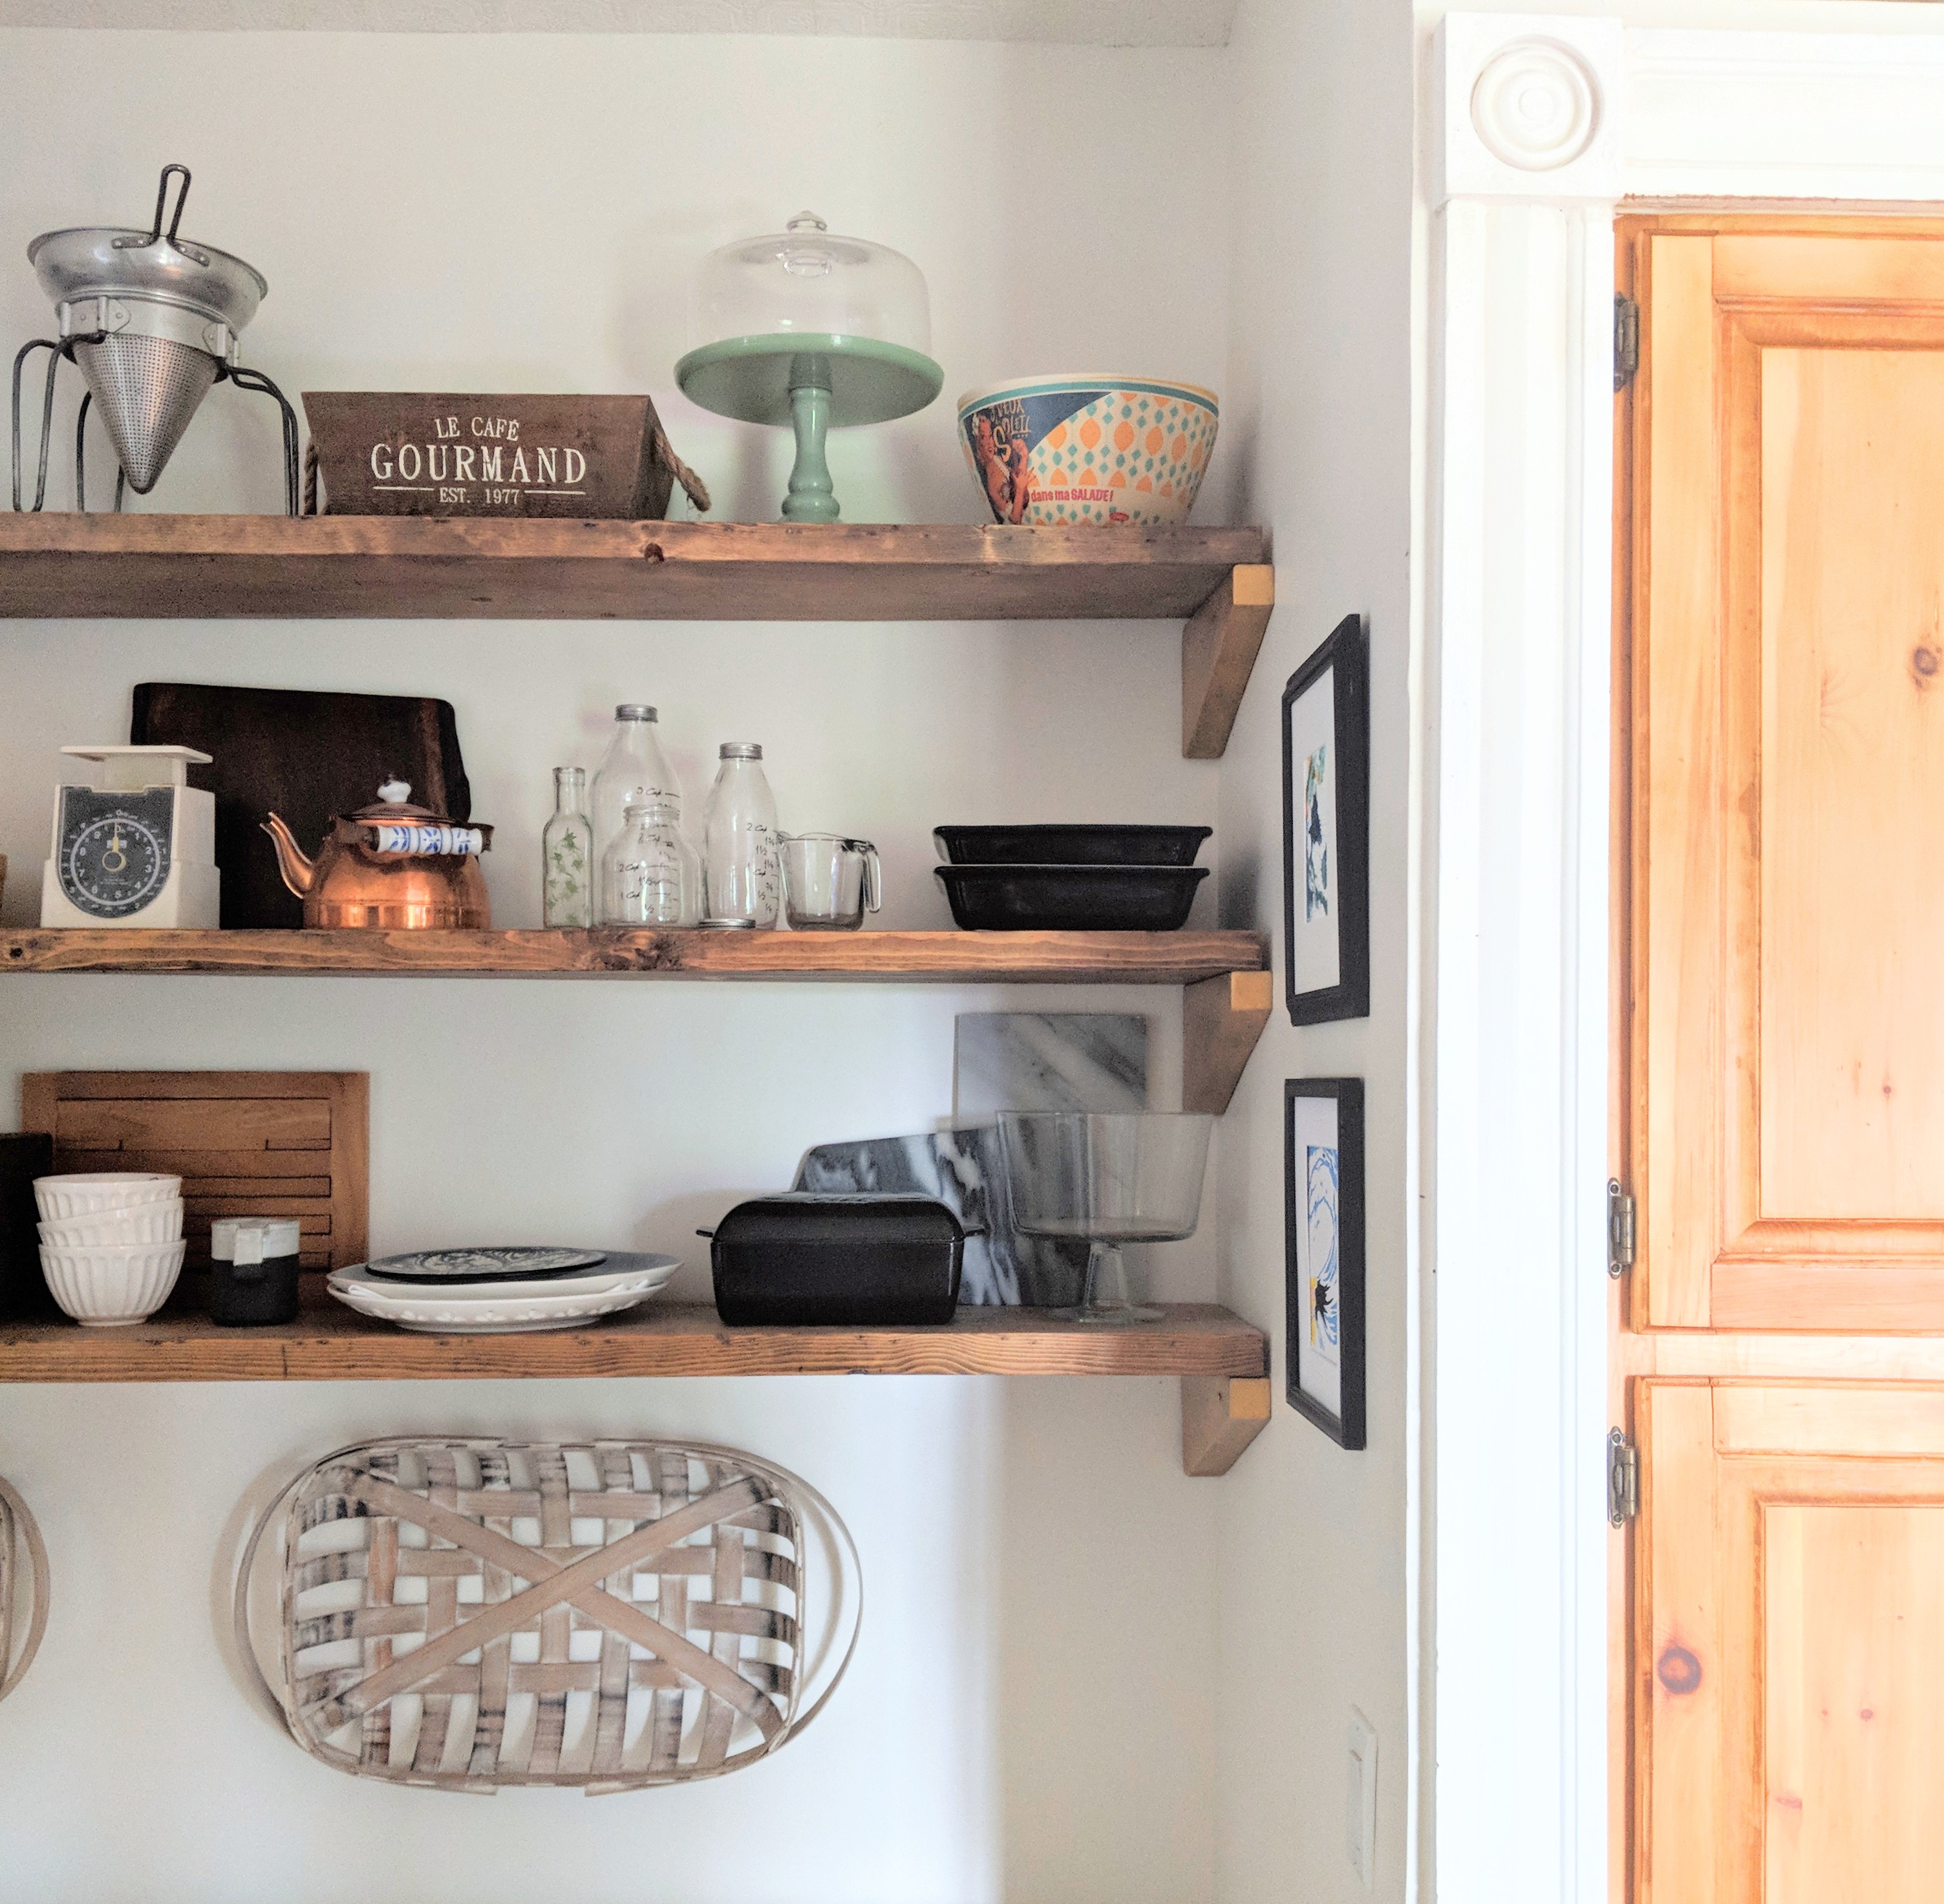
The shelves are 2×12 pine from Home Depot stained with Verethane Gel Stain in provincial, and are held in place with simple black wall brackets, also from Home Depot. I thrifted all of the storage baskets and vessels that are on these shelves, mostly from The Salvation Army and also Value Village. To refresh, check out the WEEK 1 post to see what the space looked like before.
Stay tuned over the next three weeks to see the full transformation. And, head over to Instagram to keep up with all the One Room Challenge crazy and check out my story highlights for a time lapse video of how I styled the shelves.
-
One Room Challenge | Honeymoon Over | WEEK 2

I think this is what they mean when they say the honeymoon phase has ended. Last week was all joy and excitement for the One Room Challenge. I was buzzing on inspiration and the thrill of working with some sweet companies (see the paint colour I picked for the vanity!!!)

This week I am like, w.t.f. it’s almost Friday and I haven’t finished sanding the vanity – my goal this week is prep and I’m not done prepping. I was swamped with therapy appointments, some of them intense. I’m tired and I wallowed yesterday in misery. A voice in my brain kept tellinge me this wasn’t a smart idea, that I can’t do it, that it’s too much, that the products I need won’t arrive in time.
That voice is an evil voice. It’s the voice that keeps you from being your best self. Today I visited one of my AWESOME sponsors: House Rules Design Shop, headed up by the wonderful Heather Smillie of HGTV fame. I was refreshed by her design brilliance and being in her thriving, inspiring store. I also saw my psychotherapist and she spoke reassurance of who I am and what I am capable of.
The bathroom faucet is on the way. The paint is sitting on my basement staircase and the cabinet is almost ready. I can do this. If you are ORCing too, then I want to say the same to you. If a voice of doubt is gnawing at you then put it in its place because you are able, you are awesome.
I can’t wait to share my experience working with the PPG Paints I am using on this vanity and the walls in next week’s post.

-
One Room Challenge | Moody Bath Coming Your Way | WEEK 1
It’s that time of year. Not pumpkins but ORC — One Room Challenge that is. The ORC is an event held biannually hosted by Better Homes and Gardens and Love Home Network that encourages bloggers, Instagrammer and DIY heroes to makeover or renovate an entire room in six weeks.
I’ve always longed to participate in the One Room Challenge, since way back in my earliest blogging days, but it’s simply never worked out. This spring I had big plans and then I hit a tree with my car and more than my ORC plans were scrapped.
But, nothing is getting in my way for Fall 2018. I have to go-ahead. I have some exciting brands and stores on board who I can’t wait to introduce you to, and I have a vision!
MOOD BOARD
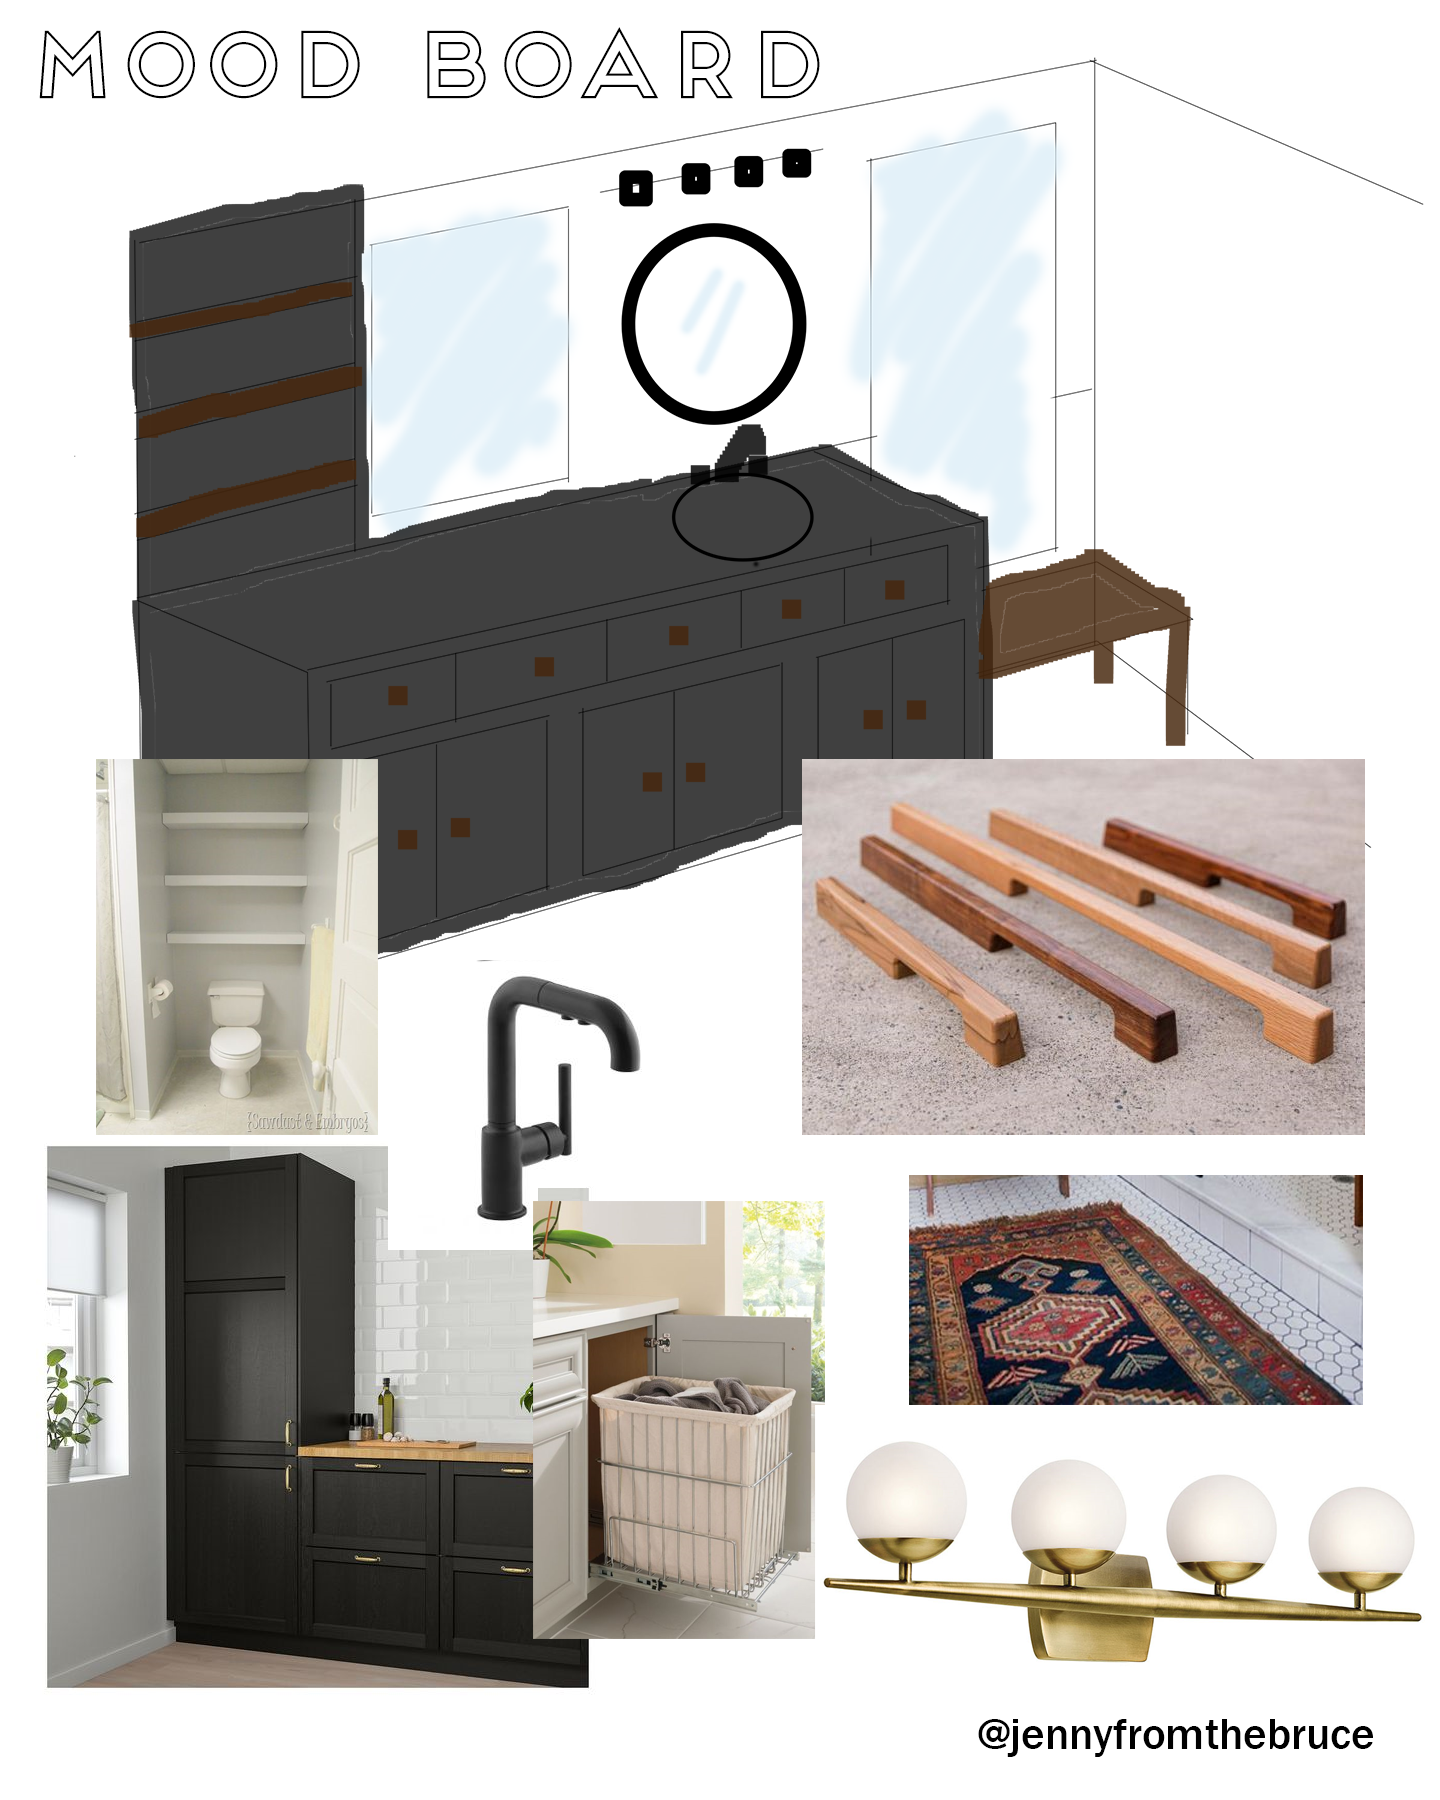
So what can you expect? Here is a simple breakdown.
- overhauling existing cabinets with paint and new hardware
- a stunner of a light fixture in natural brass
- floating shelving
- a built in bench for supervising the kiddos in the bathtub
- new art, decor and accessories

Stay tuned on Instagram for all of the fails, fiascos, successes, laughter and tears.
-
Cedar Shim Backsplash and DIY Kitchen

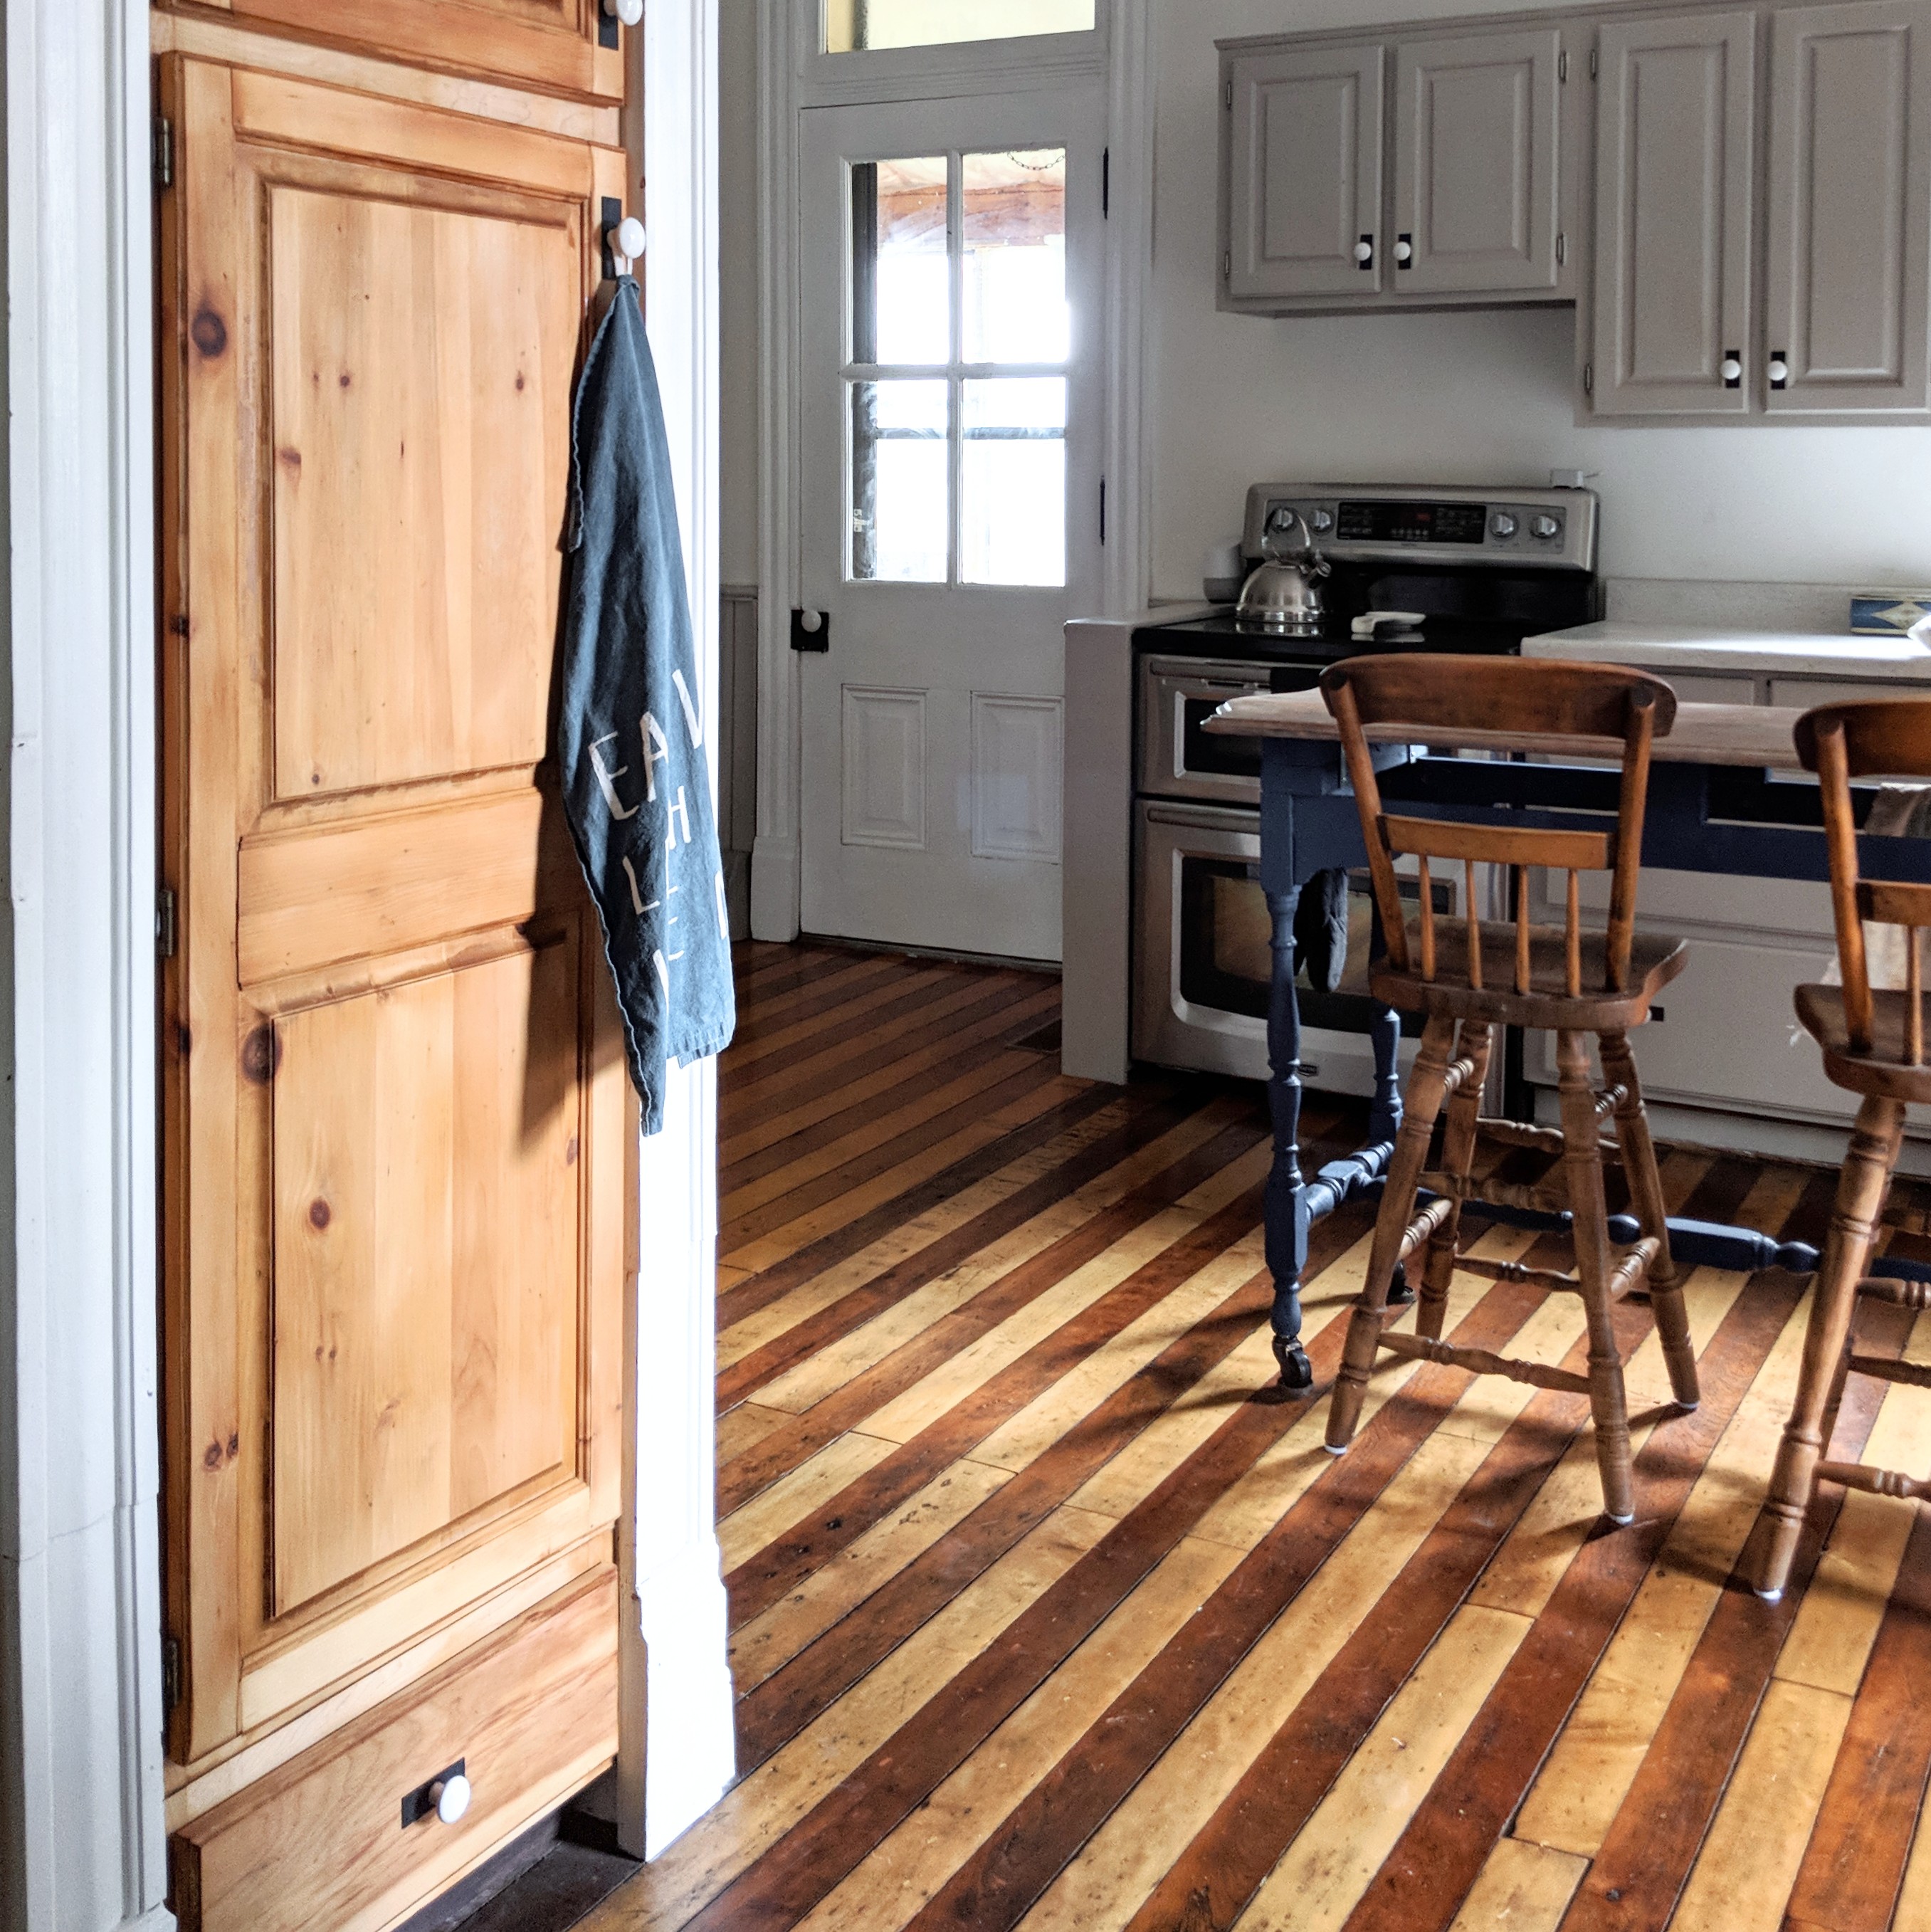
Our 1880s Italianate farmhouse suffered a serious attack of 80s pine, sometime circa the 1980s no doubt. One of the hardest hit areas was what could have been an otherwise lovely eat-in kitchen. Armed with some paint, DIY prowess and Instagram inspiration I set out to rectify the situation. One of the major focal areas was installing a budget DIY cedar shim backsplash as part of the kitchen makeover.
Please enjoy these before photos. They will give you a true appreciation of the task that lay before me. It wasn’t just the pine, it was the sheer amount of competing wood tones and types. It was the glass panels and the brass hardware. It was the brown laminate countertops.
BEFORE

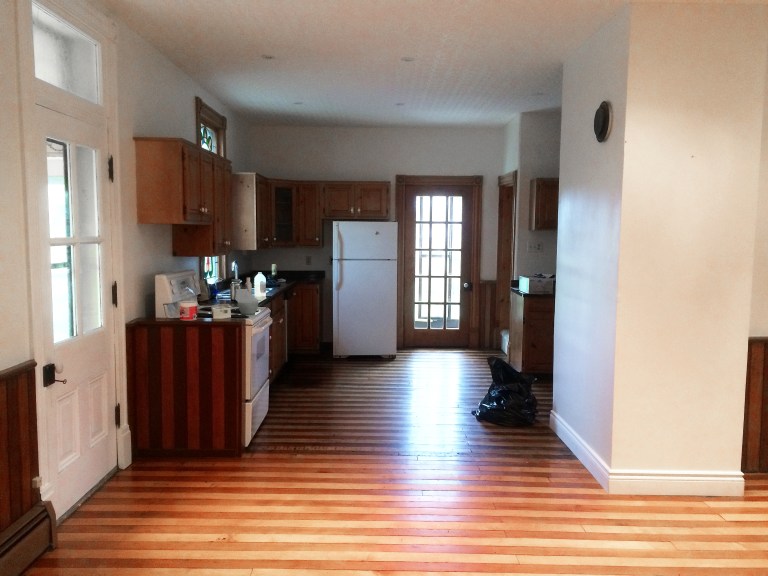
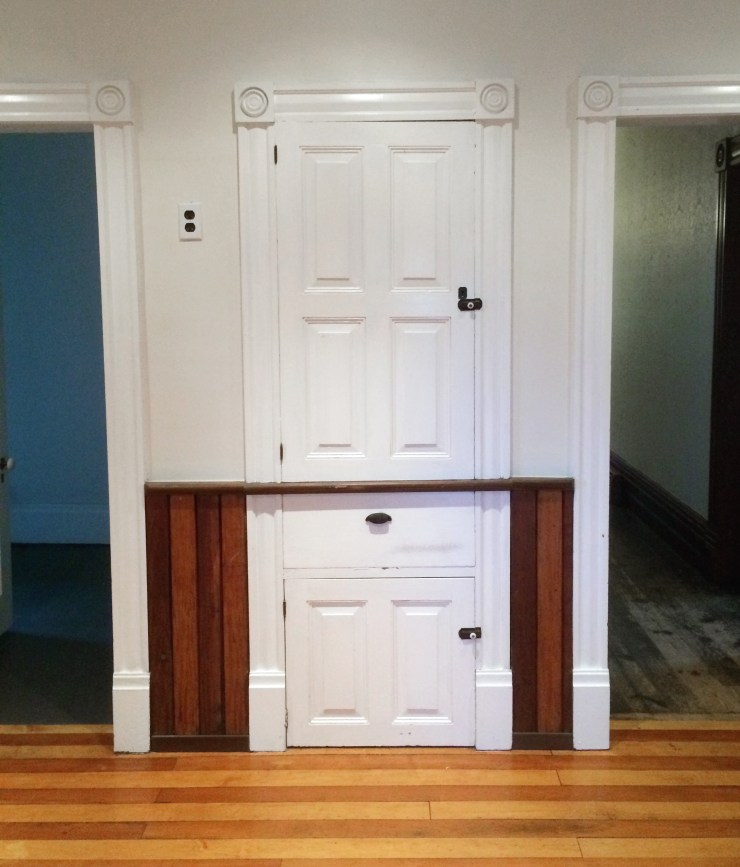
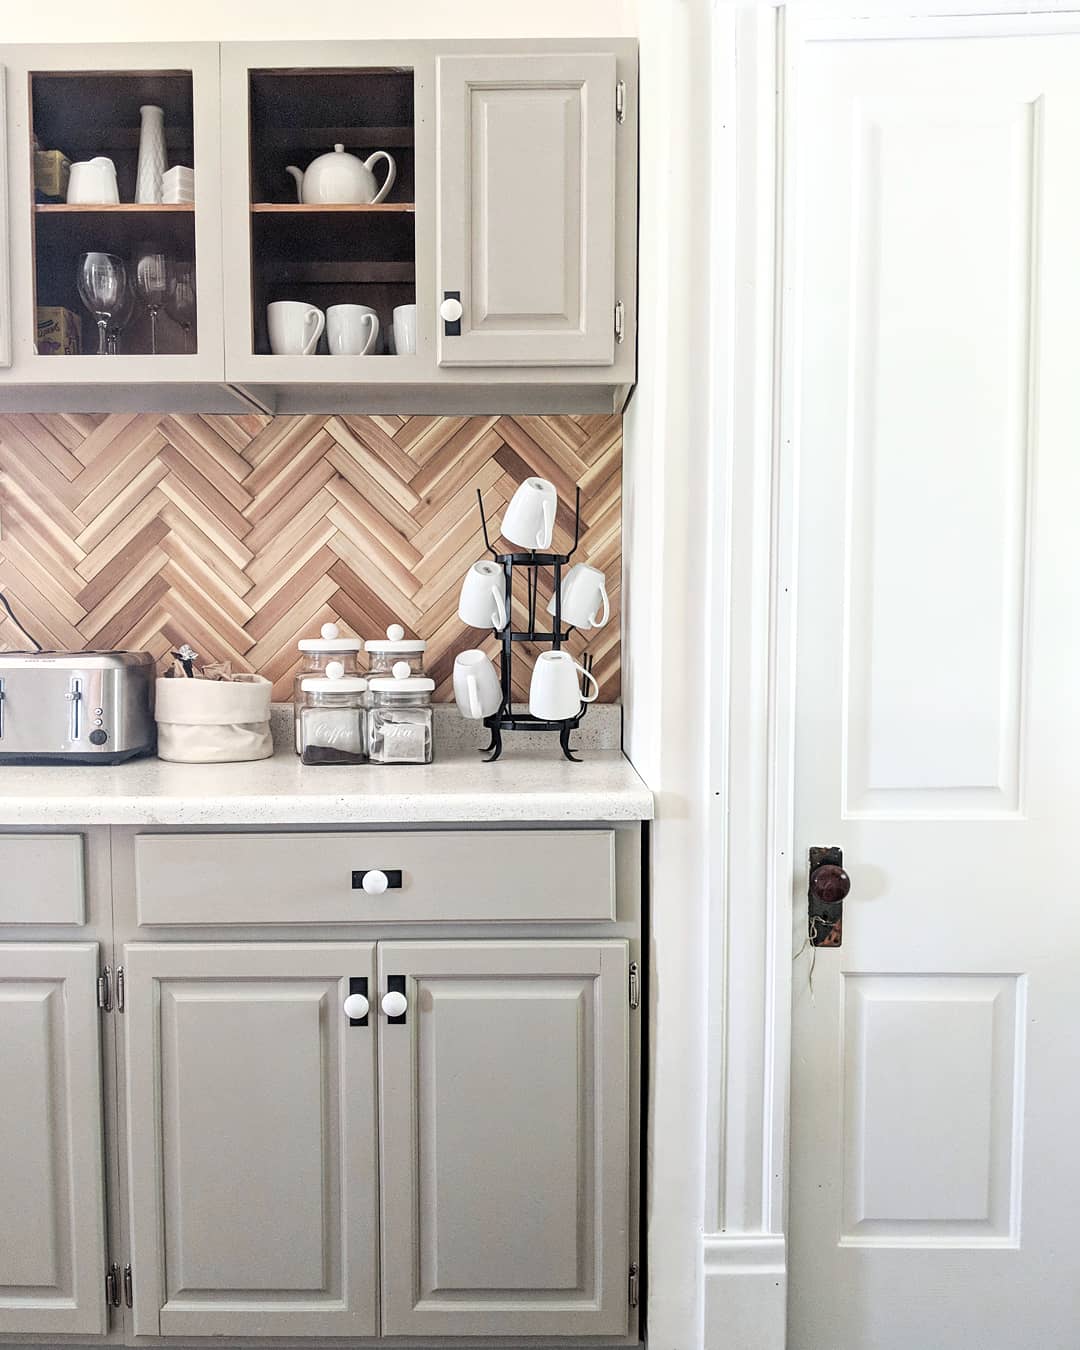
Overhauling this room really came down to painting the cabinetry, removing the stained glass window, painting the beadboard, a countertop refinishing kit, and installing some really nifty features like the herringbone cedar shim backsplash and open shelving.
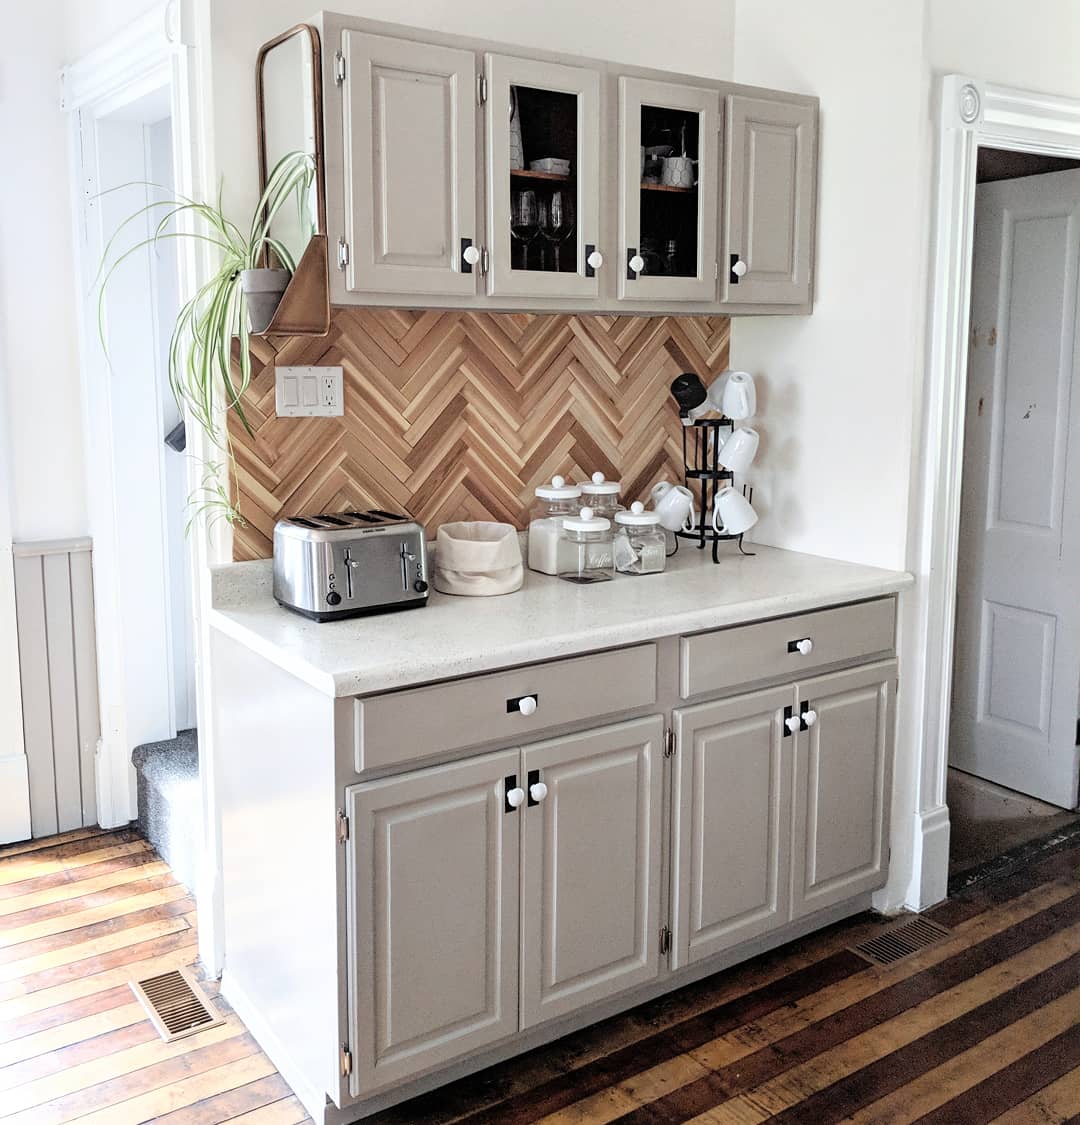
The cedar shim backsplash is the coolest and cheapest part of this kitchen makeover. It was accomplished in a morning with $30 worth of cedar shims and a nail gun.
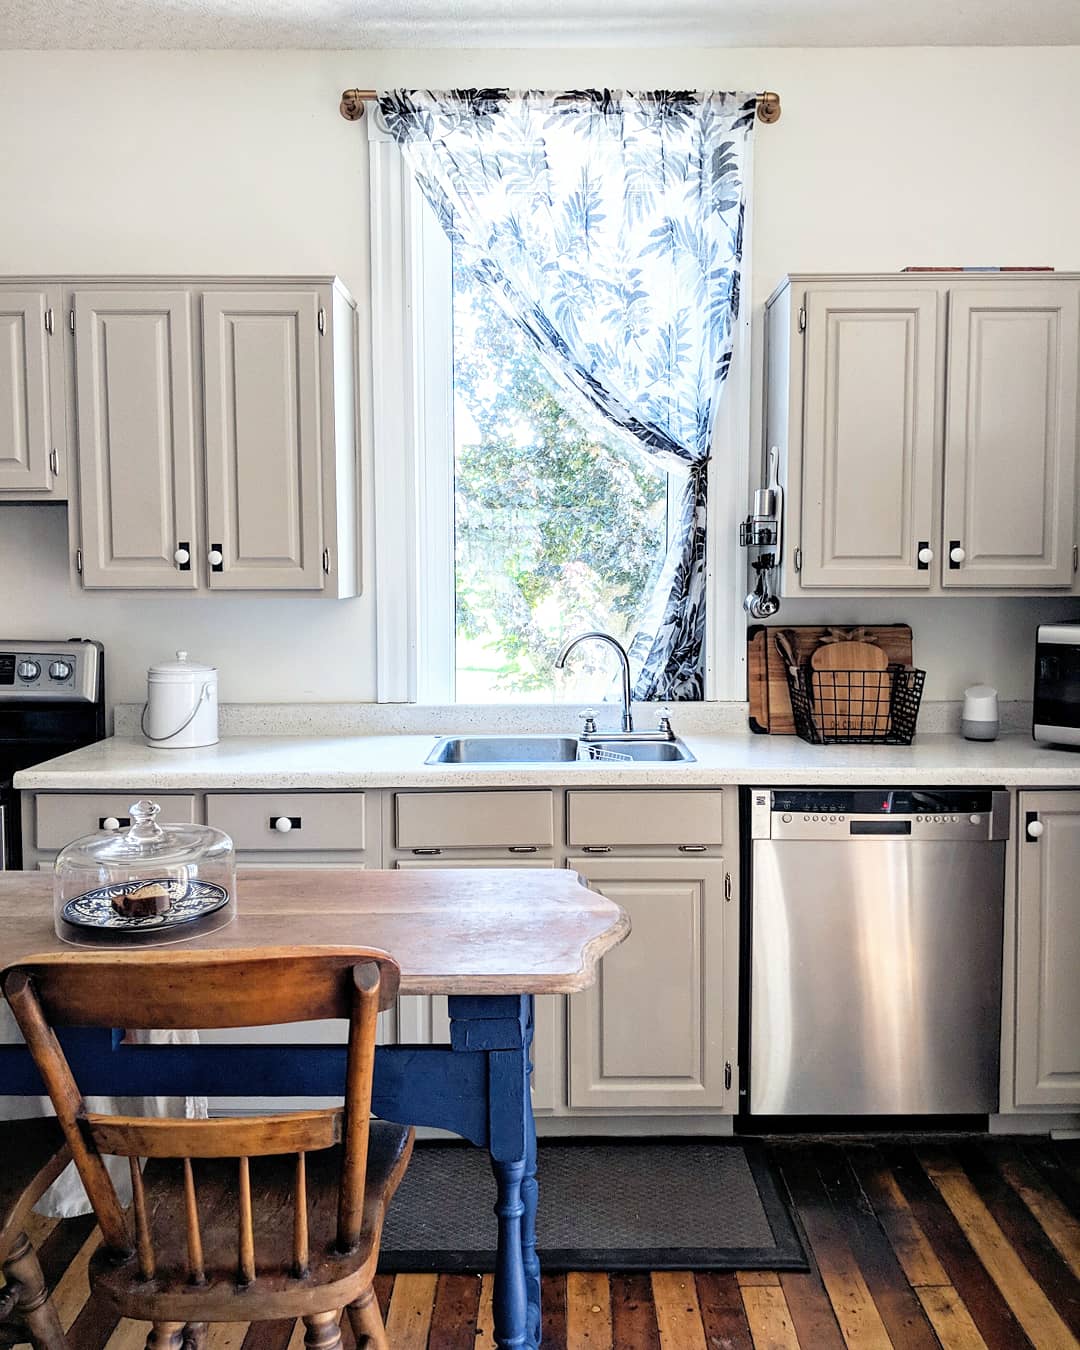
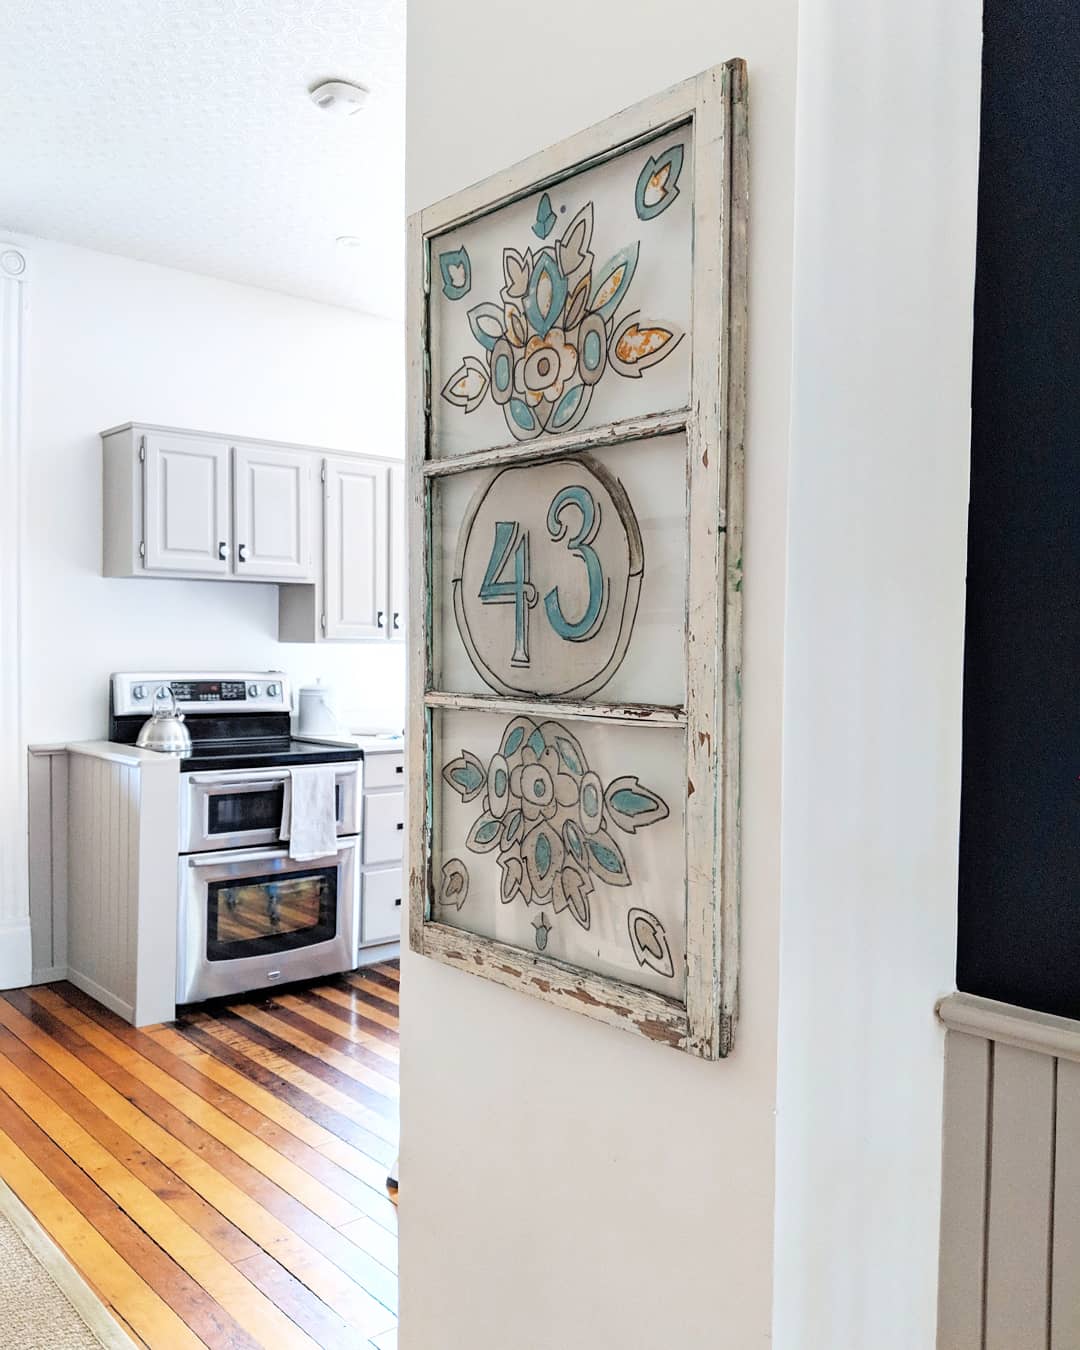
THE AFTER
-
Vintage Glam for a Little Lady
When I was still on bed rest for my injuries I posted a mood board with inspiration for a bedroom refresh for our daughter. In the end I did give her room a makeover, but went another direction.

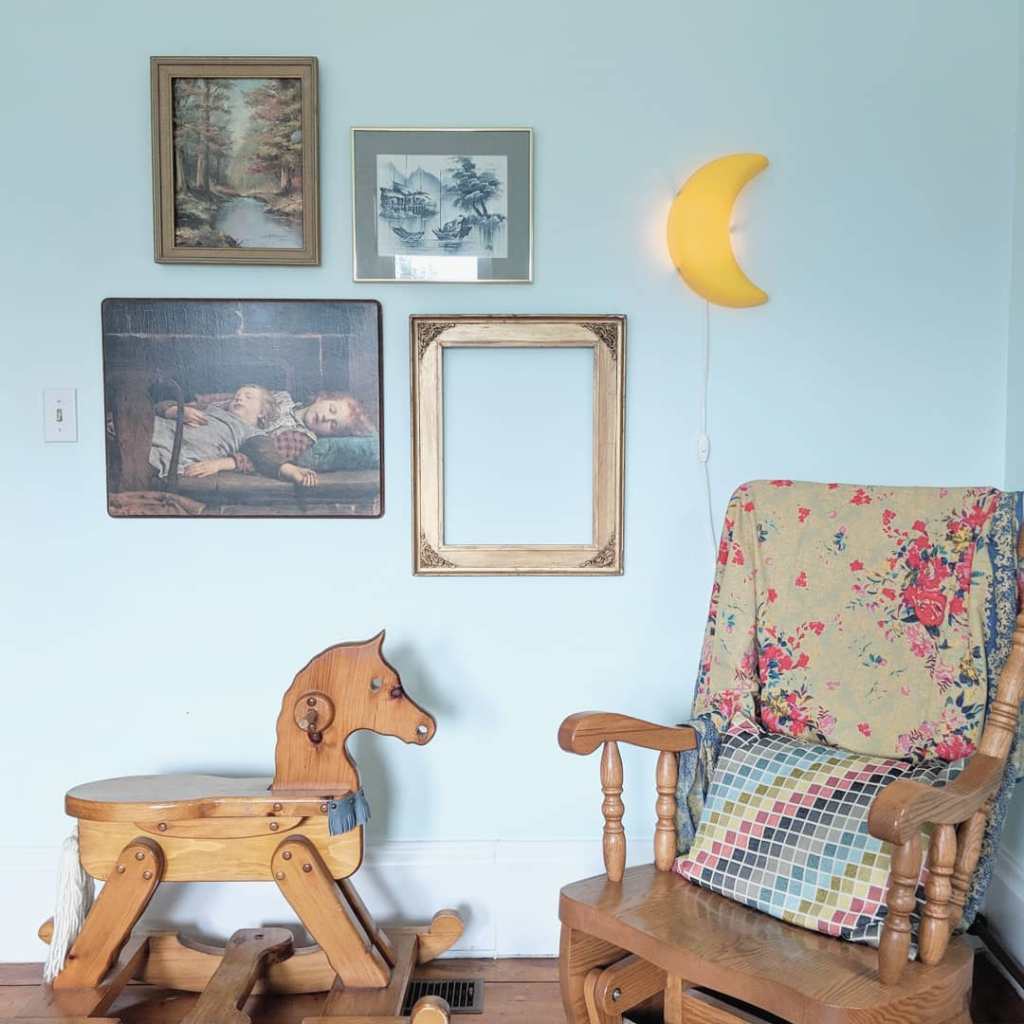
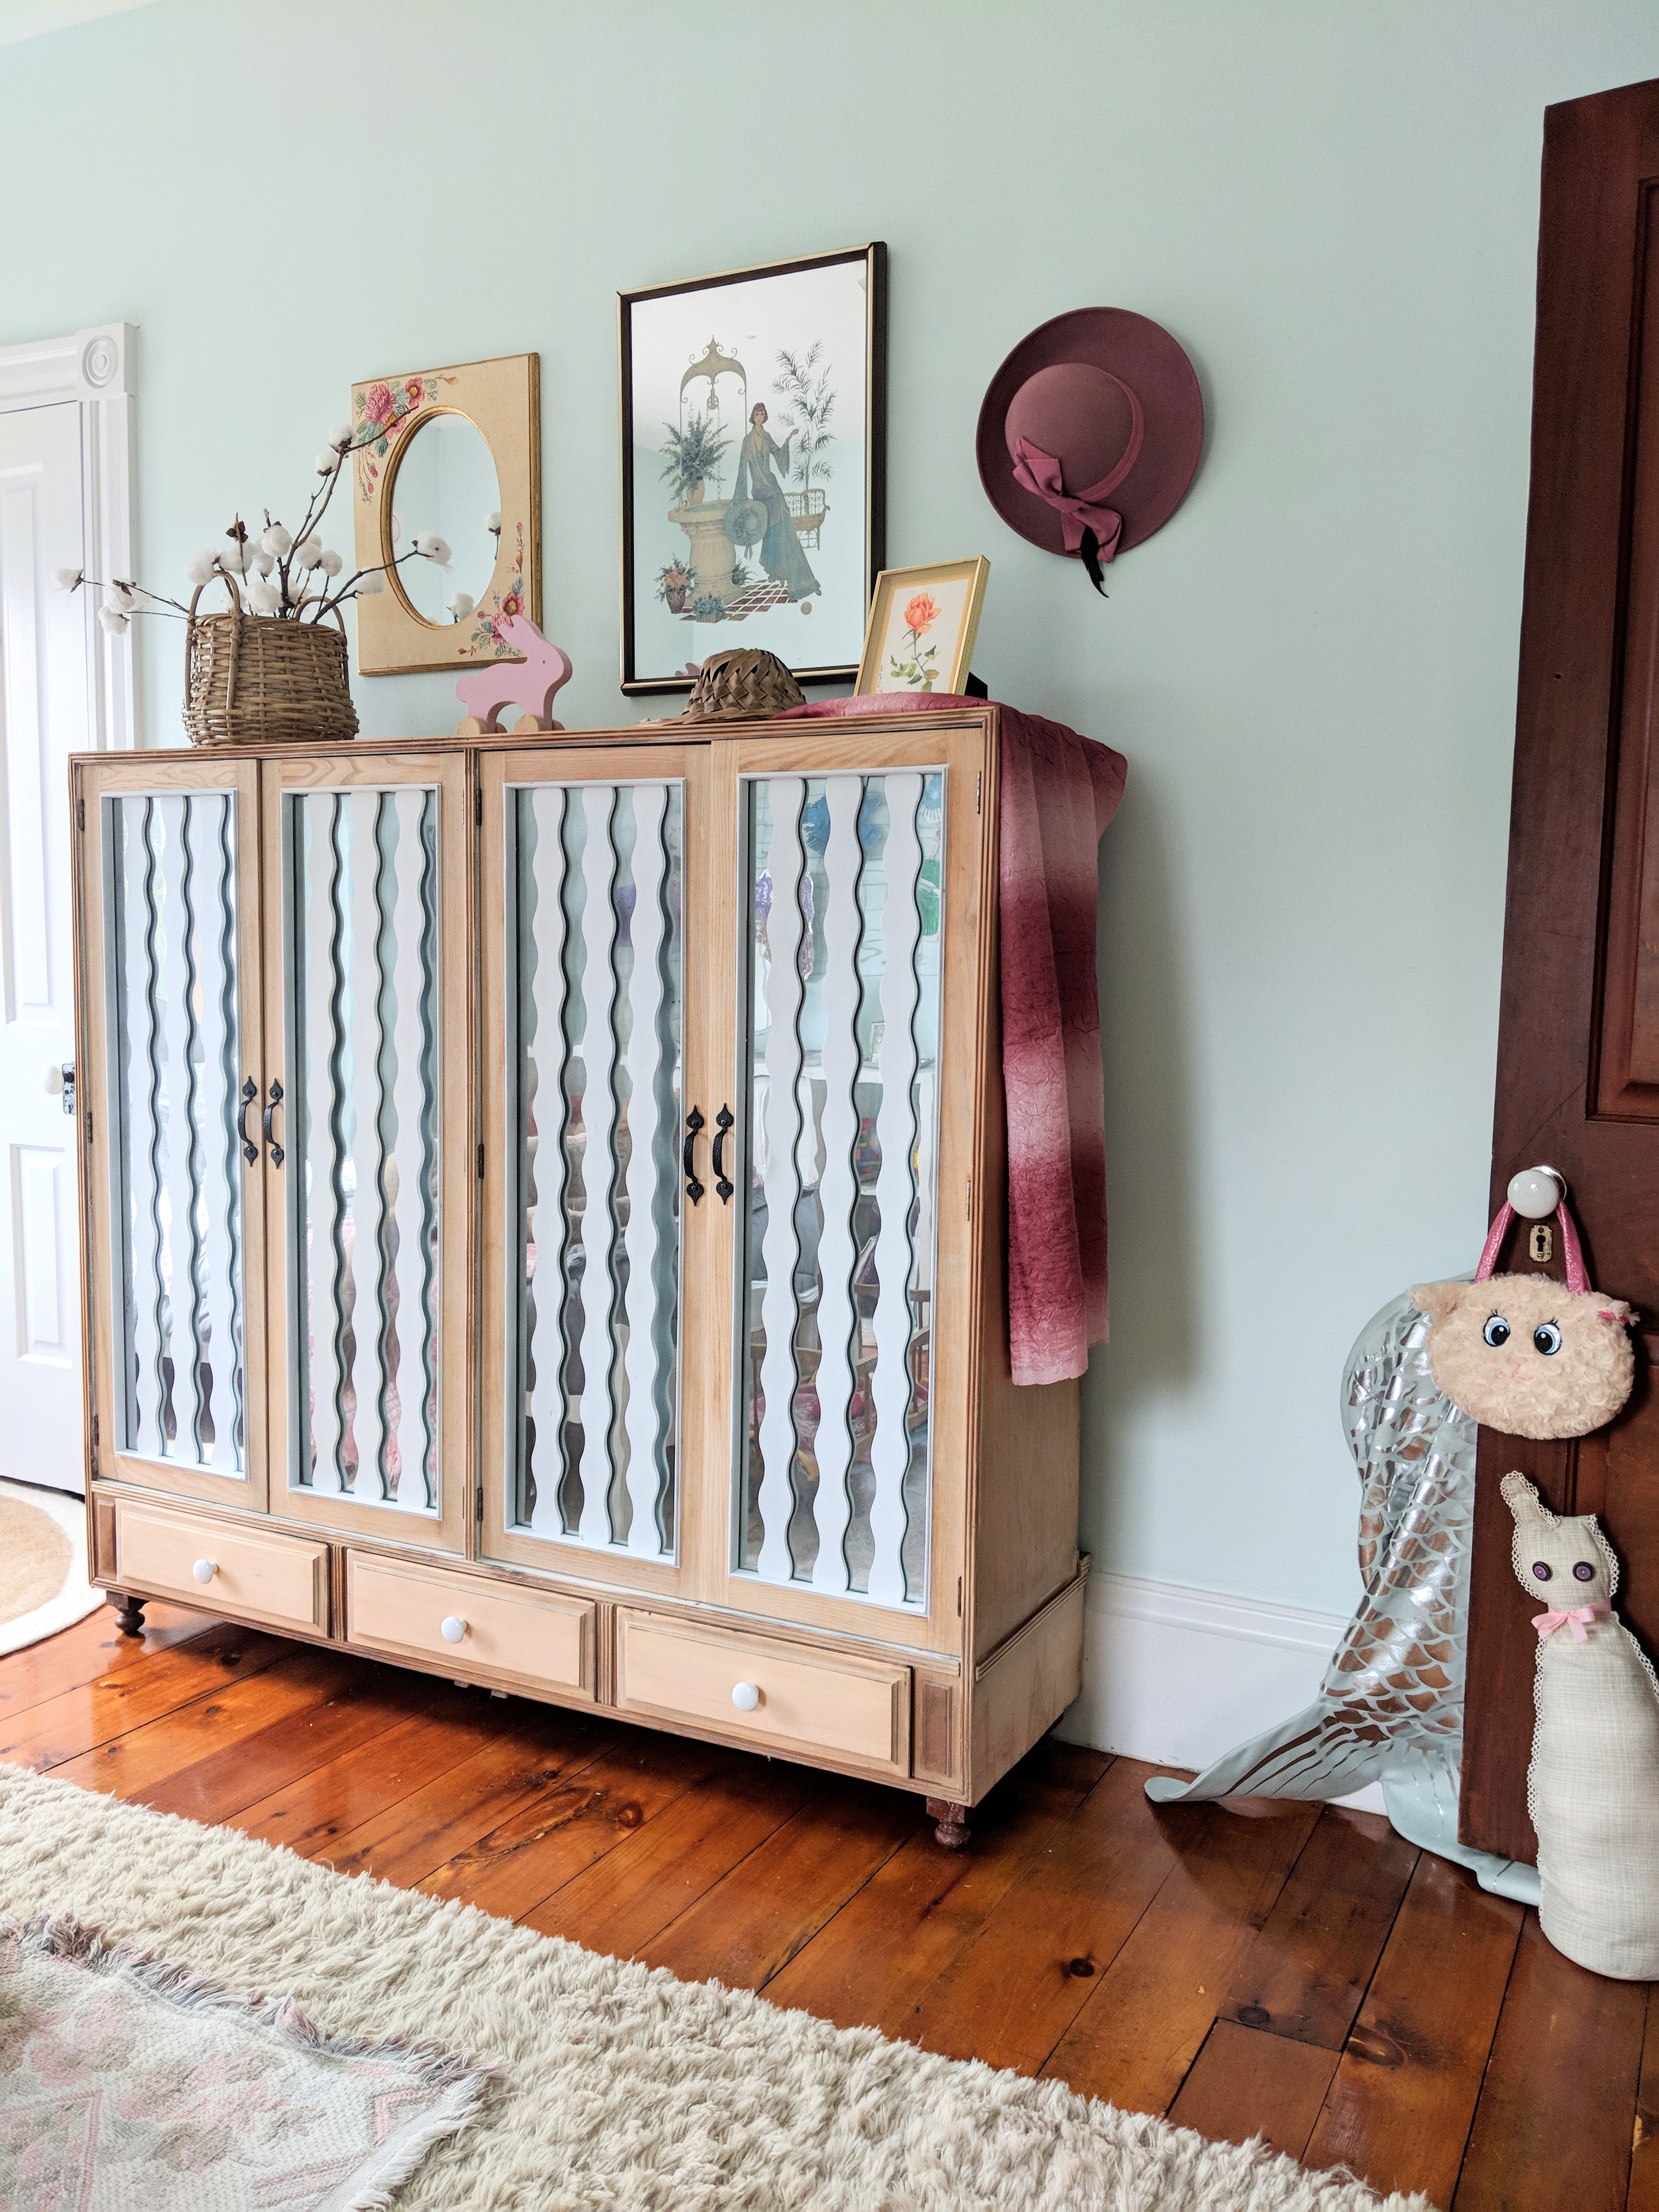
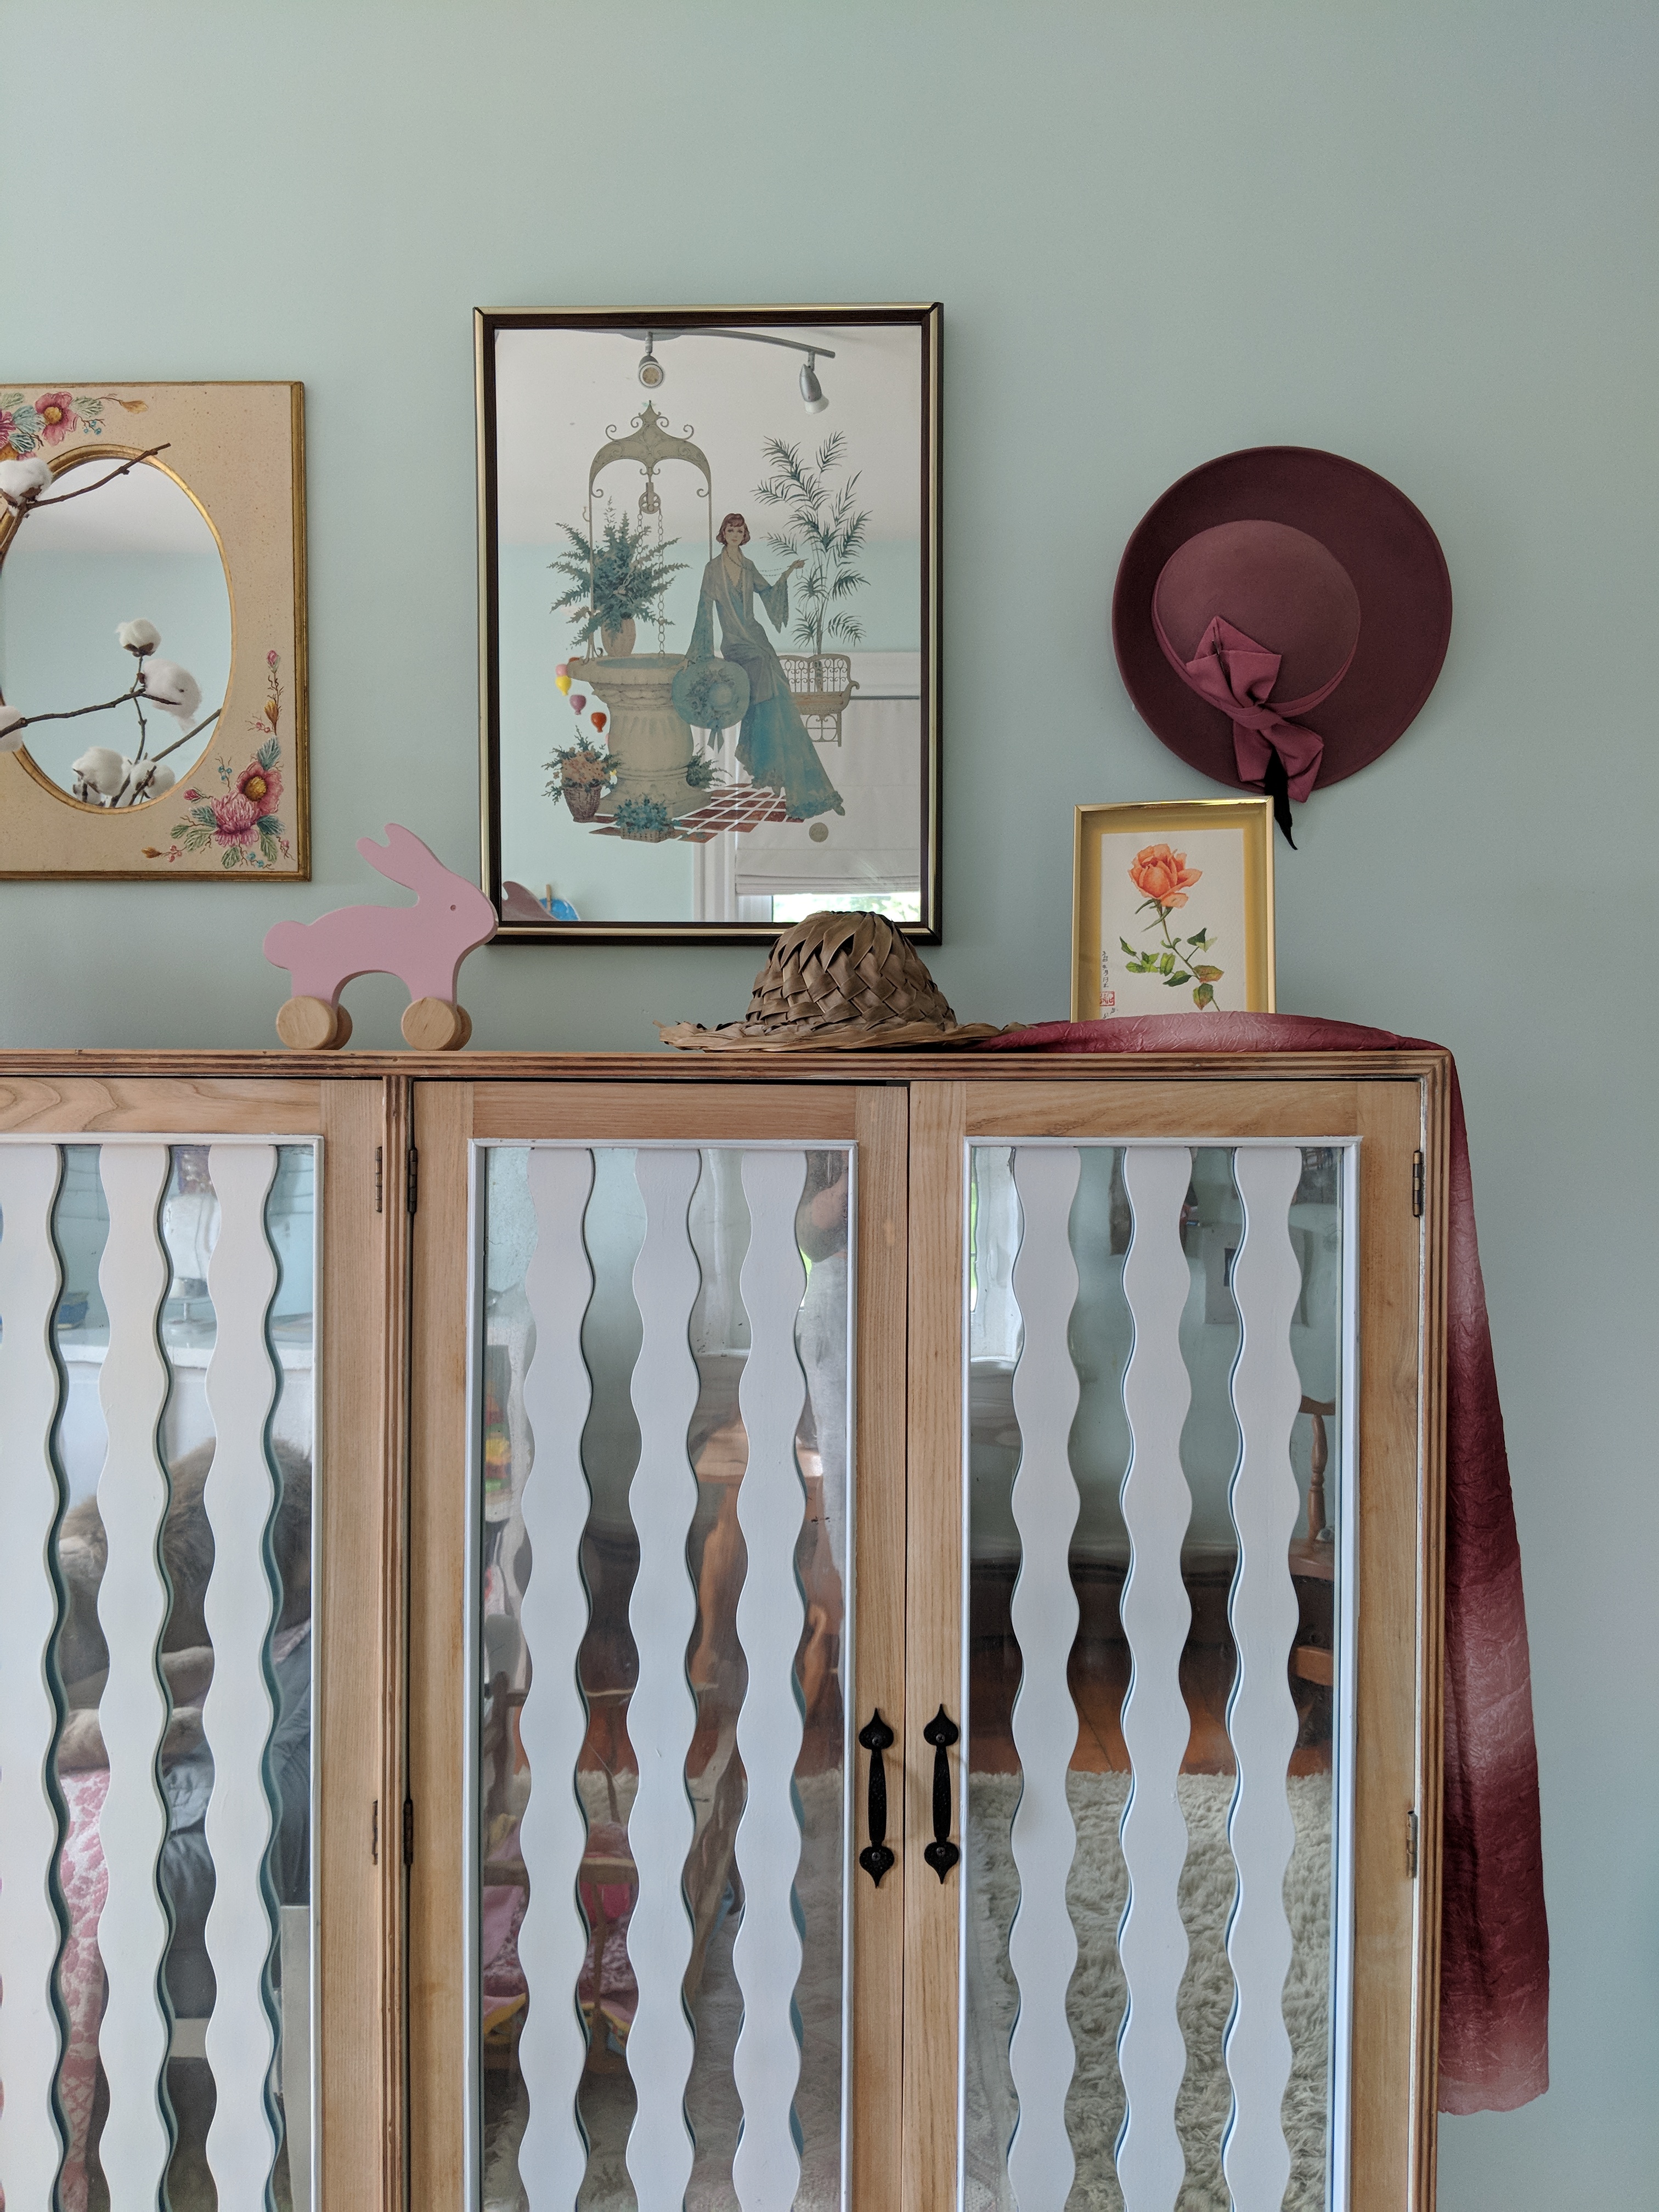
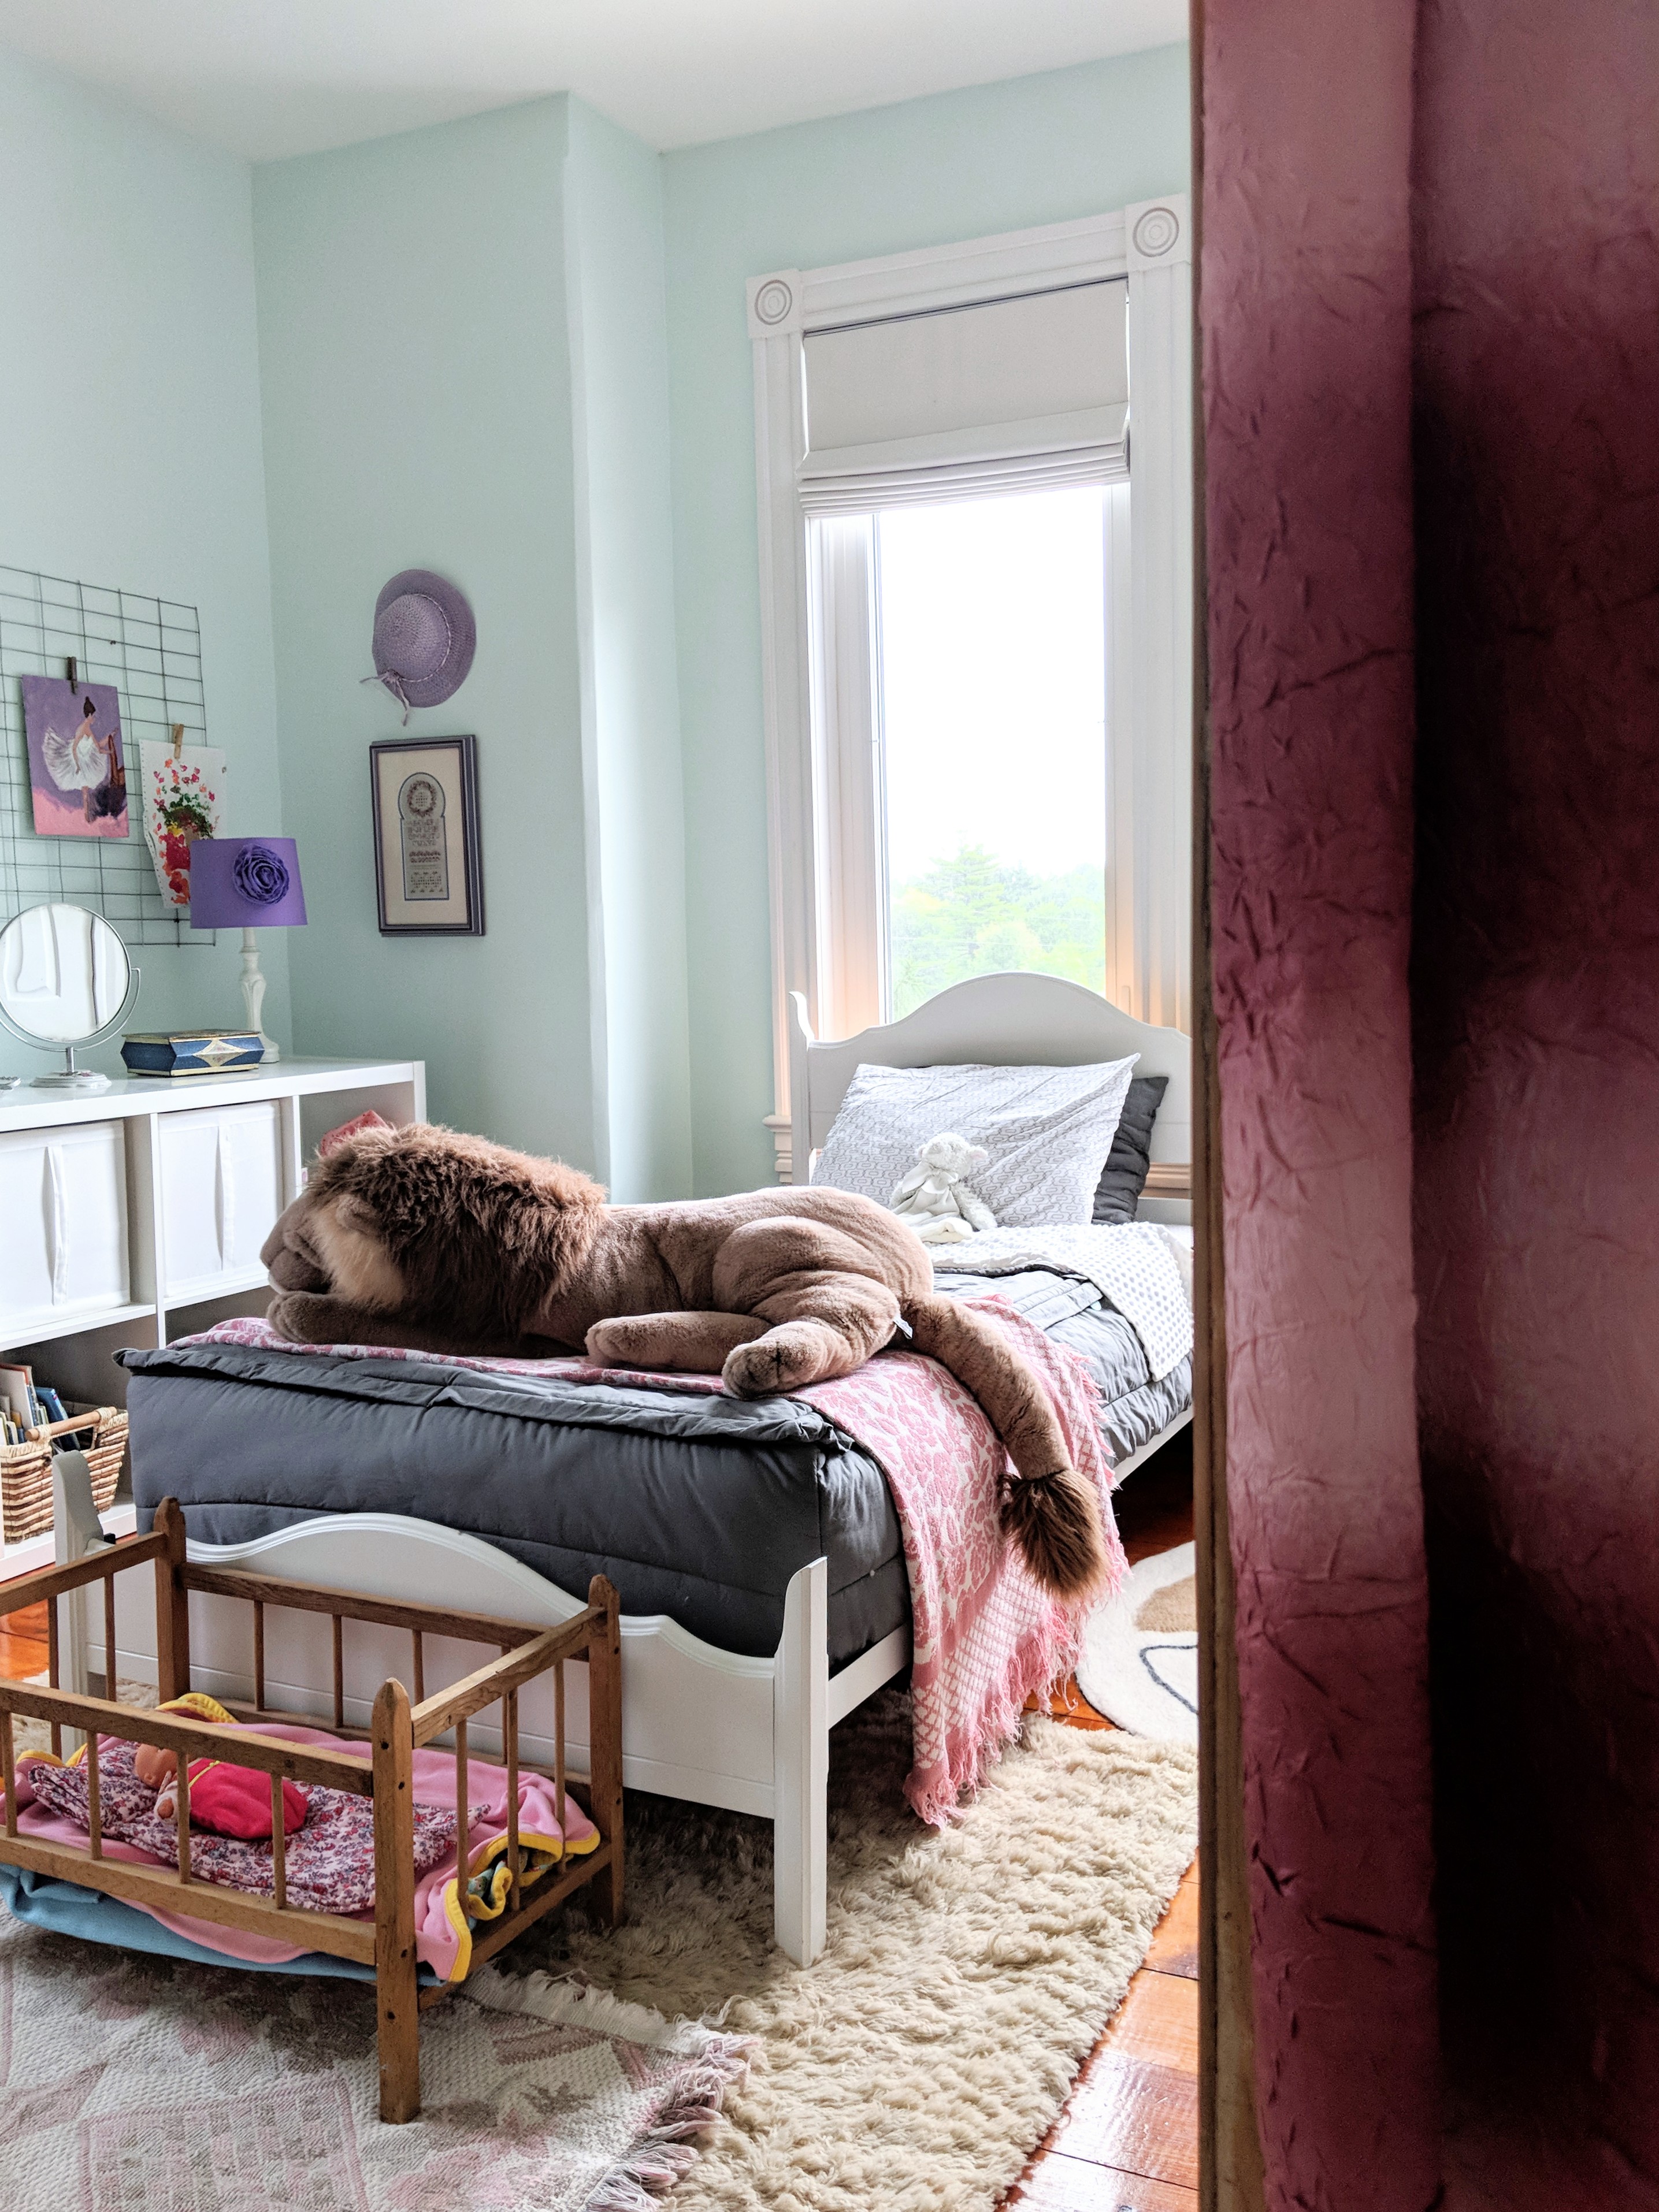
I decided that it would be fun to do an entirely thrifted room makeover and went with a vintage glam theme instead. The vintage glam look just seemed to speak more to the age and character of the house and it was so much fun to source colourful vintage finds.
Just for a reminder here is her bedroom before.
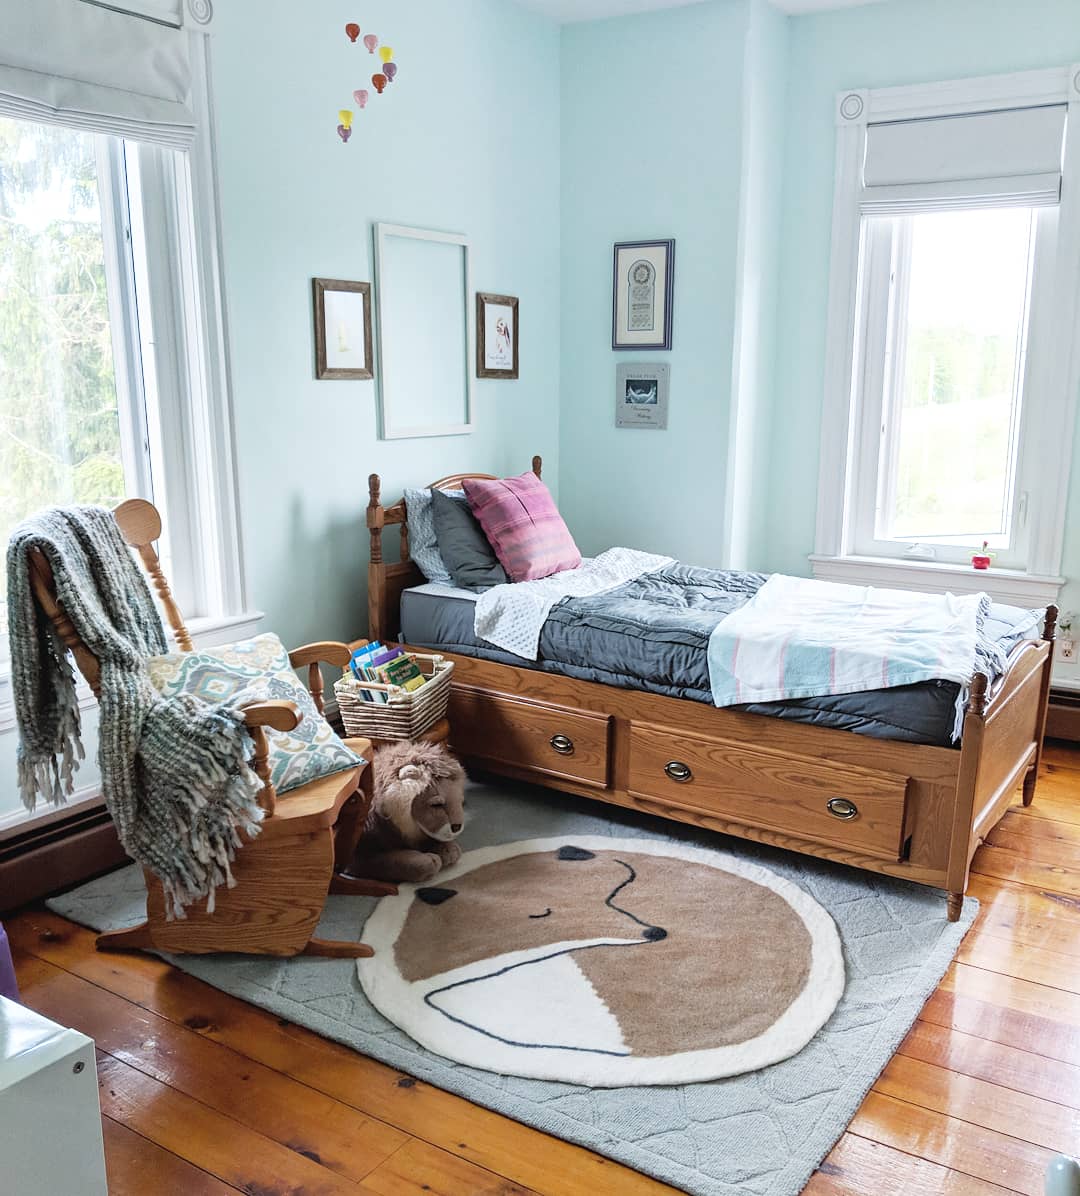
I hit up a lot of thrift stores often to make sure that I was finding all the best goodies for my daughter. My top five finds included a $10 white bed, a free vintage wardrobe, a pink velvet hat, a vintage wood plaque of two sisters sleeping, and some vintage blue tins.
-
Boho Beautiful at the Lynwood Remodel by Studio McGee
Did you ever read The Tig? It was a lifestyle blog by Megan Markle before she got herself all engaged to a royal. I wrote this feature for her on a stunning boho style living room makeover by Studio McGee (and if you haven’t heard of them just get out of here now). I still love this space and the design is still relevant, but The Tig is now shut down, for shame.

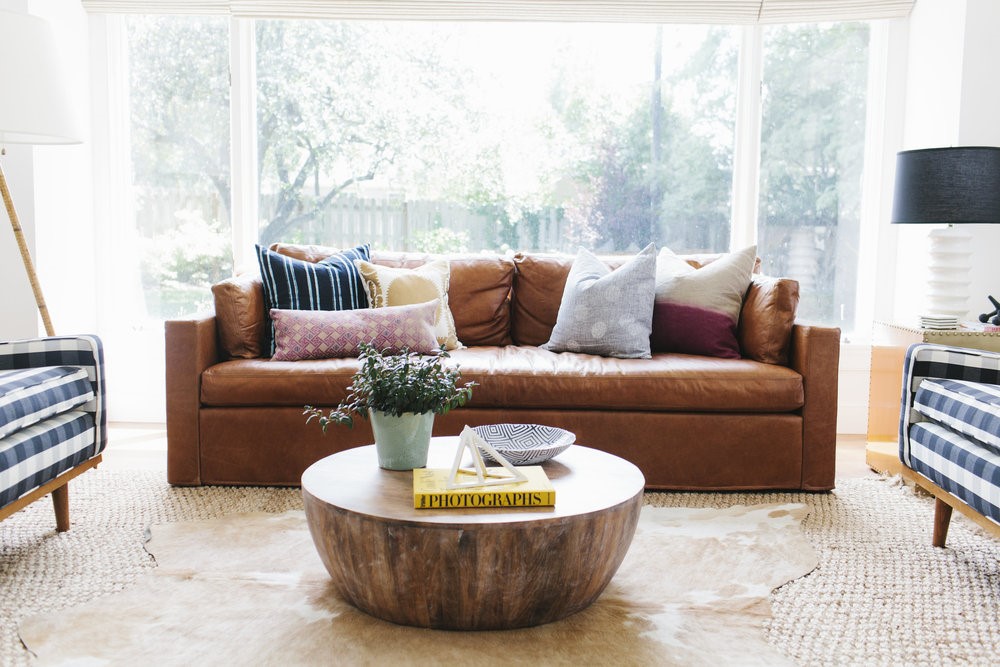
This colorful boho style family room by Studio McGee makes me want to kick back with friends, flip on a record and dig into some take-out. Husband and wife team Syd and Shea McGee turned to a mixture of natural woods, metals, textiles and patterns to bring this modern room with a fun bohemian undercurrent to life. If you’re swooning over this space as much as I am, read on for some tips on how you can accomplish this look in your own living room.
1: Layer Area Rugs
Layering rugs is a chic and clever way to add depth and texture to a room without breaking the bank. If you haven’t heard of this design trick that will keep your pocket book happy then let me let you in on the secret. Because extra-large area rugs can come with a hefty price tag, layering a smaller expensive rug over a larger budget-friendly rug will help fill a space without blowing your budget. Here a natural fiber rug (like jute or sisal) creates a neutral backdrop against the more interesting cow hide.
2: Add Shapely Table Accents
Geometric shapes are continuing to influence design trends, as we keep up our love affair with mid-century modern inspired style. A large prism on the coffee table and a fun geometric patterned bowl are great examples. Don’t overpower a table top with too many busy objects though; a few carefully chosen items will keep your space clean and simple.

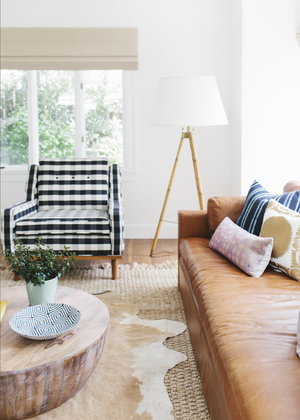
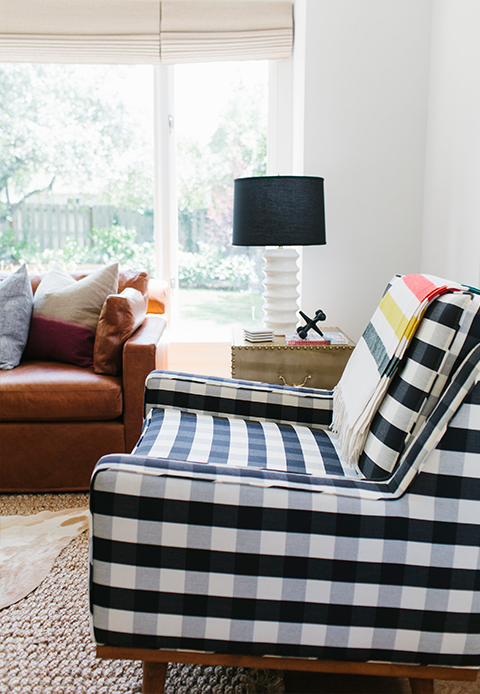
3: Use Black and White (always duh)
Use black and white to give a modern punch to a colorful space. If you are aiming to create a room with rich texture and a bohemian-inspired color palette like this one, the neutral tones of black and white will establish balance. Here the designers amped up a plaid occasional chair by using a stark contrasting buffalo check pattern, and balanced the warm tones of the wood and gold tabletops with a black and white lamp, an oversized black jack, and a white prism.
4: Pick Your Pillows
Selecting the right accent pillows can transform more than just your couch. In this space Studio McGee played off the gold and black in the décor accents, and then added a contemporary splash of pink to sweeten the deal. When shopping for throw pillows I like to bring items I’ve already purchased with me to the store, to ensure the colors and patterns work together. It’s okay to look a little silly.
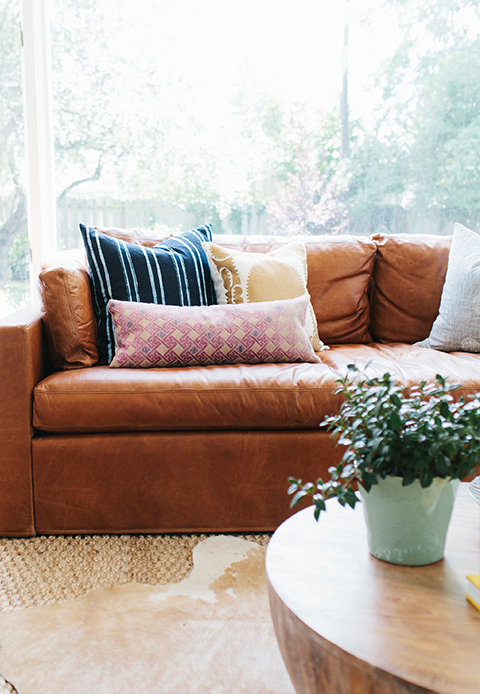
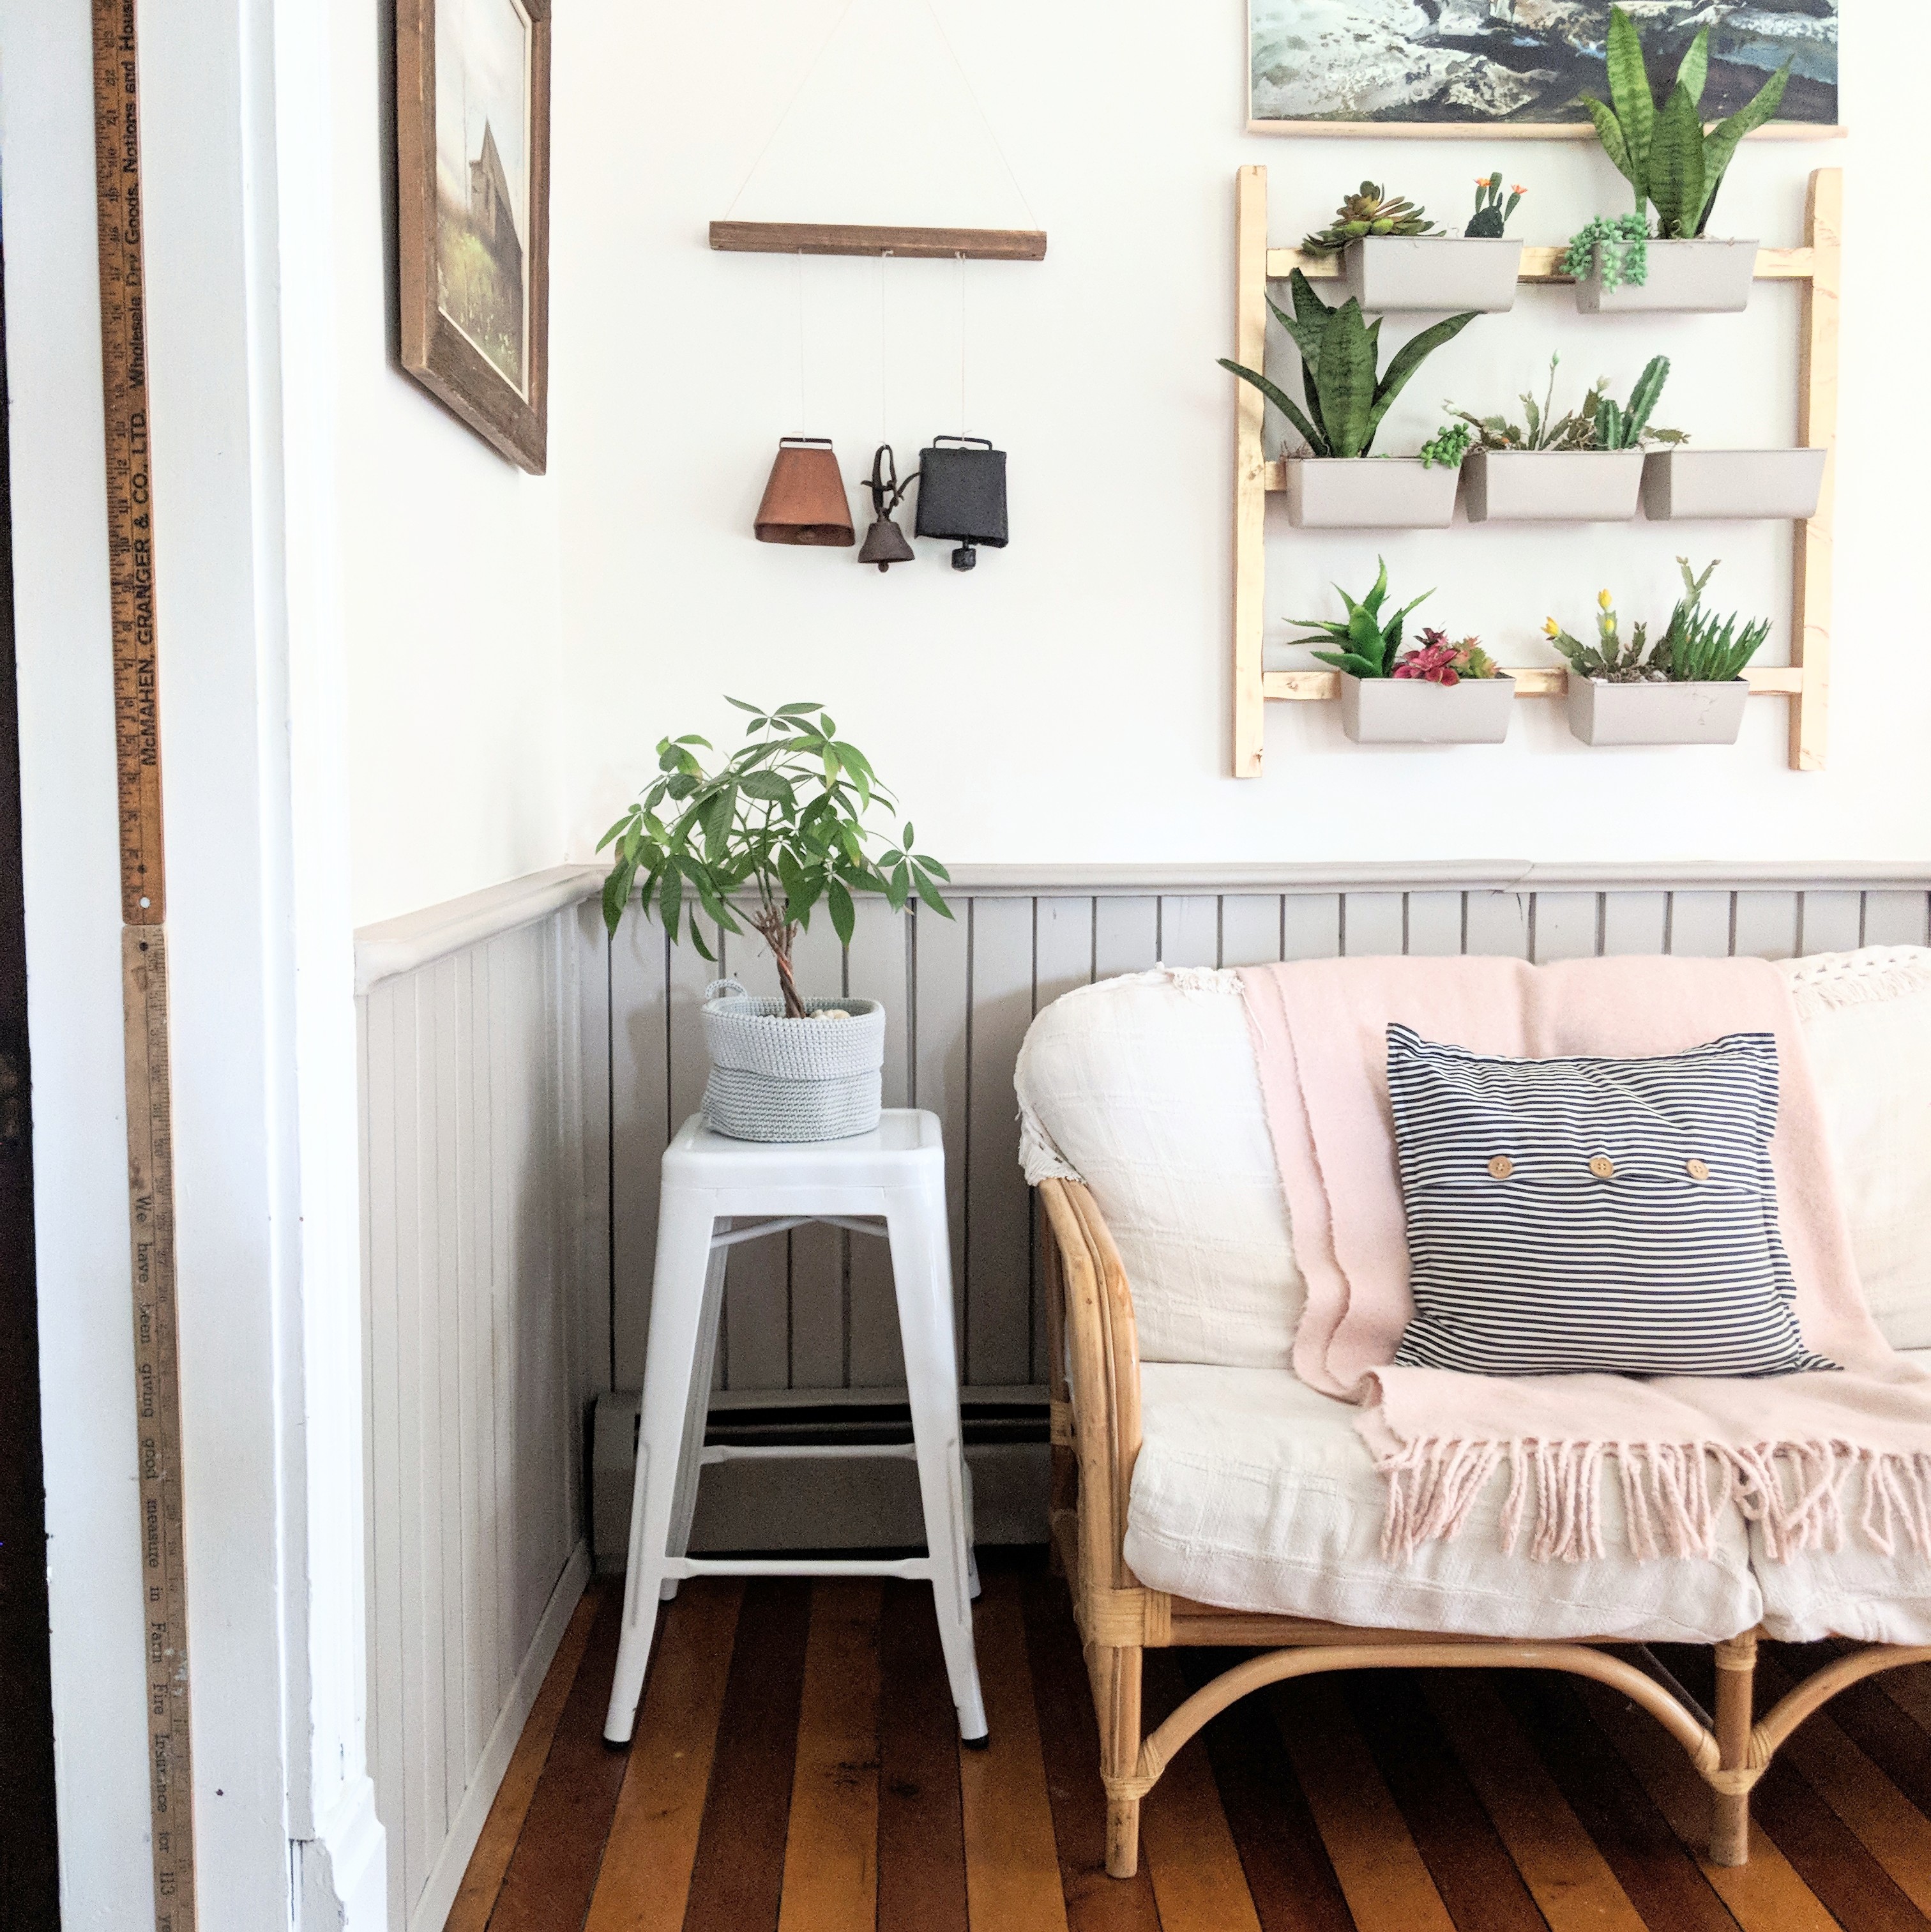
5: Grow a Plant
Greenery is an essential component in a living space and a relatively inexpensive piece of décor. There are so many practical reasons to grow house plants — like oxygen — but adding a potted plant also makes a room feel lived in and more casual. Make sure to pick a house plant that is easy to care for and needs light appropriate to the room. Remember: perfecting your boho style is more about plants than anything else. Boho style spaces are plant happy homes.
Photography by Becky Kimball