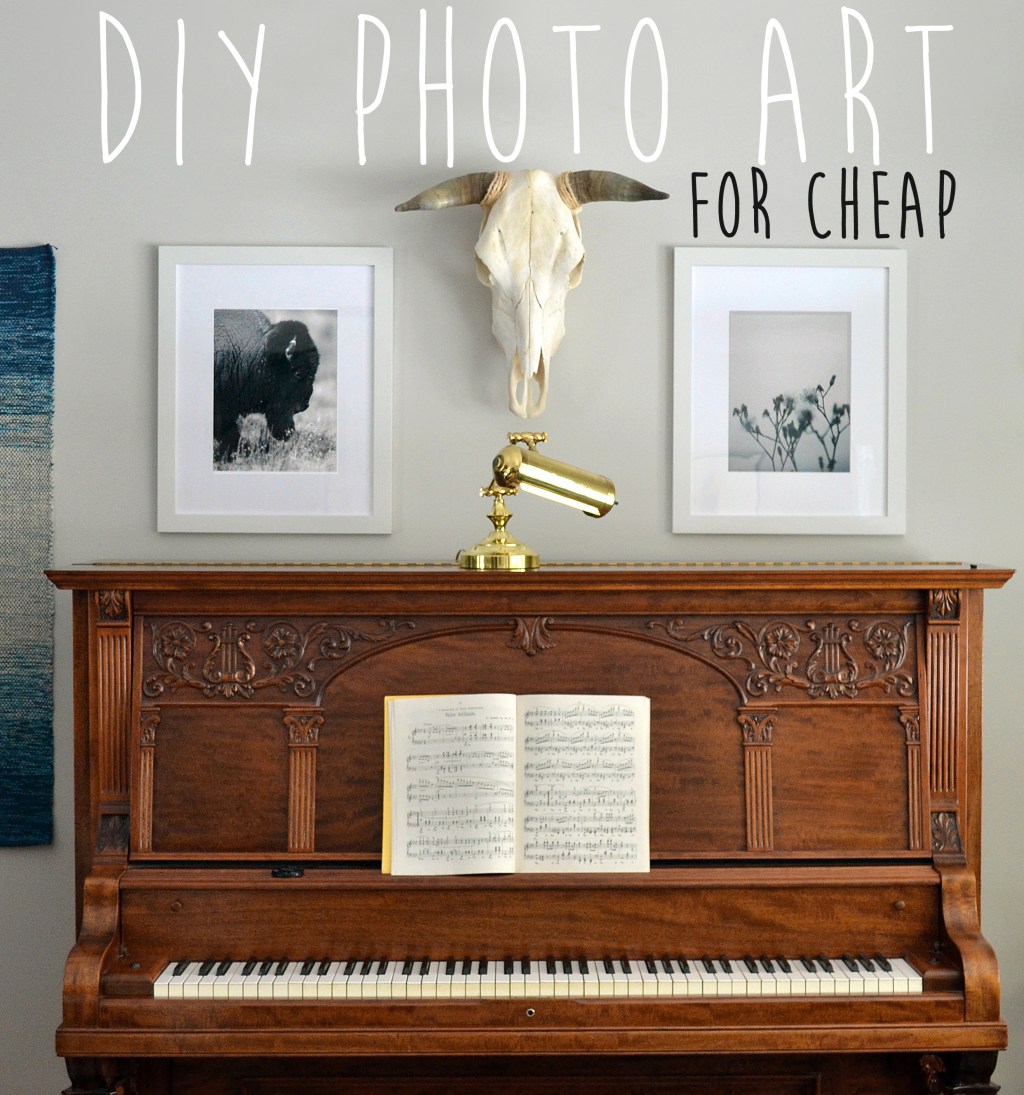
Art makes or breaks a wall. You know what I mean? But, it’s expensive. I’m not trying to give the impression that art has to be unattainable in cost, because it doesn’t, but buying a large piece of photography from a gallery, framed, is not going to be $35. This is my tip of the week: how to DIY photo art for cheap. Basically, you can hang photography in your home for next to nothing and make it look bad ass. All you need is my secret weapon, some nimble fingertips, and a trip to Michael’s.

These are 16×20 frames, matted, with 13×10 photographs on matte paper: $35 each (that’s Canadian, with tax). Compare to Minted for a similar size image: $200 CDN, before tax, before shipping, not matted. Yep. Wasn’t going there today. Now, Minted prints their images on archival quality paper, and I didn’t. This is like Style At Home’s much-loved High & Low Feature. This is the low, Minted is somewhere in the middle, and a downtown gallery is the high.
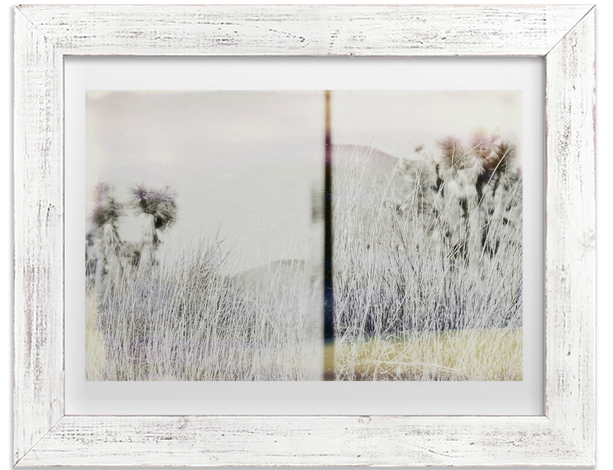
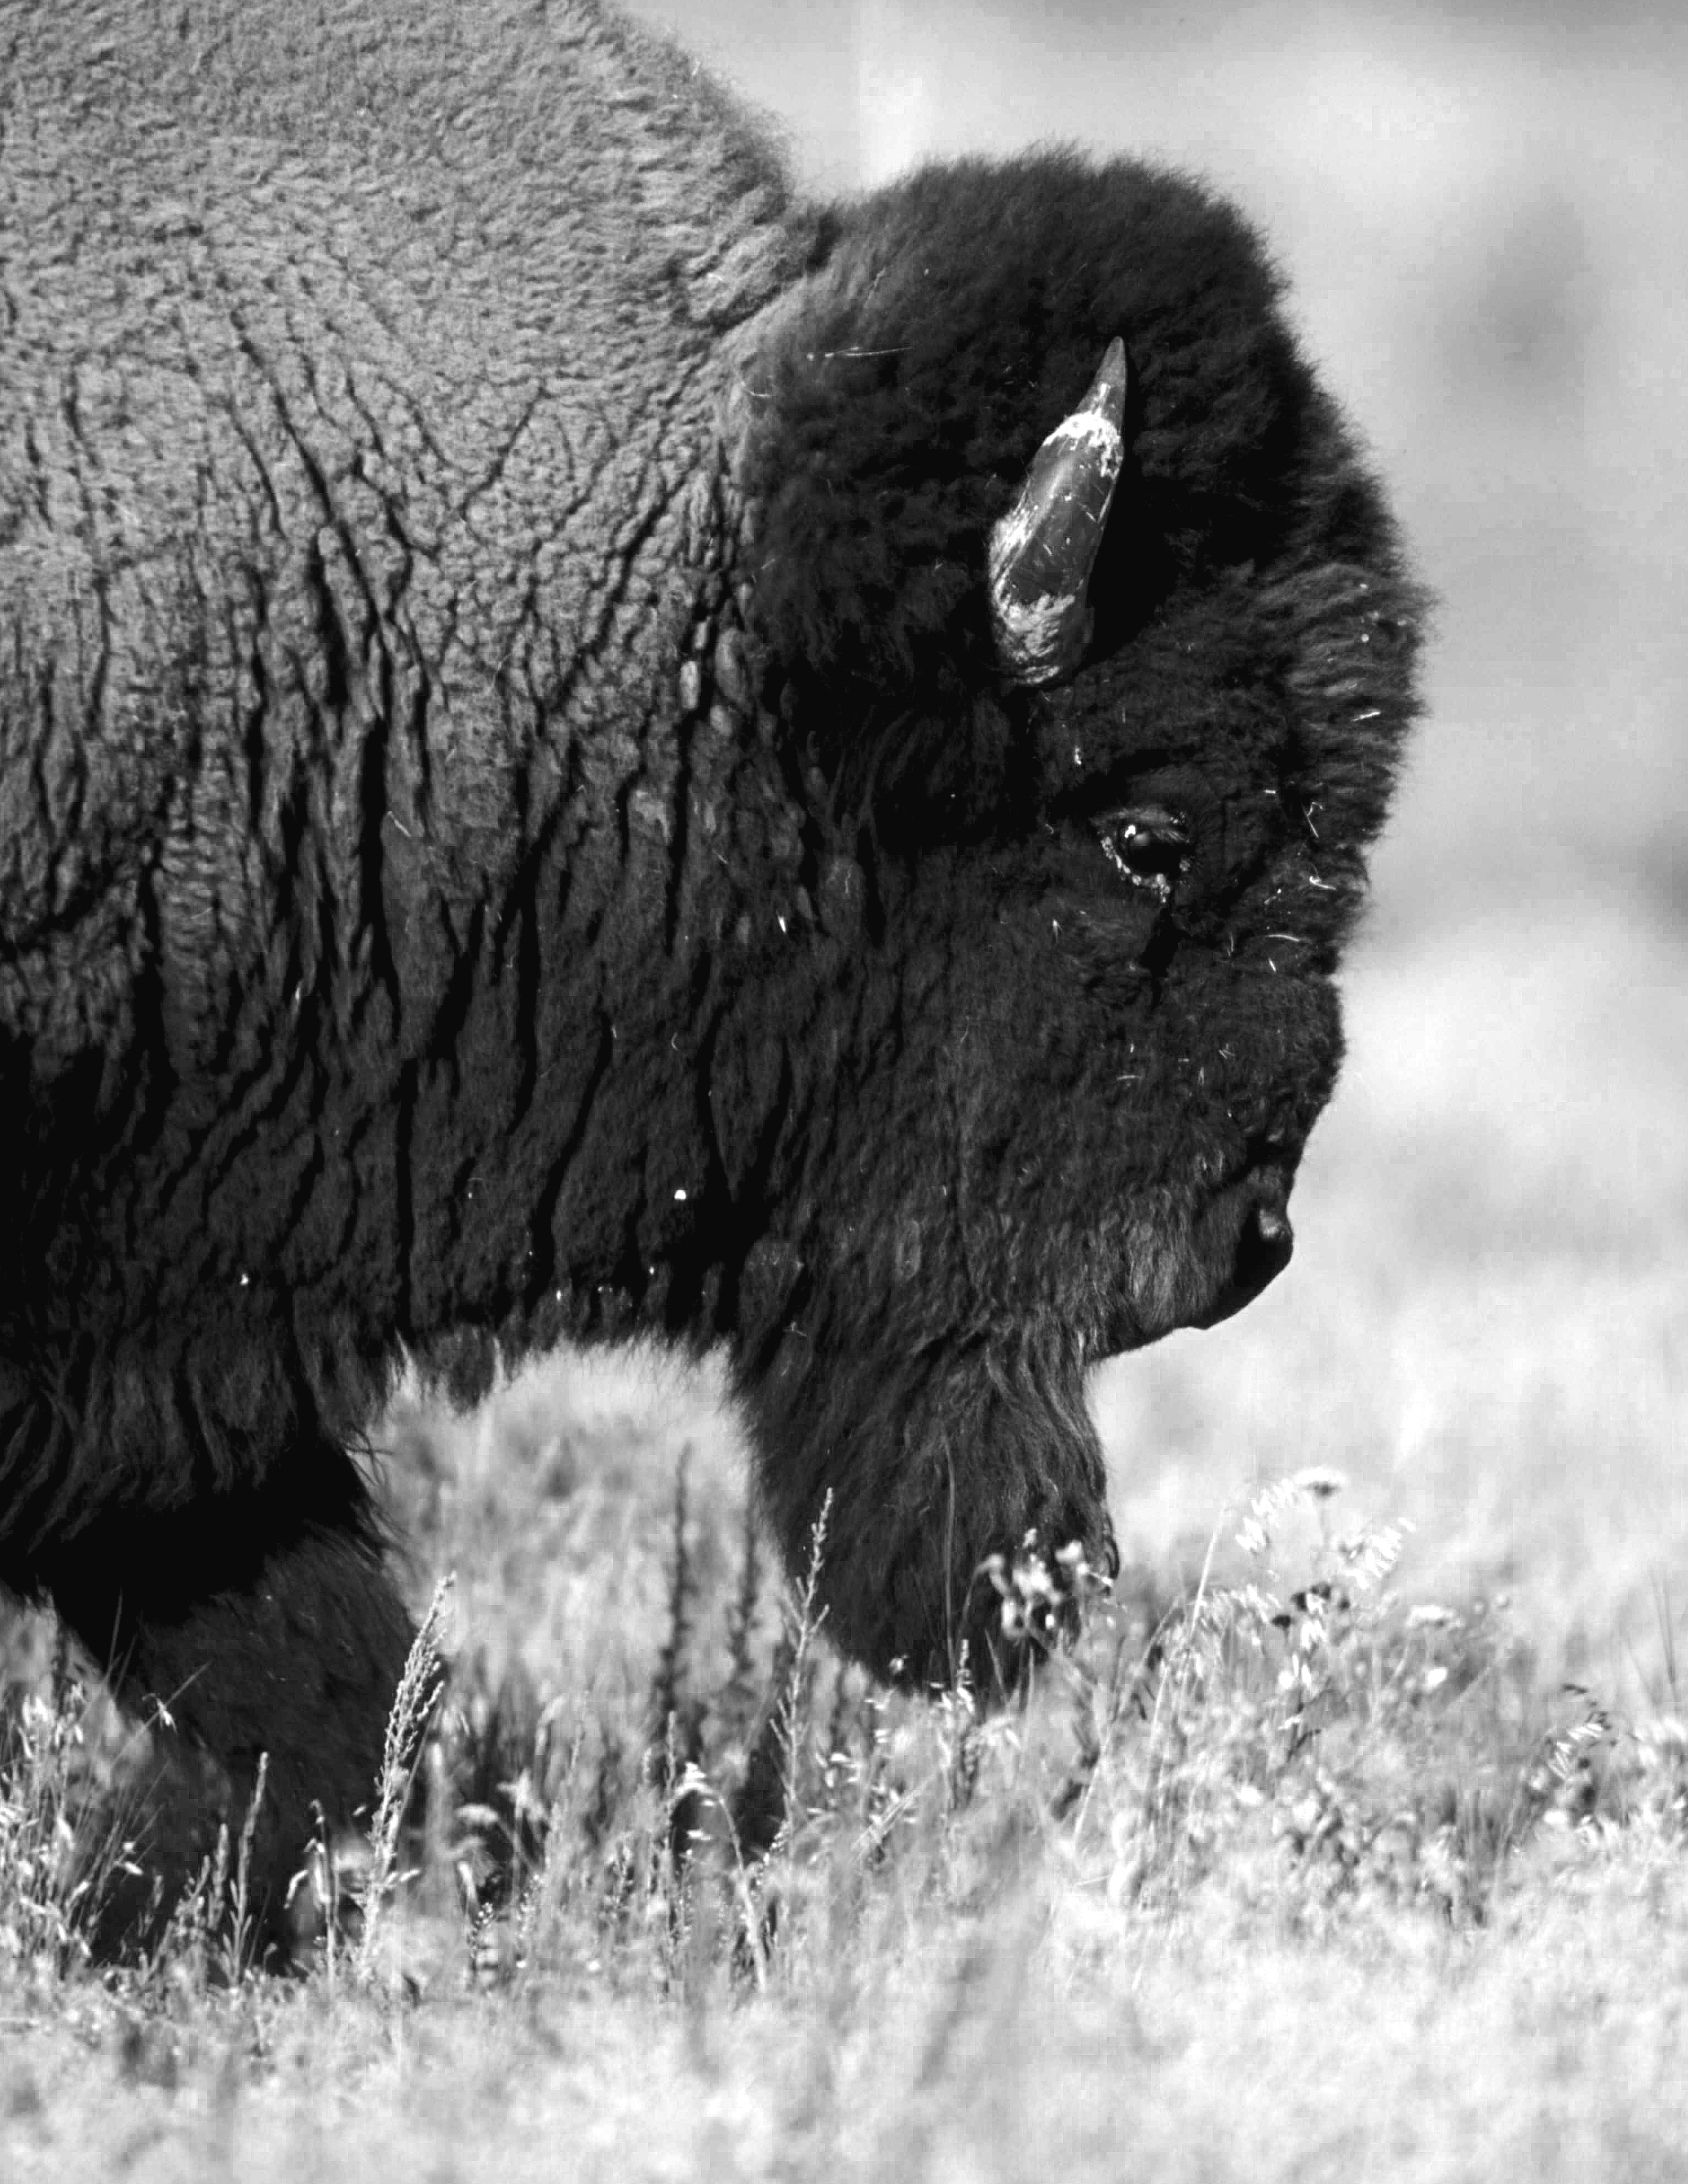
For the record, these were the original inspirations from Minted that inspired me while I was trying to decide what kind of wall art I wanted to put up in our living room. I didn’t even bother Googling DIY wall art ideas, I just shopped for photography as a starting point.
Let’s backtrack. This story starts with our living room wall. It was missing something. It desperately needed some wall art. My pocket book was looking a little thin. Free printables might be all the rage, but I’m more into photography than graphics. I found some nice stuff on Minted and Etsy, but with the Canadian dollar wallowing somewhere near the 9th circle of hell I was getting outside my sphere of sensible real quick. So, I let out a string of expletives, felt a little better, then got to work on my DIY photo art.
Don’t get me wrong, I am all for supporting local artists, for paying people for their work. I am big on that—the paying people thing. I have hand painted art in my home, it’s nice. It cost 10 fortunes to frame. But, it’s nice. Sometimes buying art just isn’t in your budget; maybe you blew it with your outrageous backsplash tile. I did want that backsplash tile real bad.
How To Hang Nice Photography In Your Home For Cheap
Meet Pixabay. Meet Flickr. Meet Unsplash. Meet StockSnap.io, and Negative Space, and the list goes on. Meet the Creative Commons. Now, don’t feel bad. Ditch the guilt baby. People who publish their work in the Creative Commons do it to share their work FOR FREE, for everyone to enjoy, and yes, even so that you can make your own DIY photo art. Note: If you are searching for images on Flickr you will need to put “creative commons only” into your advanced search preferences.
1. Decide On Your Frame and Matting Size
You need to know what size frame you are going to use and what size mat before you print, or even search for images. You don’t have to buy your items now, but make sure you decide on what sizes you are going with.
Tip: Don’t scrimp on the mat; basic white mats are inexpensive and they will elevate the look of your art. I cannot emphasize this enough! Putting a white border around your image is not the way to go when you are talking about saving $5-$10. It will look cheap without a mat.
2. Check Your Image Sizes!
I would say nearly 100% of the images on these websites are at least big enough for a 5×7 image at print quality (300 dpi), in an 8×10 matted frame that’s a decent size. If you want to go bigger you will need to reference that in your search preferences. Not all of these websites offer that advanced search function, but Pixabay does and it’s where I found my images. You can find out what the minimum pixel dimensions you require are by opening Photoshop (or your image processing program of choice) and create a new file. Put in your physical dimensions (in my case 10″ x 13″) and then change the drop-down menu to “pixels”. Make sure you have the resolution field set to “300” NOT “72”, because that’s what you will print at. As you can see I needed to find an image that was at least 3000 x 3900 pixels.
3. Scout Out Images
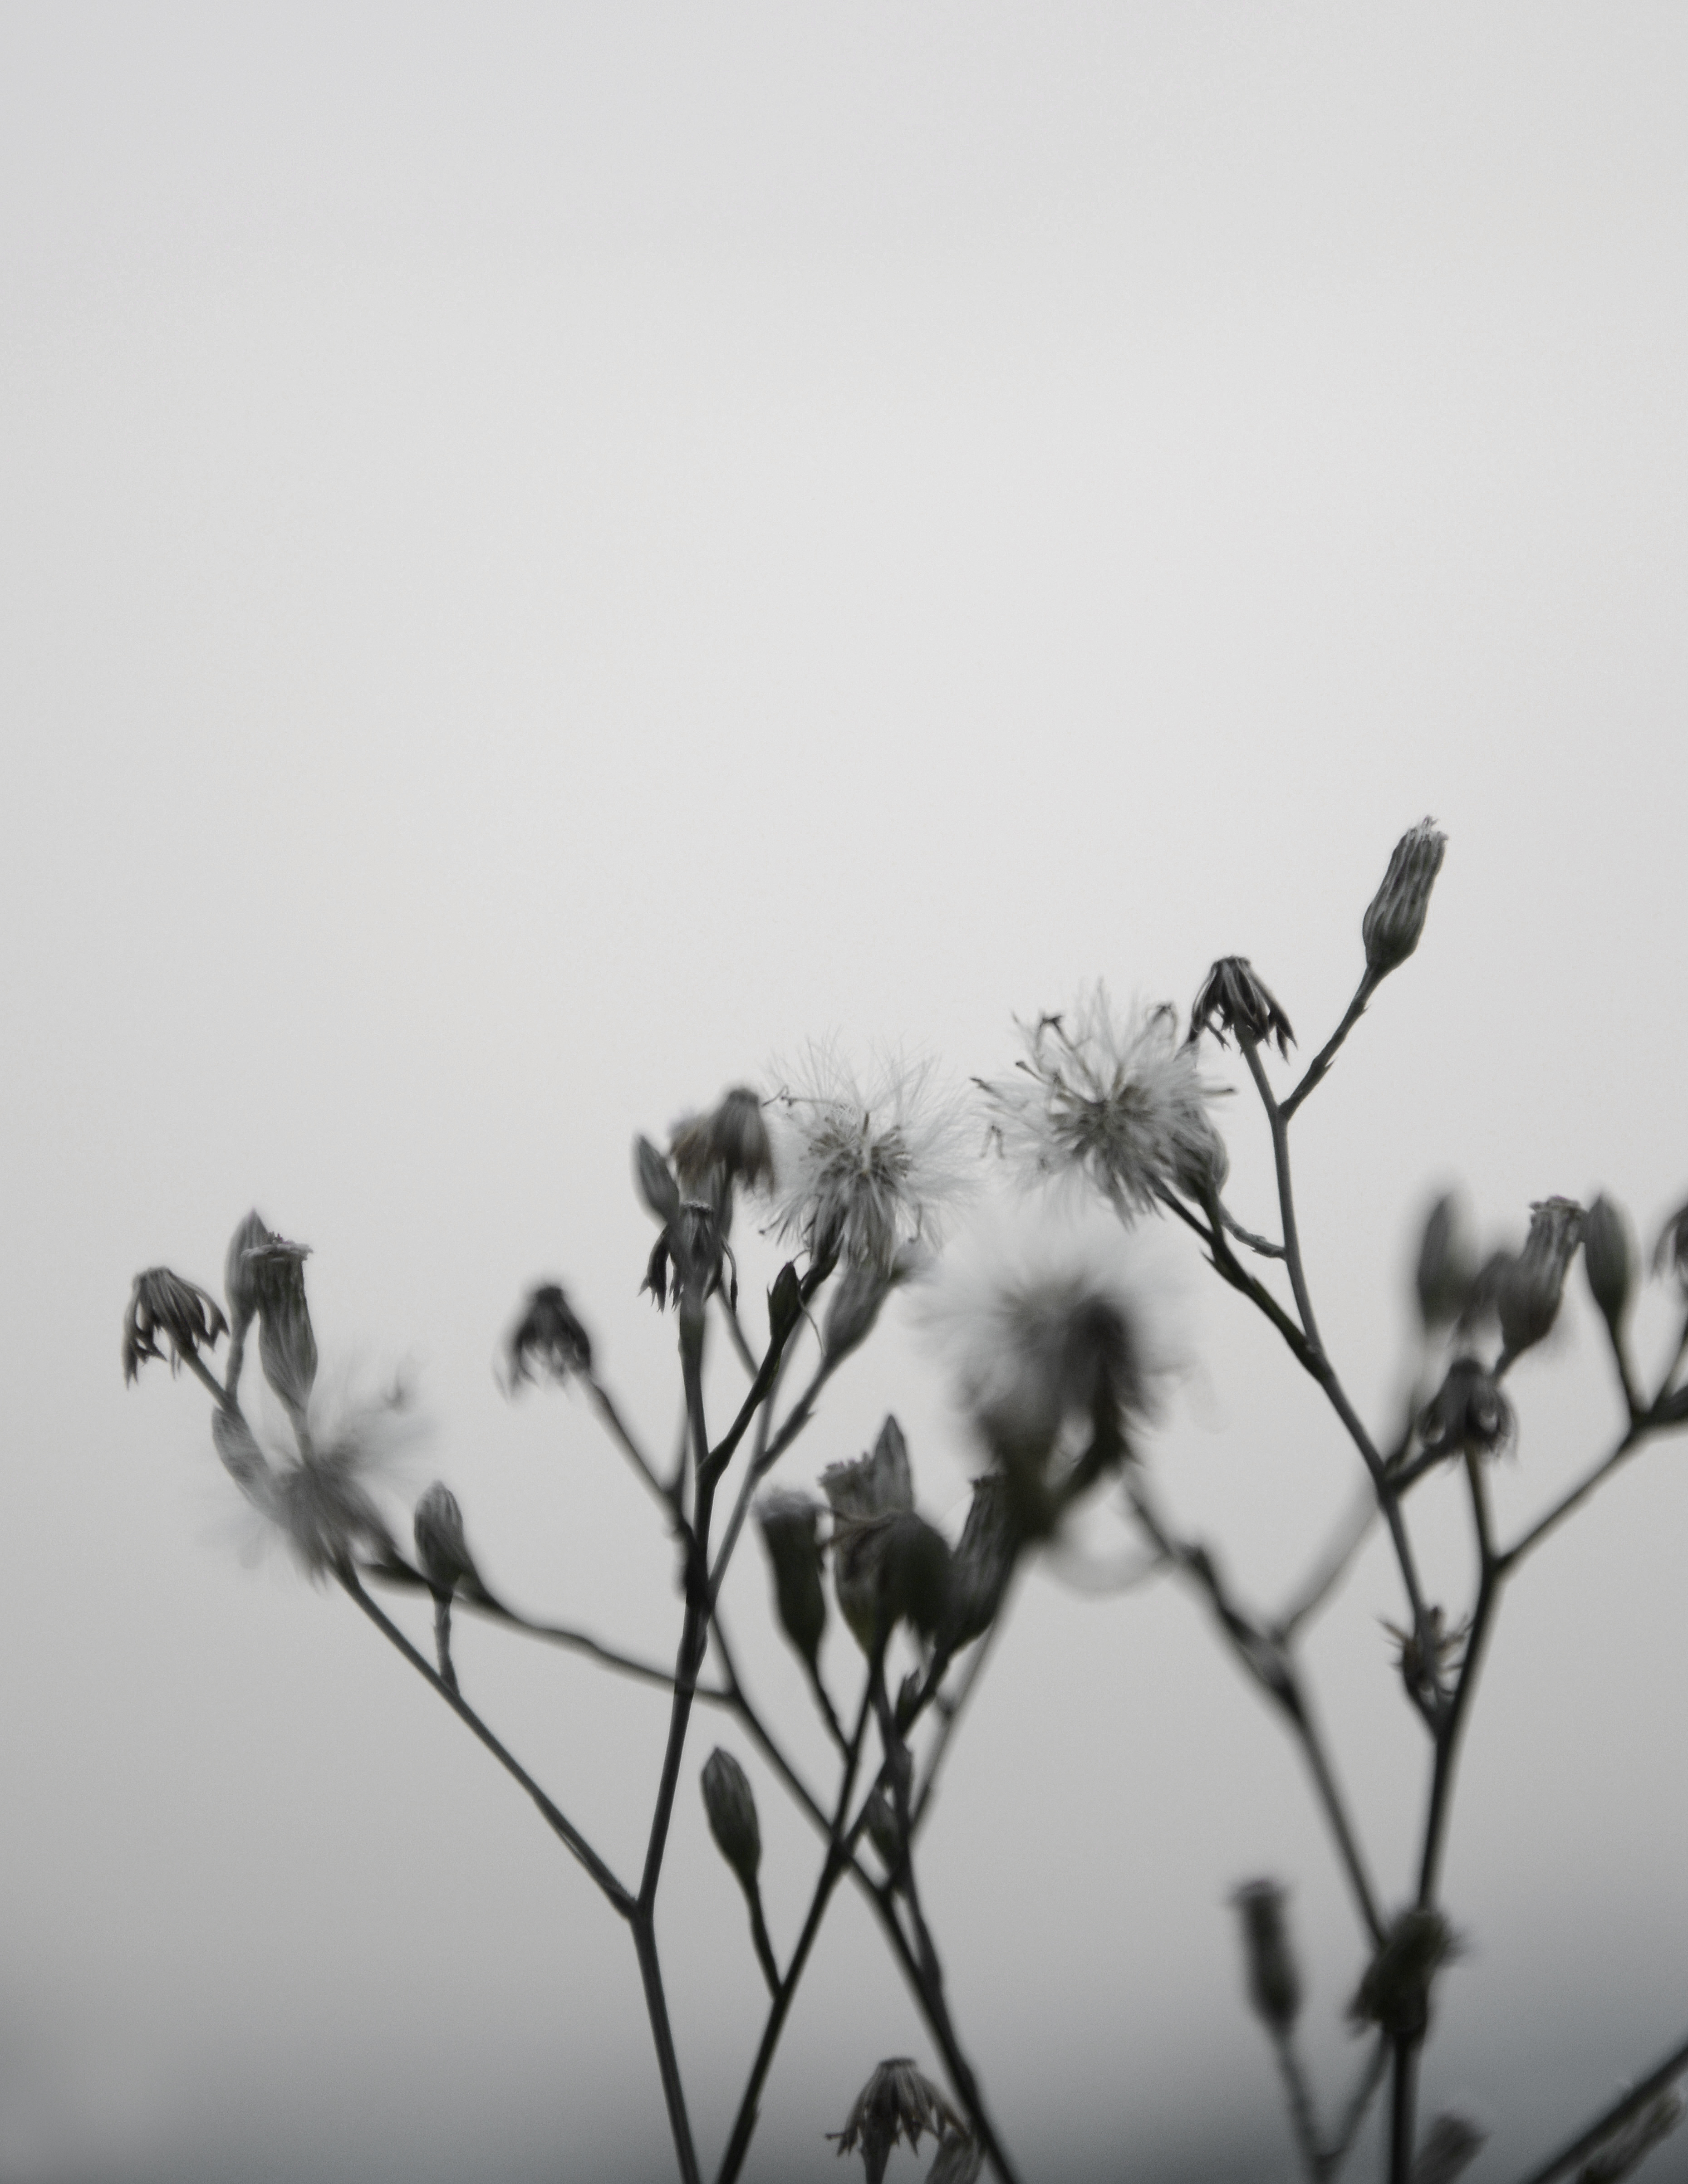
Use keywords to search for an image you like. I thought about what had attracted me to the photography I had been browsing as a starting point. I liked the buffalo, we have a Mexican cow skull hanging on the same wall, and I wanted to run with an outdoorsy theme and a neutral palette. I searched for images of buffalo until I found something I liked. I was also inspired by an image of the desert near Joshua Tree, California that was super artistic. I decided to look for photos of tall grasses and wild flowers to complement the buffalo.
4. Get Your Image Printed
You can use any on-line service or head to your local drug store if you are going with a standard size photograph (4×6, 5×7, 8×10, etc.). You get what you pay for at these places, which is a fair quality photo paper. I would go with a matte paper, you don’t want extra glare. I highly recommend calling a local print shop though, their prices won’t be much different and you will be able to get custom sizes printed and specify paper quality. My two images were $1.50 each.
5. Bang it all together and hang.
I’m not giving out tutorials on putting screws in drywall today. Have fun!
